S32 Design Studio is a C/C++ development platform, for programming NXP S32 microcontrollers and microprocessors.
The C/C++ development platform of S32 Design Studio is itself based on Open-Source Eclipse IDE, which provides the features like Text Editor: for writing the code, Views: for showing information about the code, Perspectives: for providing the functionality to do specific types of tasks and advanced C/C++ code base navigation/development features.
It is an, Integrated Development Environment (IDE), for programming and debugging of ARM and Power Architecture-based S32 Microcontrollers. Just like Arduino IDE is there for programming Arduino, same way S32 DS is used for programming S32 Automotive microcontrollers of NXP Semiconductors.
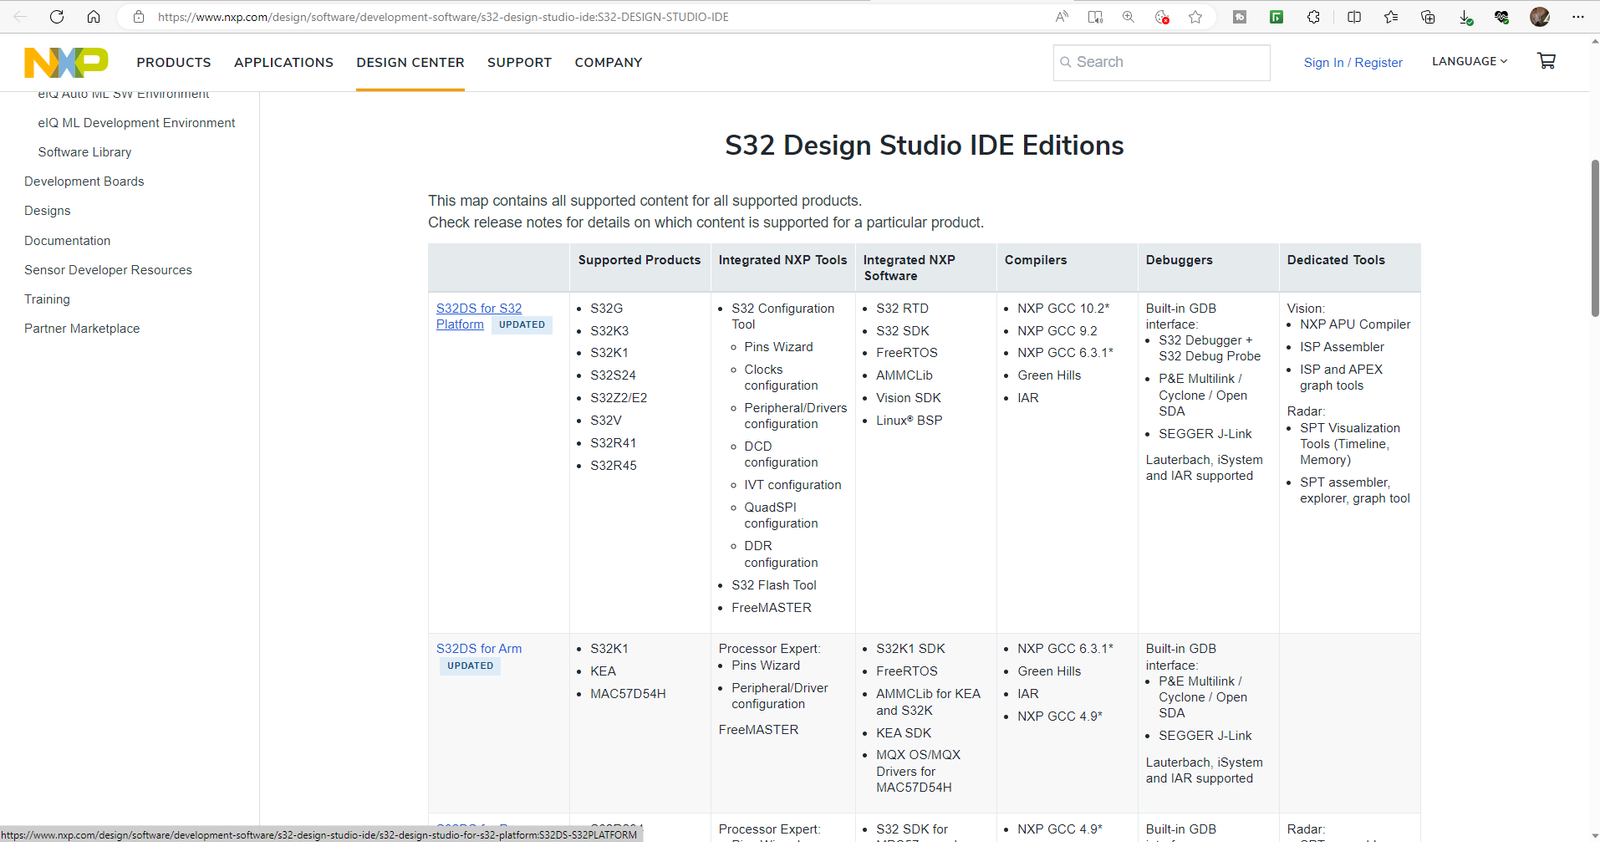
S32 Design Studio IDE comes in 3 Variants: S32DS for S32 Platform, S32DS for ARM, and S32 DS for Power Architecture. The major difference between these IDEs is the support of S32 MCUs. As shown below pic:
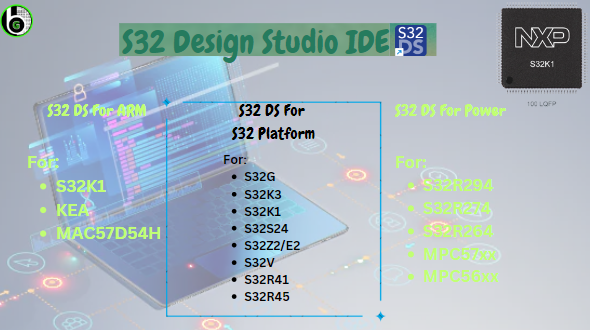
We will be focusing on S32 Design Studio for the S32 Platform, as it supports the majority of S32 Microcontrollers. So throughout the blog by S32 Design Studio we will be referring to S32 Design Studio for S32 Platform.
S32 Design Studio has specs as follows:
- S32 Design Studio is based on Open Eclipse IDE, and it supports the GNU GCC compiler. Green Hills, IAR Compilers, and ARM processor toolchain.
- S32 Design Studio has a text editor for writing the programs, with C/CPP programming widgets and modules.
- S32 DS is a modular IDE in which there is support for many embedded programming features in the form of different perspectives.
- S32 Design Studio also has a Code Configuration Tool S32 CCT, for selecting and configuring the peripherals of selected S32 microcontroller Via Graphic User Interface, making it easy to write the application and quickly.
- S32 Design Studio also has compiler support of GNU GCC, so that we can directly build and compile the code from IDE via its GUI Interface to generate the elf of our program written.
- Also, S32 Design studio has support of programming and debugging the generated elf into the hardware. It supports drivers for Jlink and PEmicro debuggers/programmers. It supports GDB and Openocd software debugging, these are the software packages that are required to program and debug the ARM Processors.
S32 Design Studio has features like:
- peripheral configuration tool,
- code generation tool,
- compilation-linking of C/CPP programs and
- Debug features for NXP S32 microcontrollers and microprocessors.
Software Installation Part can be divided into 2 parts.
First is S32 Design Studio IDE Installation and other is Microcontroller software development package and SDK Installation. In the first part we are just going to download the required IDE into our host laptop/computer and in second part we will install some plugins into our IDE to make it suitable for our microcontroller. As we are using S32K144 MCU and it belongs to S32K1 family, so development package and environment for S32K1 family would be installing. One can take this step analogous to step in Arduino, in which we need to install some extra packages and setup the environment for ESP controllers.
S32 Design Studio IDE Installation:
- Navigate to NXP Website: Automotive, IoT & Industrial Solutions | NXP Semiconductors
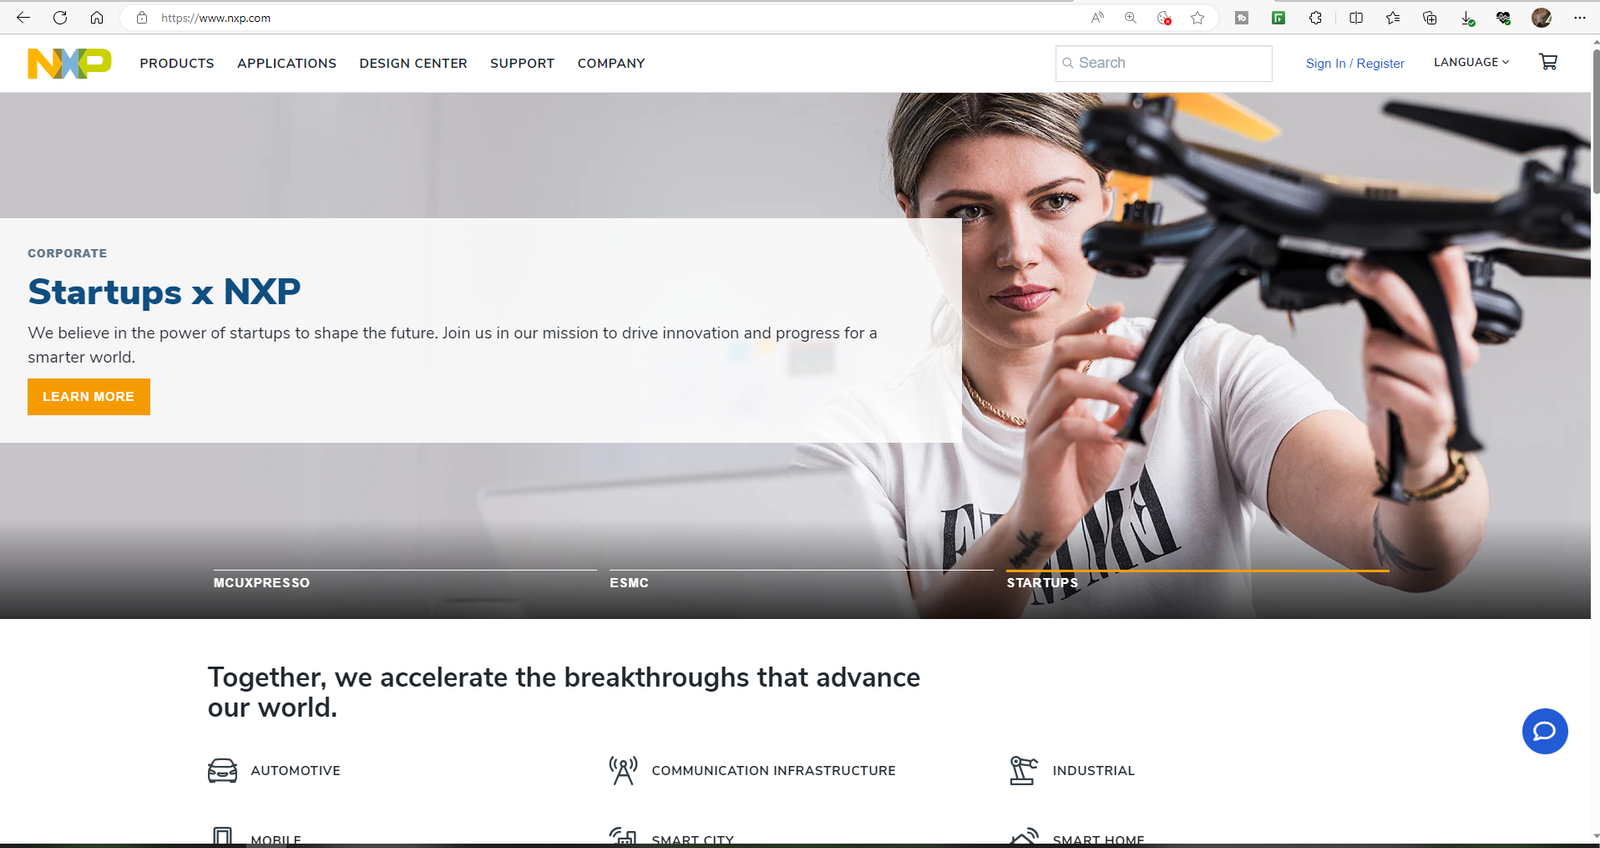
NXP Semiconductors Website - On the search bar, search for S32 Design Studio
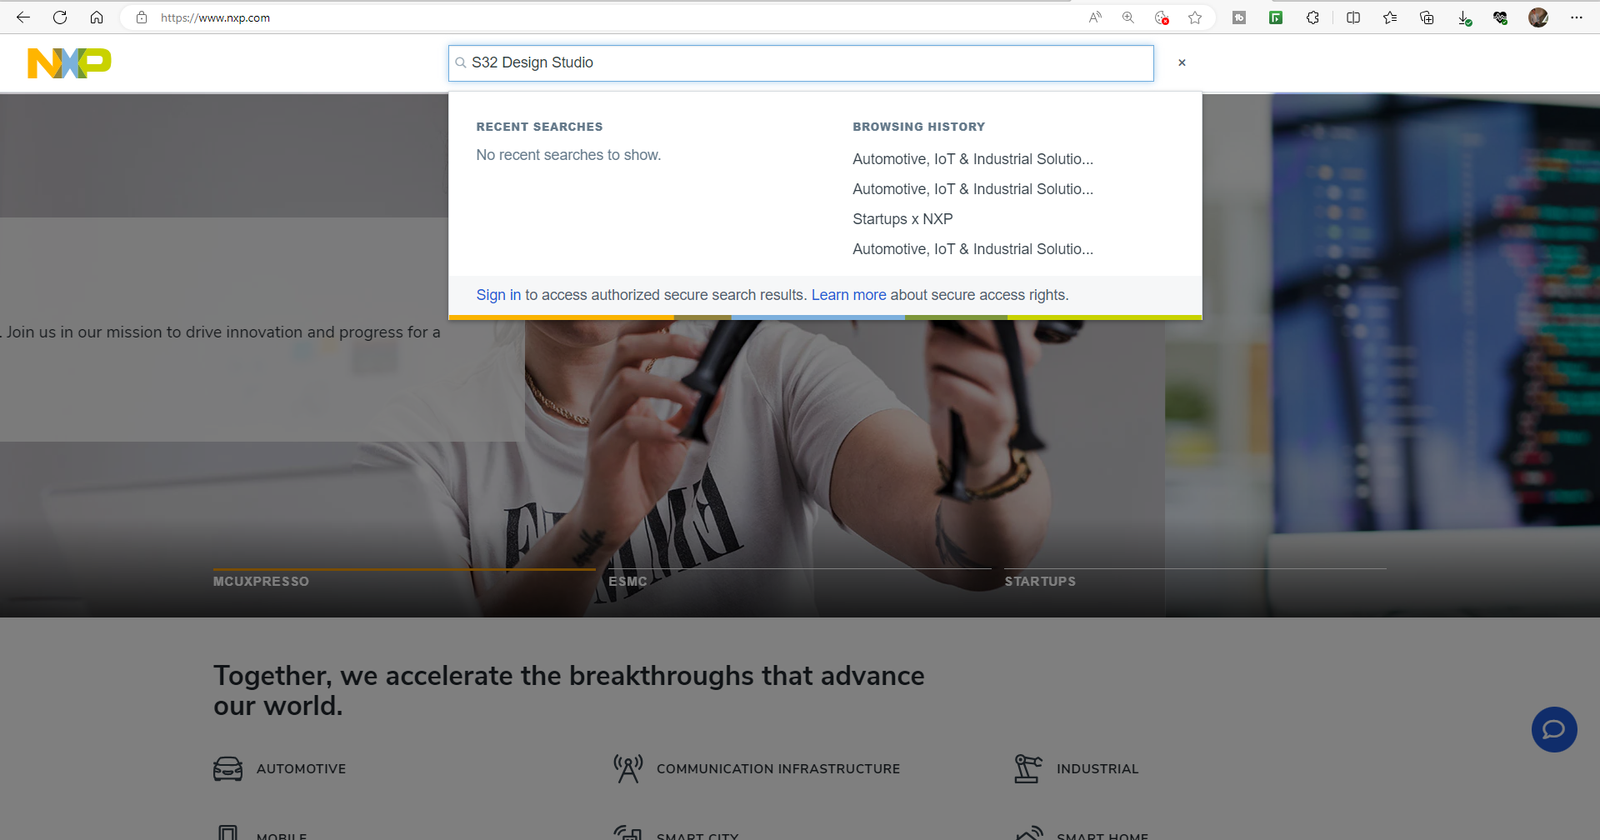
Searching S32 Design Studio on NXP Website - Then click enter and select the first selection: S32 Design Studio IDE from the list.
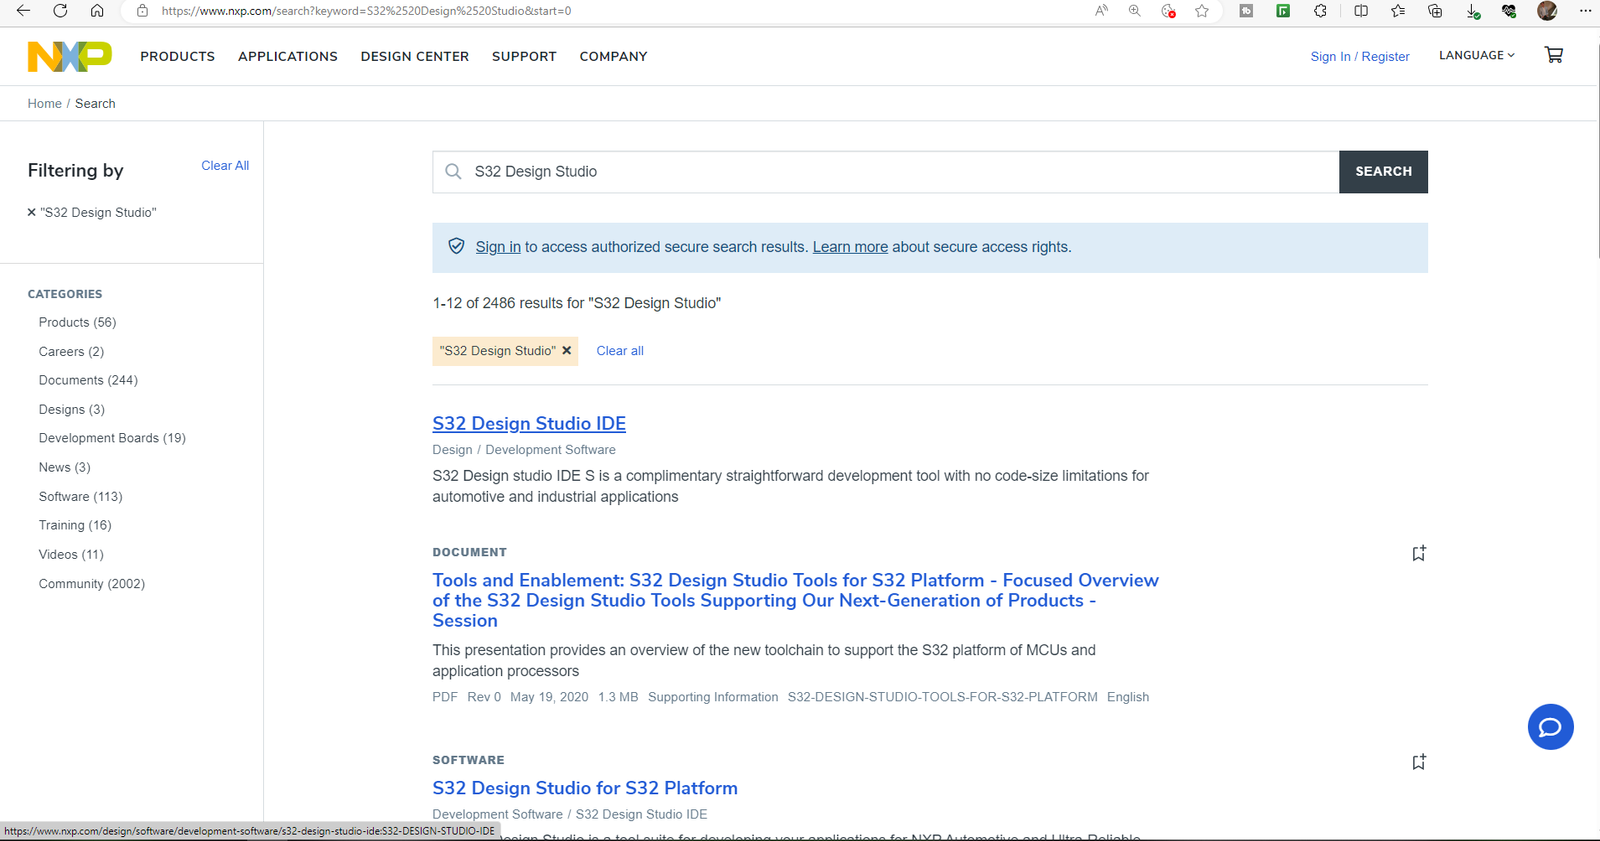
S32 Design Studio - Now in the new window that opens, as you scroll down one can see there are 3 editions of S32 Design Studio. We are going to use S32 Design Stuido for S32 Platform, so click on that one.
S32 Design Studio for S32 Platform - After this, page of S32 Design Studio for S32 Platform would be loaded, like this.
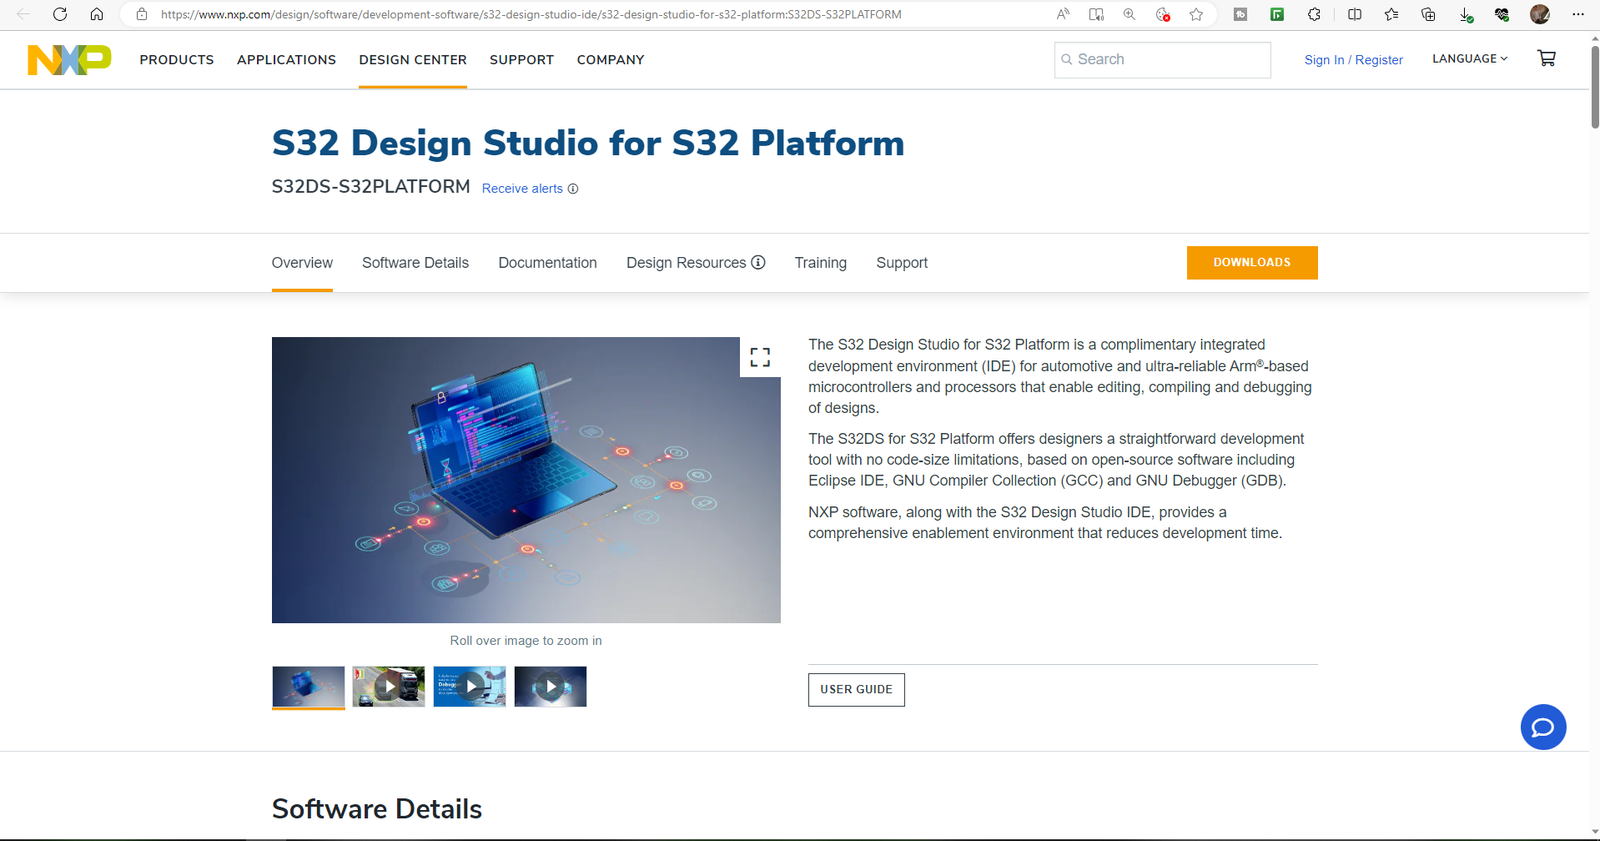
S32 DS for S32 Platform - Now before Downloading, we need to login with our Email-ID to NXP website. So, click on Sign-in/Register option on the top right. 

- Create an account NXP or Login to your account if you are already registered. It’s a simple and usual sign-in process. One thing to note, there is no compulsory need of professional or business email-id for registering at NXP Website. One can Register from our persanol email-id also.
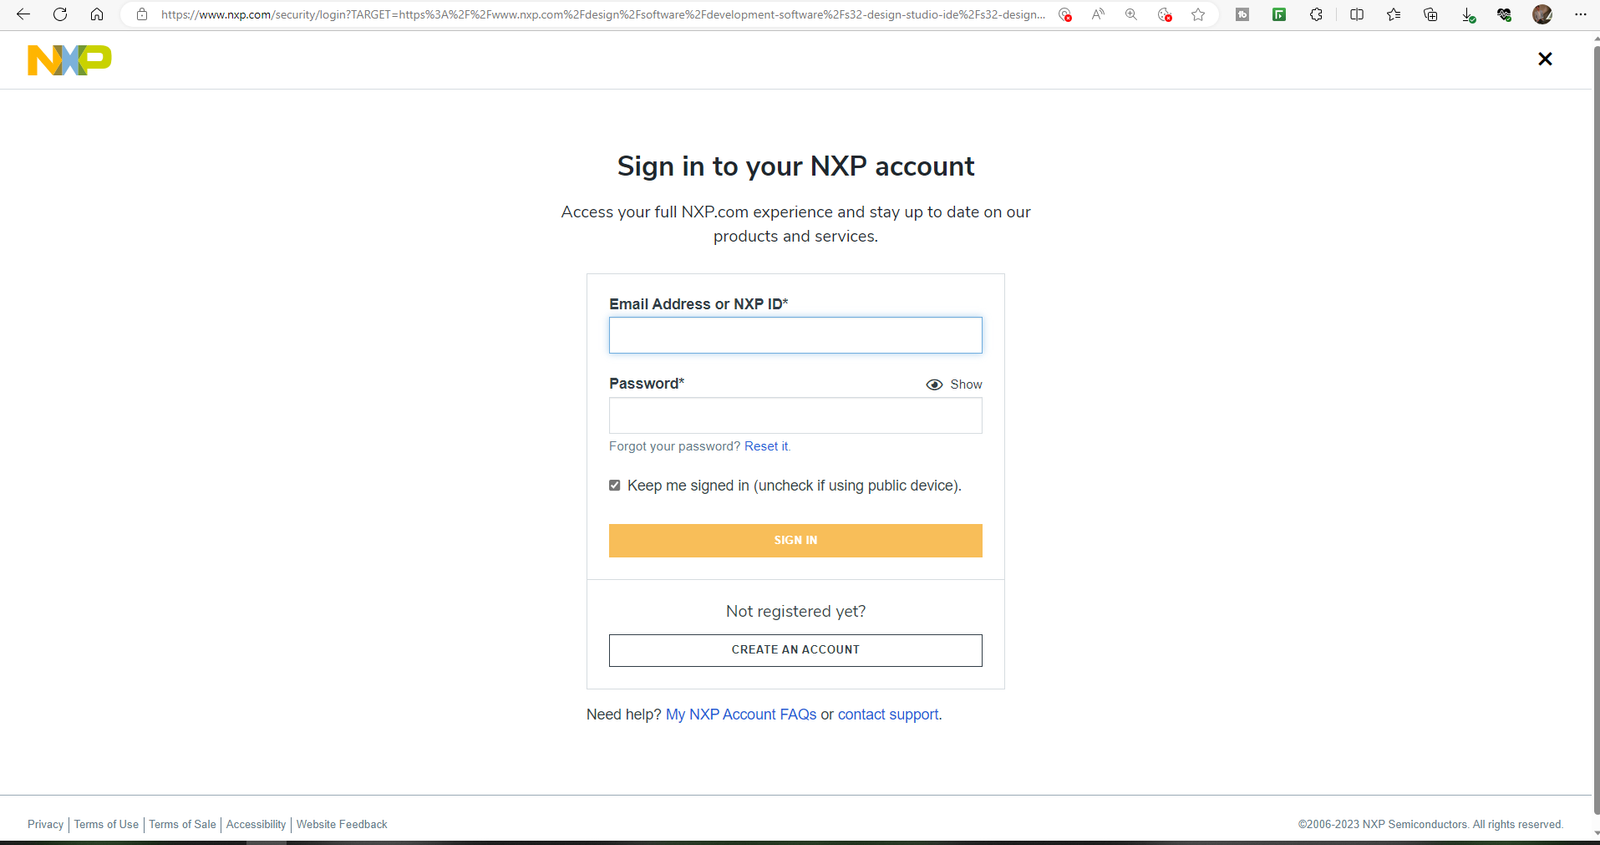
How to Log-in/Sign-in on NXP Website? - I have already created my account, so will be continuing with that:
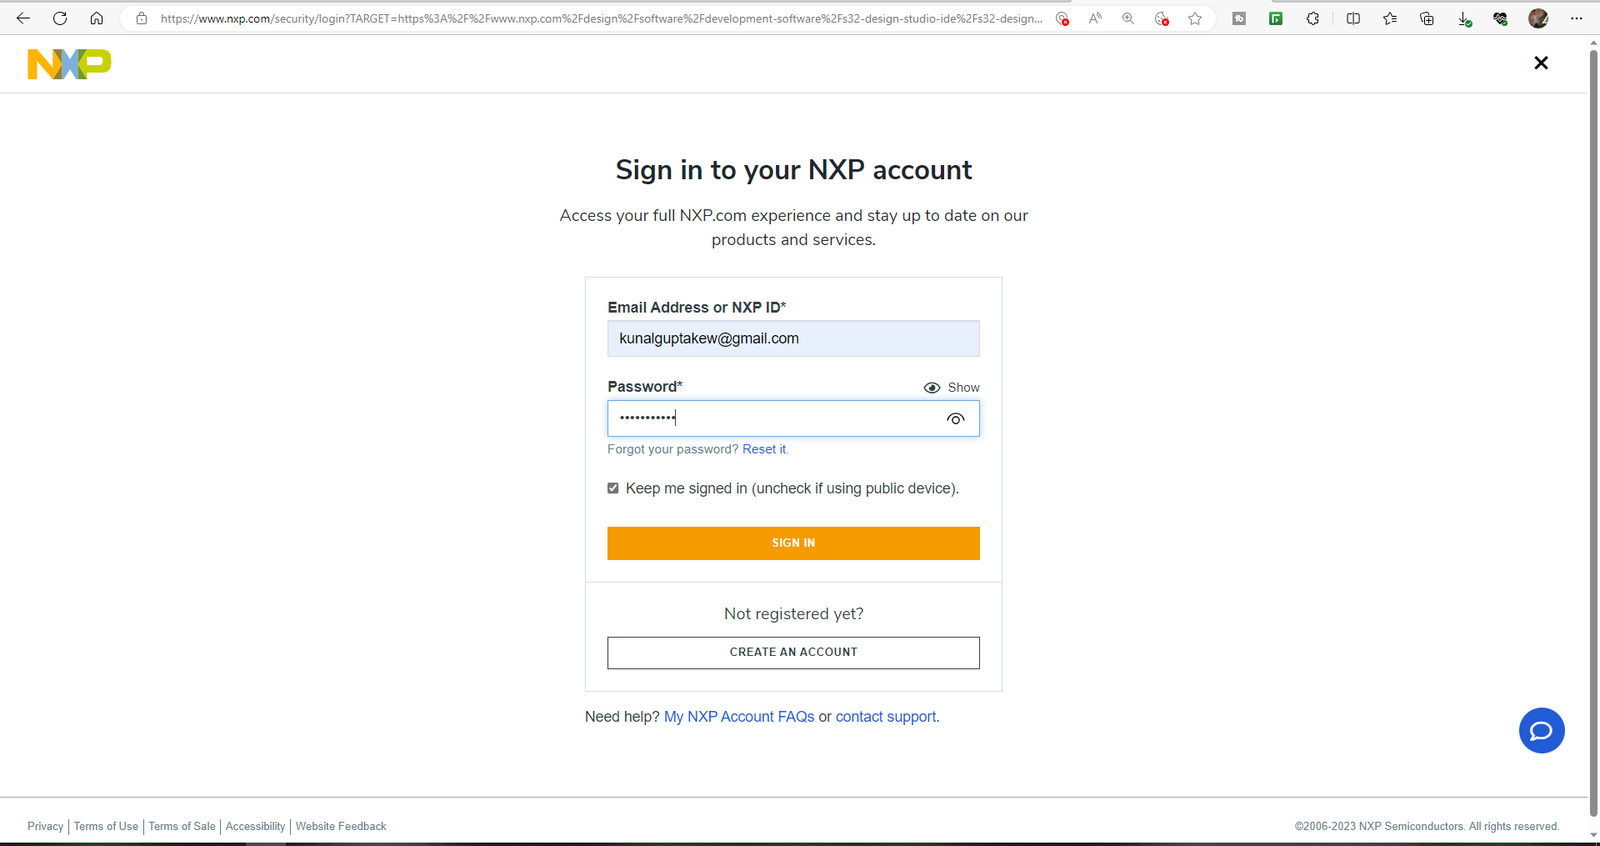
Sign-in on NXP Website - After the successful log-in, you can see of My NXP Account on Top Right. 

- After successful Login, go back to step 5 again and click on downloads option, which will navigate you down to the download list:
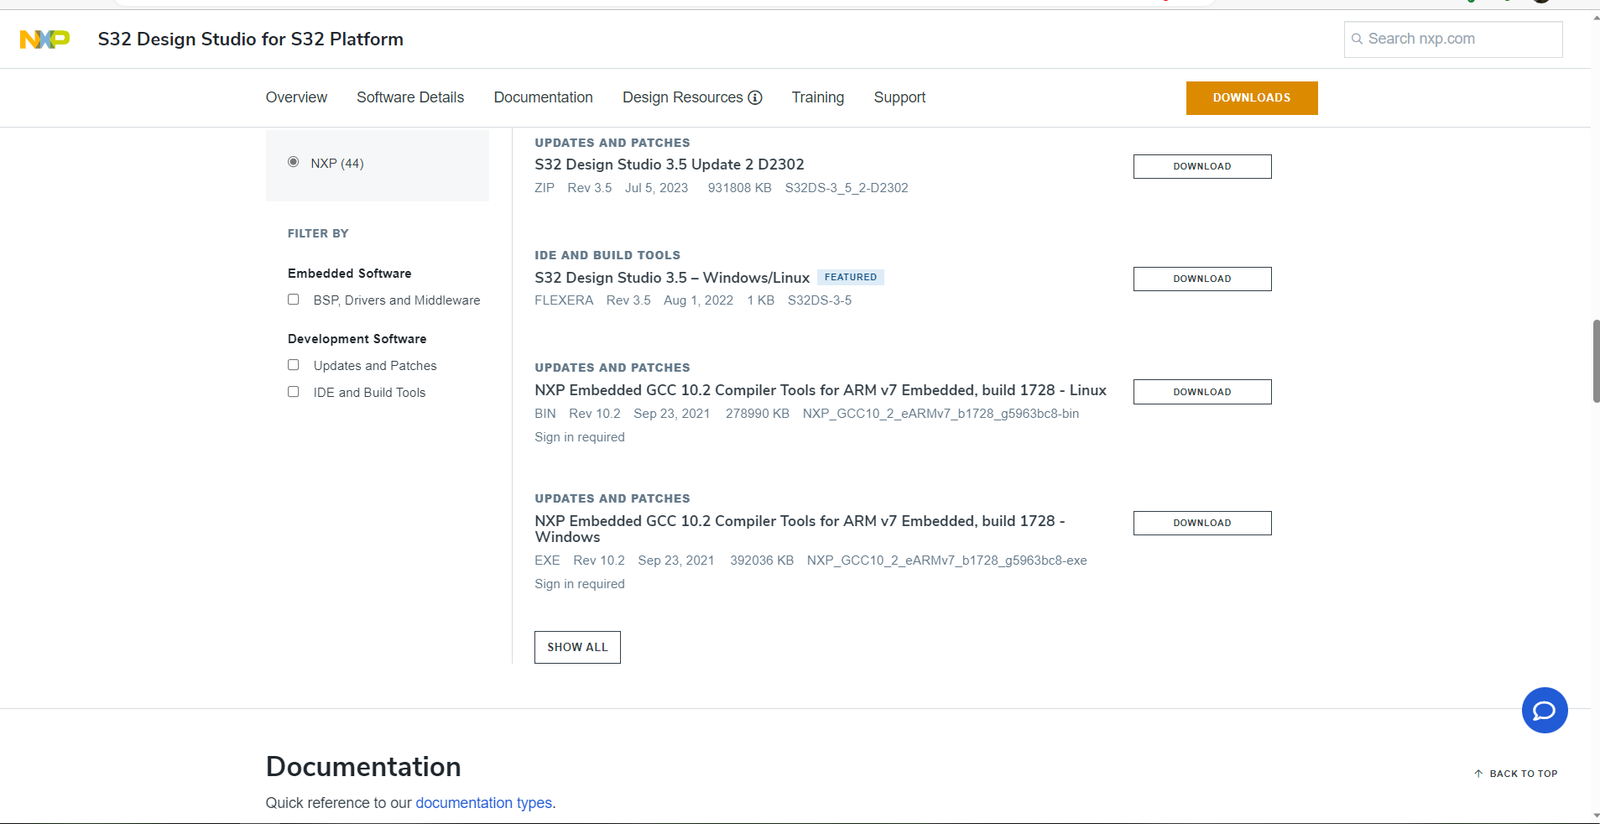
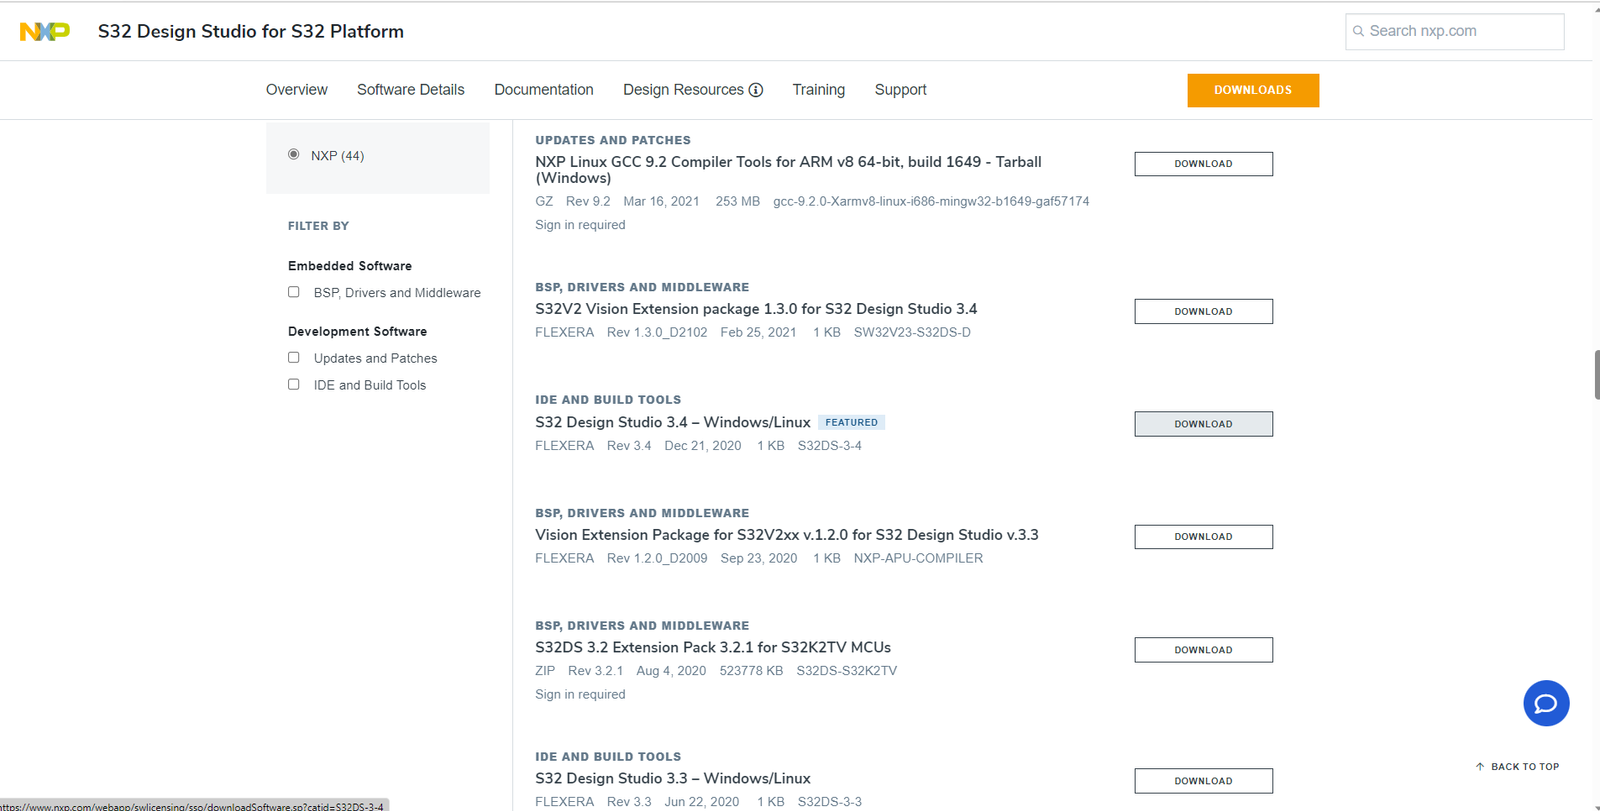
Download S32 Design studio for S32 Platform - Now from this list, which you can see click on show more and search for S32 Design Studio 3.4 – Windows/Linux. Click on the Download option alongside it.Their are different versions of S32 Design Studio S32 Platform, there is support of different S32 MCU’s in different versions of IDE. So, for S32K1 Family we would be using S32 Design Studio for S32 Platform 3.4 version:
Searching for required version fo S32 DS for S32 Platform - Now you will be navigated to NXP flexera link, from where Software would be downloaded. Click on the S32 Design Studio IDE once this page opens. On thing to note if, you have not registered your account till this step it will ask you to at first log-in.

NXP Flexera Window for S32 DS for S32 Platform - After that page will be loaded showing the versions of S32 DS. Click on S32 Design Studio for S32 Platform v3.4:
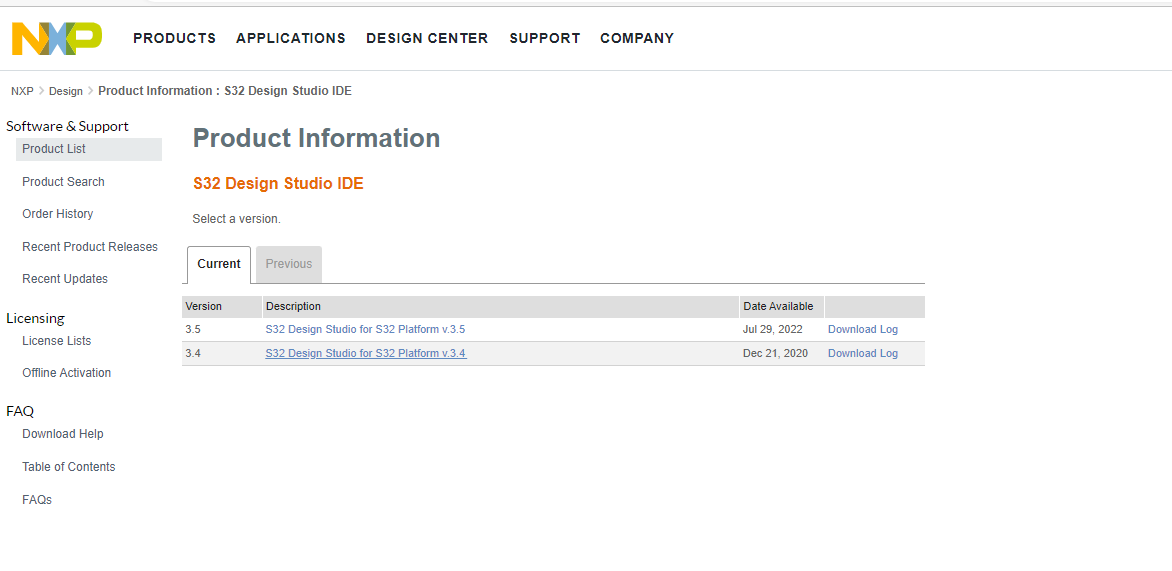
NXP Flexera Window for S32 DS for S32 Platform v3.4 - Now you can see list of Products that can be downloaded for 3.4 version:
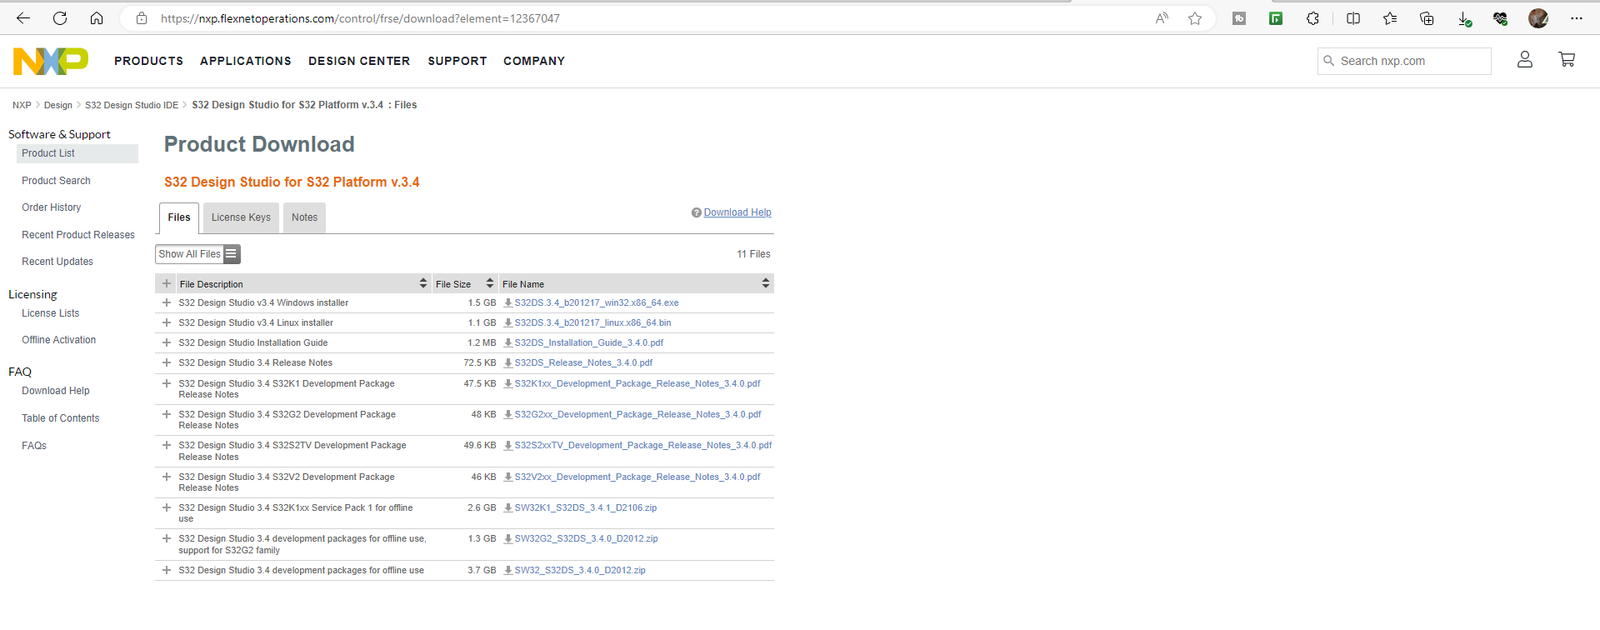
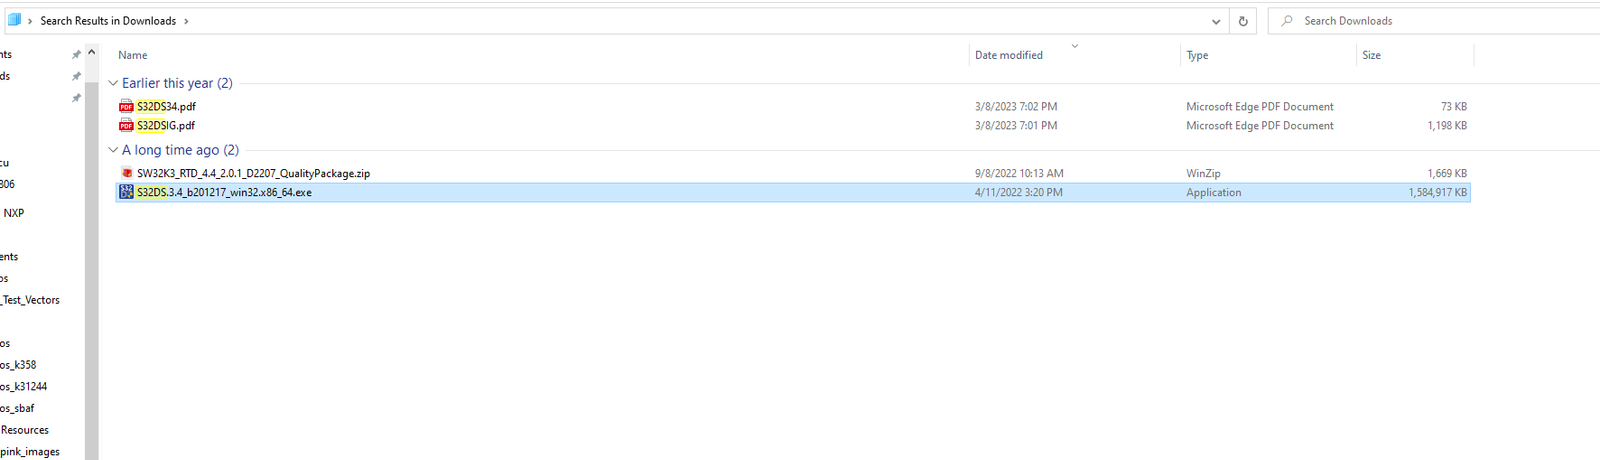
Product page of S32 DS for S32 Platform v3.4 - Click on first Option, that is exe file, and you can see your download process would be started: 
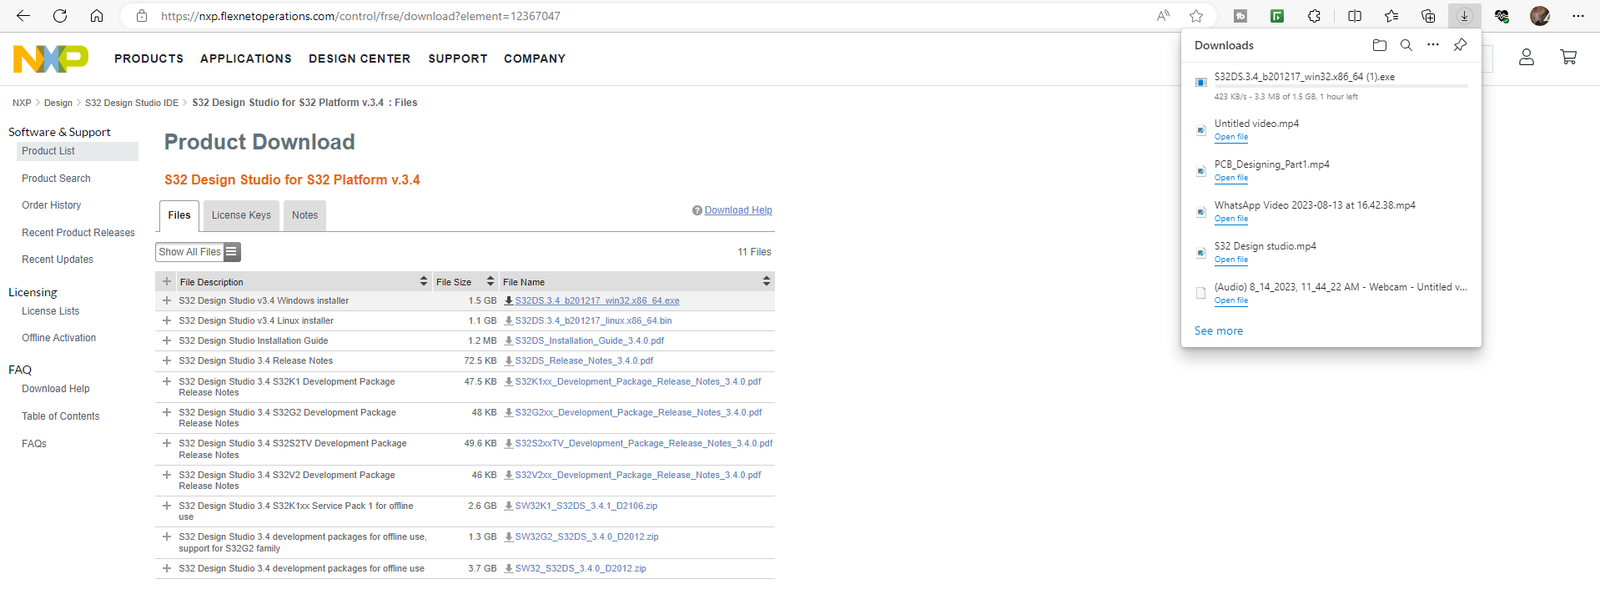
- Once Exe file is downloaded, double click on it and follow the usual Installation process.
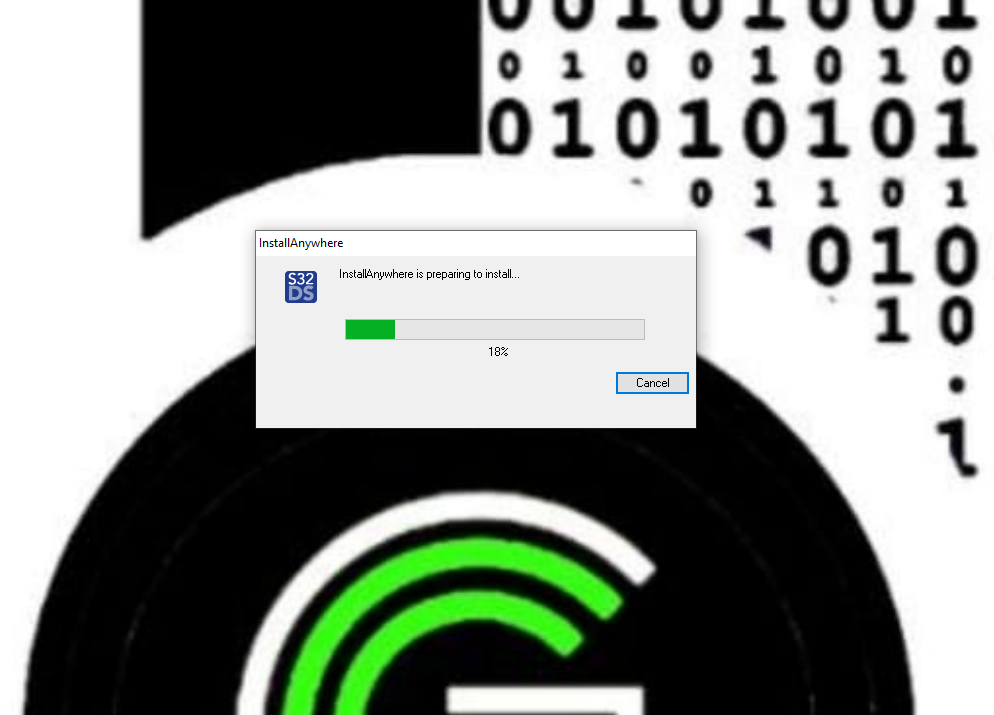
- During the installation process it will ask for Licensee activation code, when that window/stage comes up. 

Software Activation Code Required for Software Installation - Open the mail ID through which you have registered at NXP website, and you can see a mail like this, in which is Activation code of your Software.
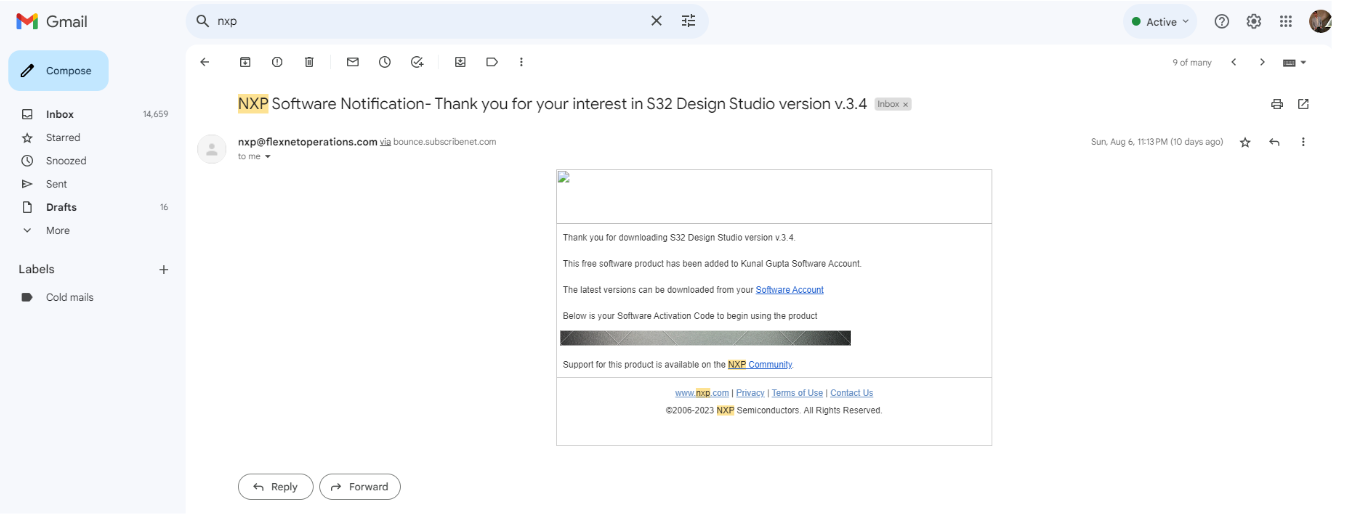
License Activation Code For S32 DS 3.4V - Copy the Code from your mail-ID and paste it on the step-17 window. After that it will ask for which type of installation and select online Type.

Activation Type for S32 DS3.4 - After that, window will pop-up asking for installation of PE Micro debugger driver files. Click on I agree and follow the process:

Installation of PE Micro Driver - After this step, make sure your PE Micro debugger drivers are installed properly as failure of 20th step, would make issues in installtion of MCU development package. To do so, navigate to the Directory where S32 DS is being installed, by default its at C:\NXP\S32DS.3.4 and look out that their is driver folder like this in the above path:
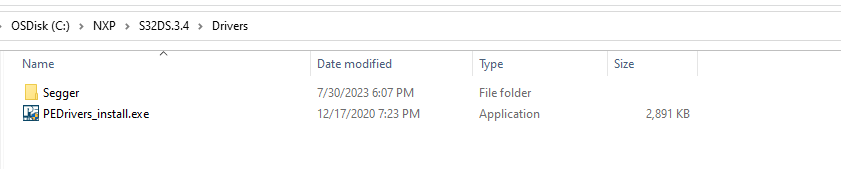
PeMicro and Seger Debugger driver folder in S32 DS - Once the Installation is done, you will see window like this:
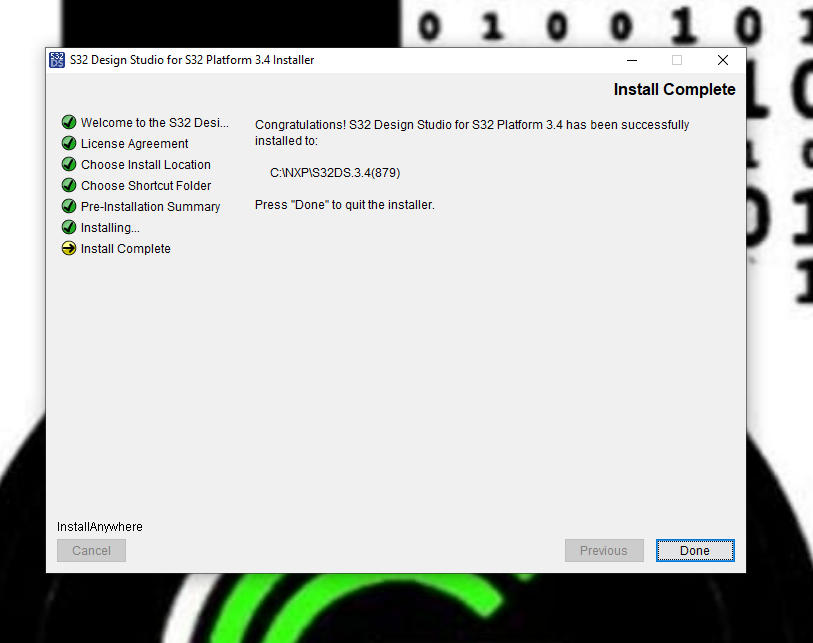
- After that open the S32DS3.4 by navigating to path: C:\NXP\S32DS.3.4\eclipse . Create the shortcut of the Application at your desktop.
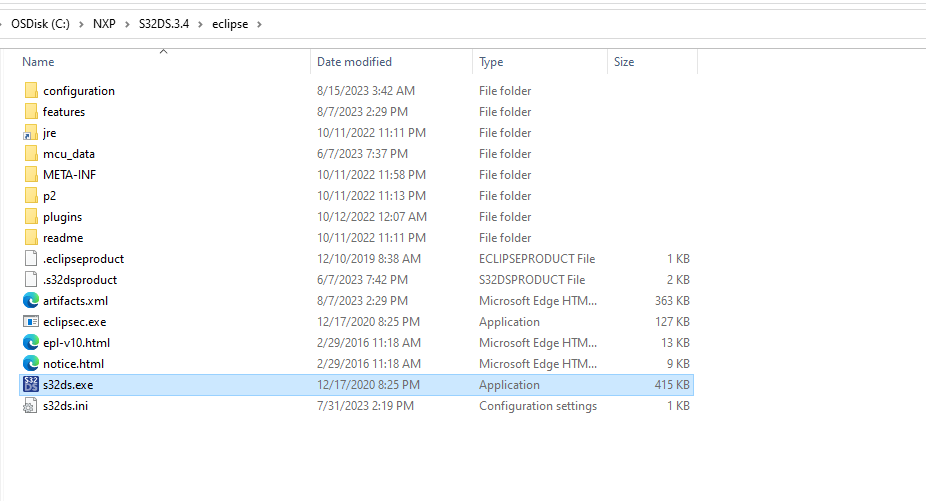
s32ds application exe path - Window will pop-up asking for the Workspace directory, by default Workspace3.4 would be created. Follow with it and click on Launch:
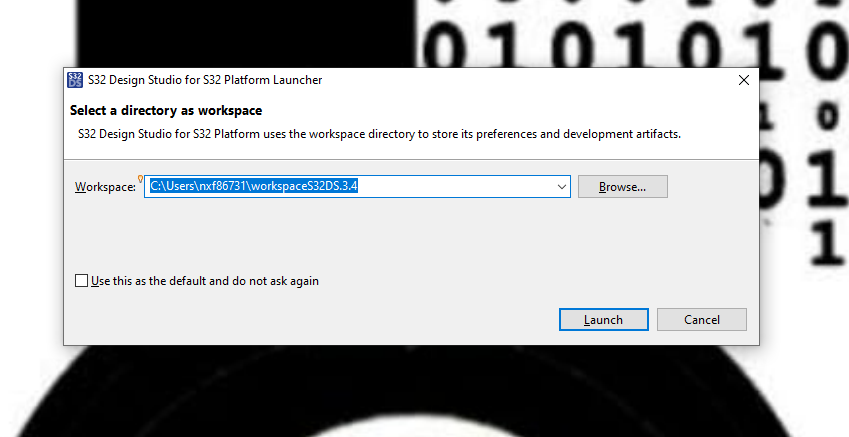
Workspace selection for opeing S32 DS3.4 - Hola guys!, you have successfully installed the S32 for S32 Platform 3.4 Version.
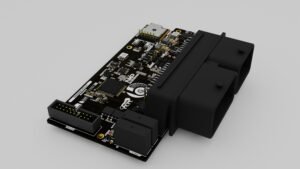
Now We, have downloaded the S32 DS successfully. Next step is to download the Required Microcontroller Development package and SDK Files. We are going to use S32K144 MCU, using elecronicsV2 Board. So, we are going to download Development package and SDK files for S32K1 family of MCU’s.
- Let me first tell you, how to check whether we have downloaded SDK and Development package or not. There are 3 ways for doing so:
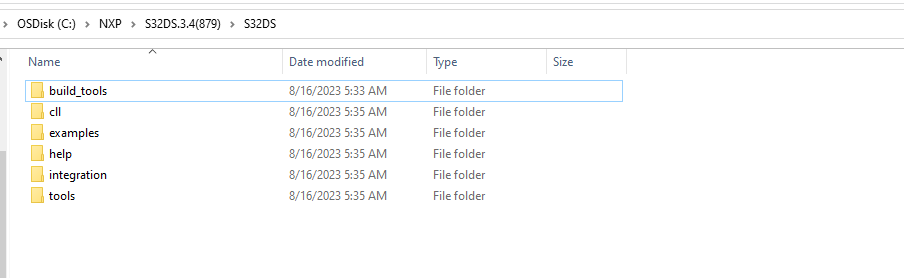
- Navigate to Location: C:\NXP\S32DS.3.4\S32DS. If you can’t see any folder by the name of Software, it means no SDK files and development package of any MCU, is being isntalled as if now:
Development package path in S32 Design Studio 3.4 - In S32 Design Studio window go to below specified menu
 and if you see there are no SDK Demo’s is displayed by the name of Corresponding MCU, it means No SDK of the corresponding MCU has been installed/downloaded as if now in S32 DS.
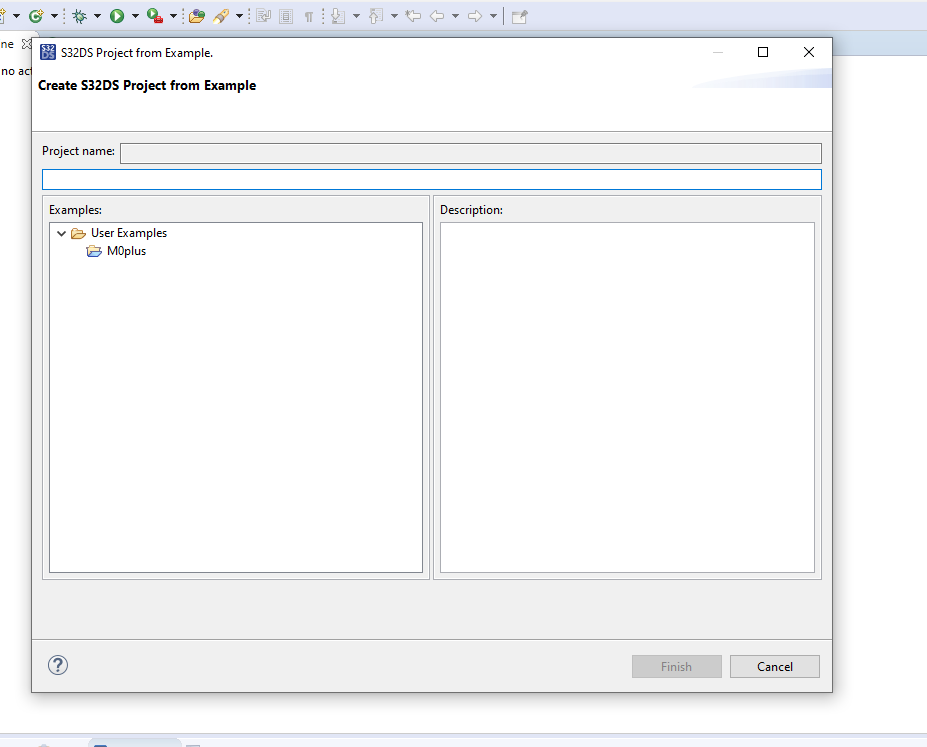
- In S32 Design Studio, check for which plugins you have installed, by going to below menu area: 
 In the Installed section, you will see all the plugins, if you can’t see any plugin and development package by the name of MCU, then it means no plugins have been downloaded as if now.
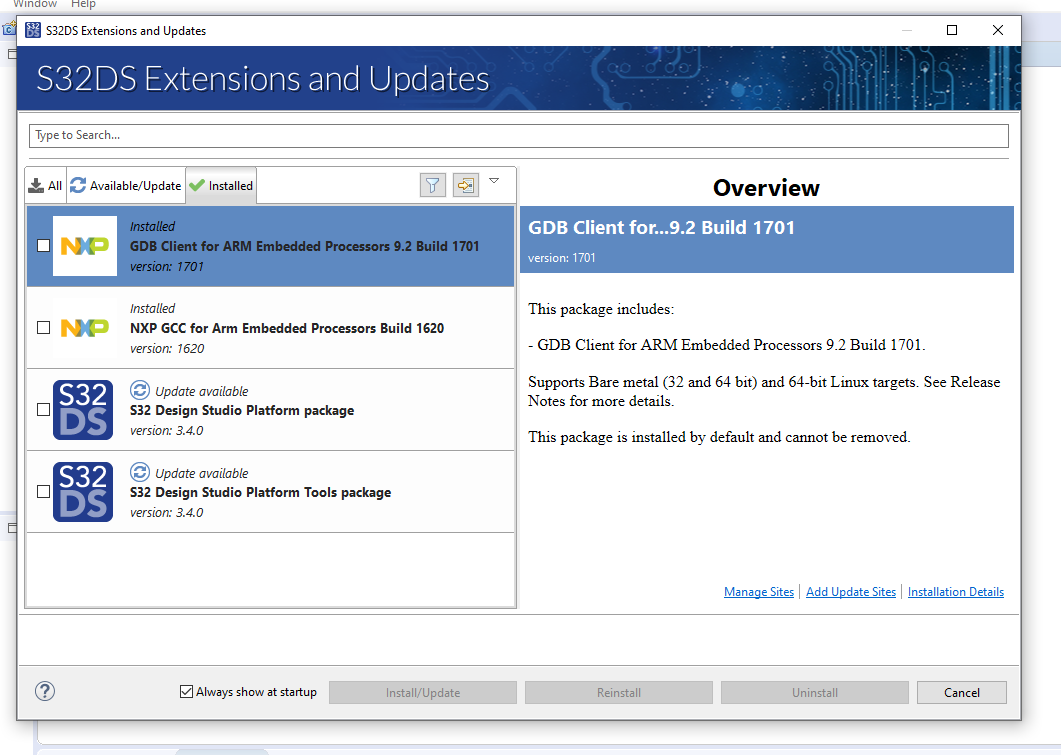
- Okay, so now we have seen all the ways to know whether required development package and SDK files are downloaded or not.
- There are 2 things to install: Microcontroller Development package and the Microcontroller RTD package.
S32K1xx Microcontroller Development Package Installation
- Let’s first download the Microcontroller Development package and then we will download the required RTD packages.
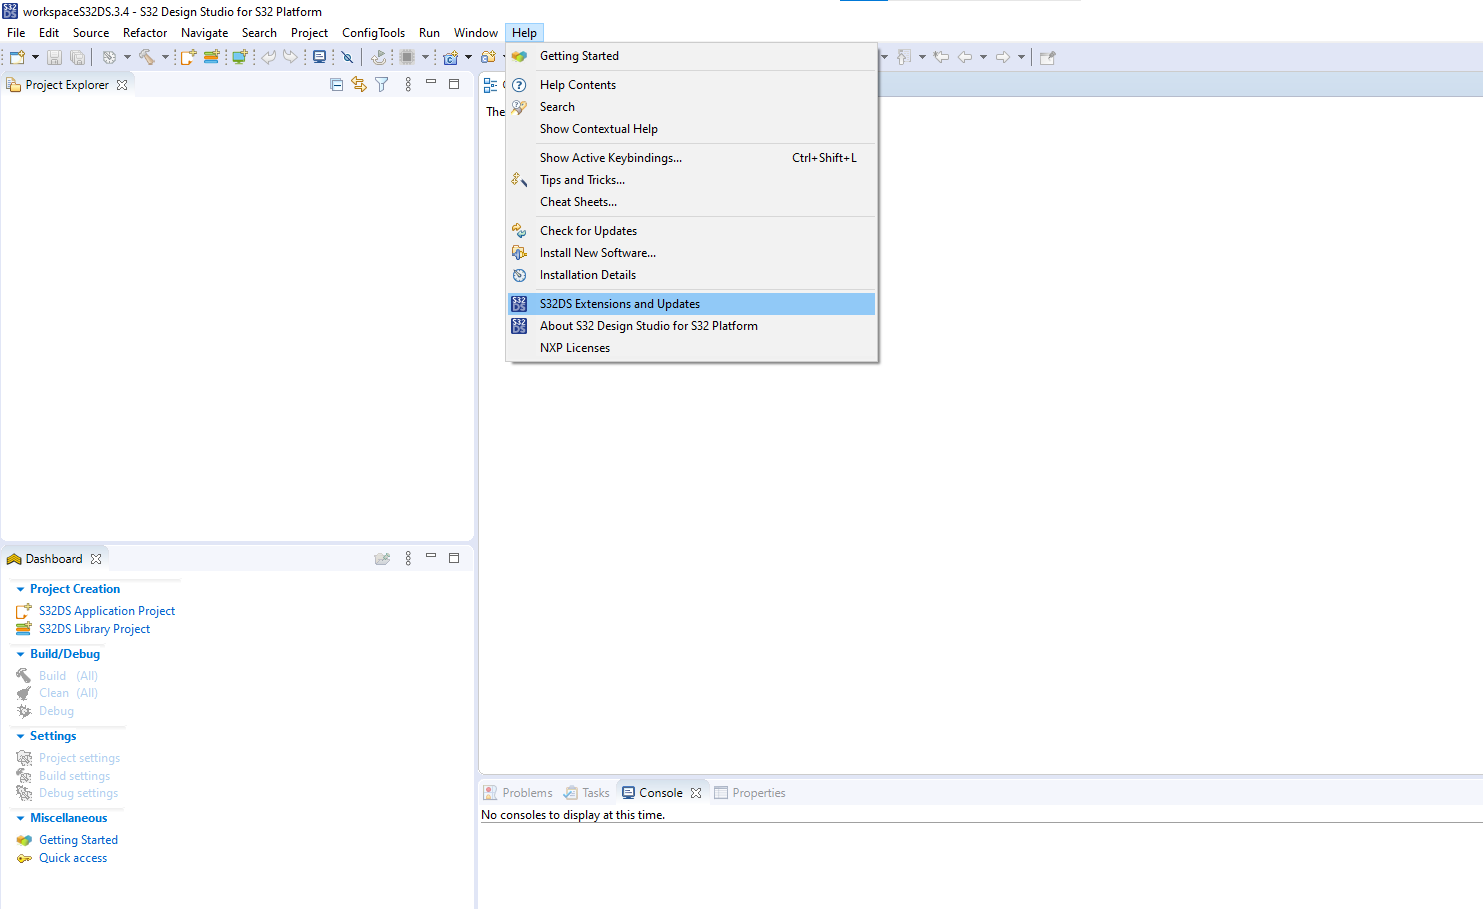
- In S32 Design Studio, go to help and open S32 DS Extensions and Updates Window, in this window go to Available/Update section and lookout for this 1 package: S32K1xx Development Package (version 3.4.1).

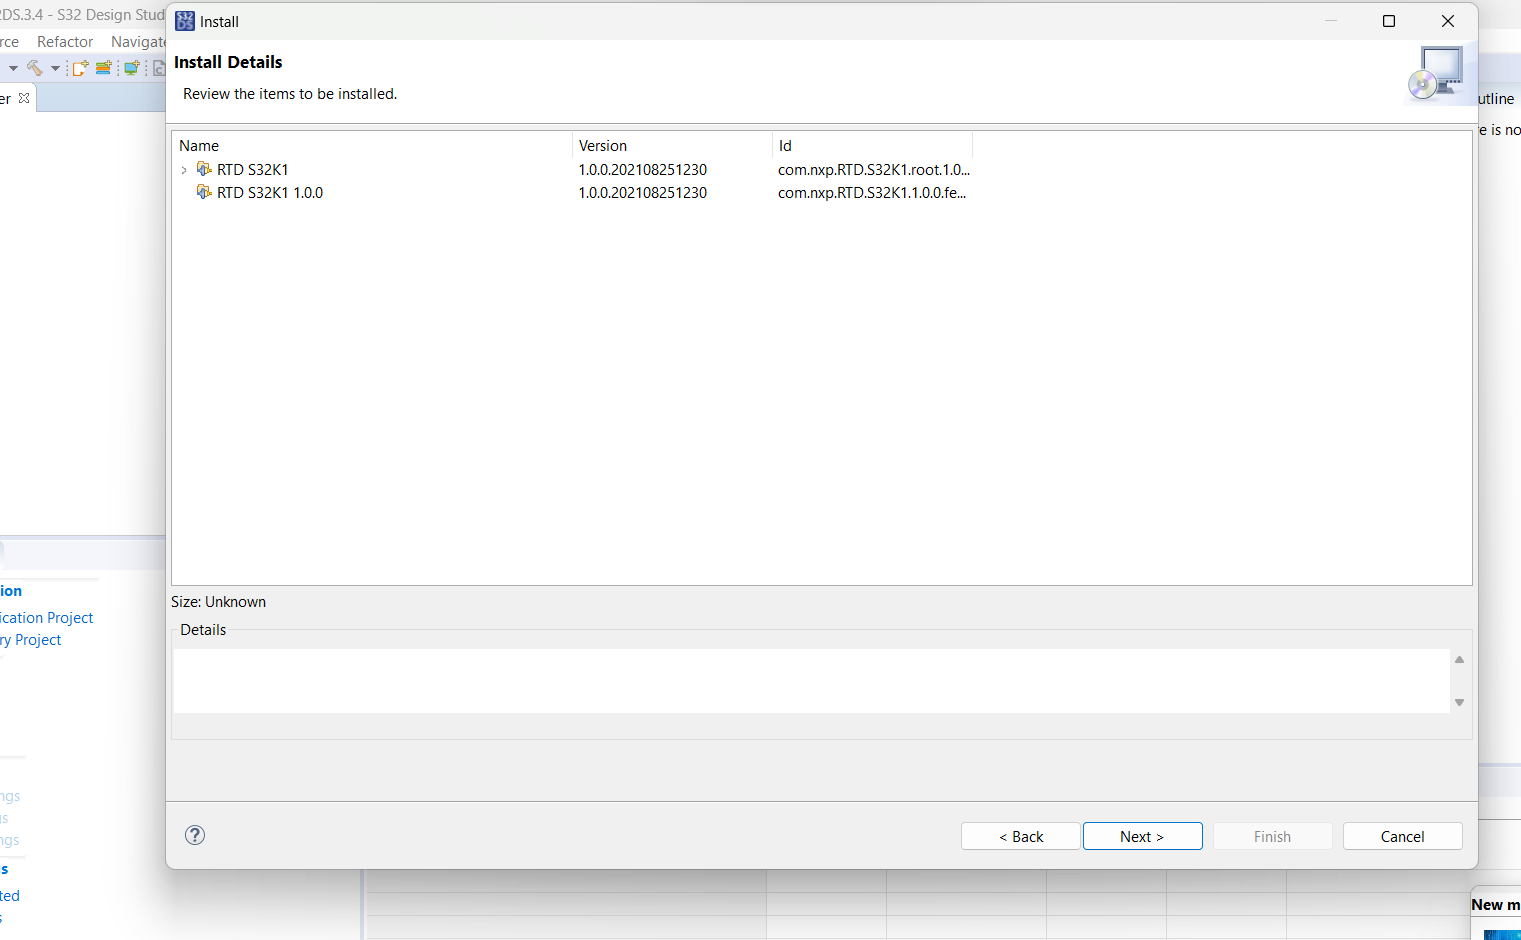
S32K1xx_MCU_RTD_Package - This is the package that all we would be needing for S32K1xx microcontroller Development Package. Click on Install/Update Items button and you will see all the plugins and packages that would be installed in next window:
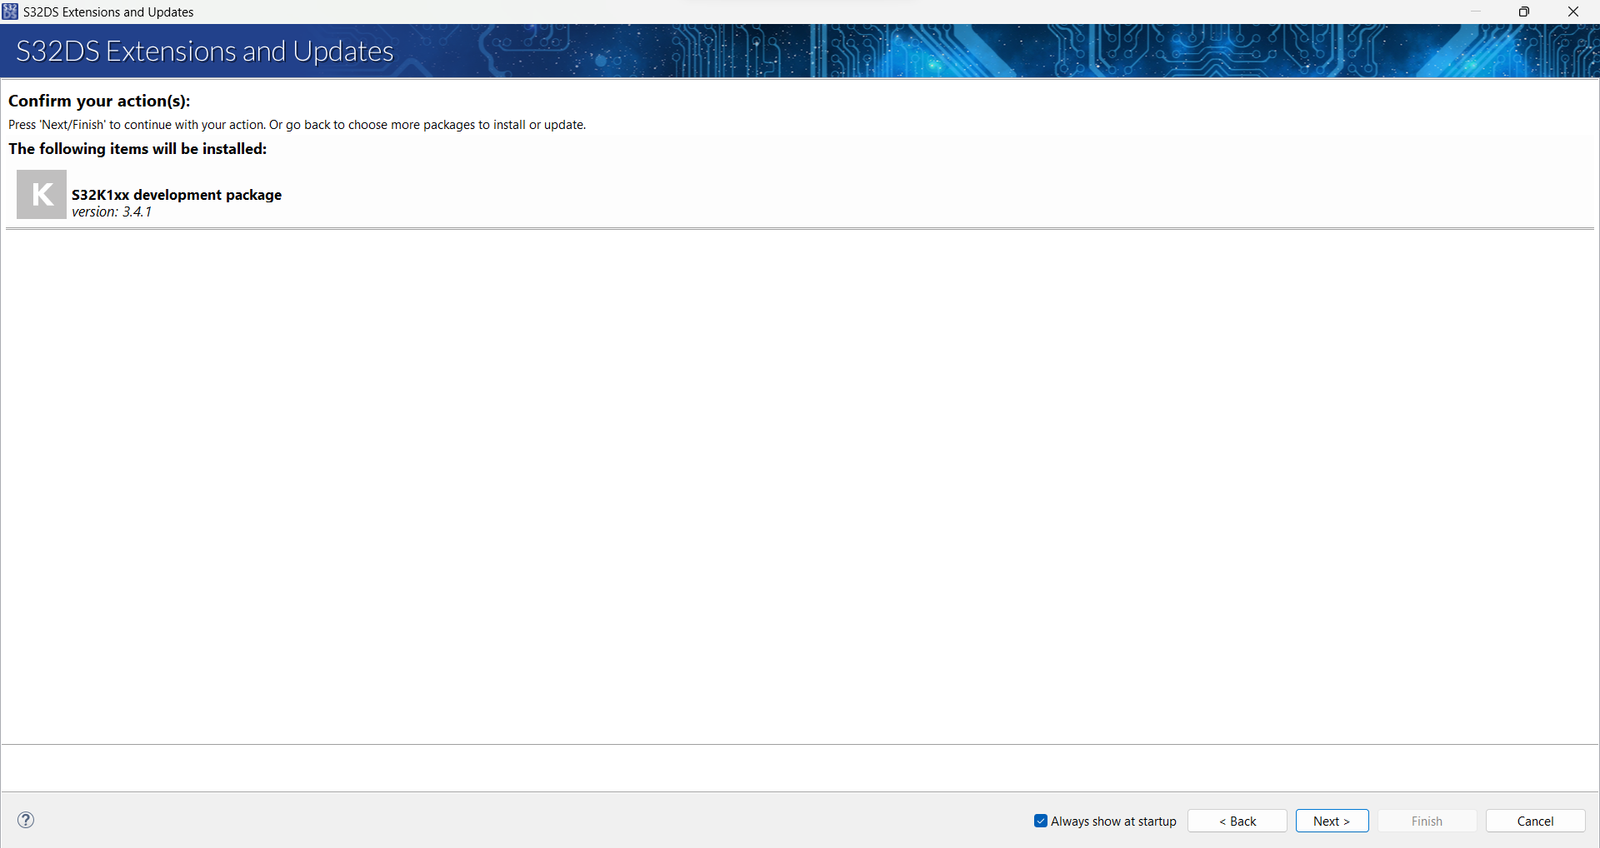
S32K1xx_MCU_Development_Package_Files Make sure all these packages, you can see, if you are downloading for first time. If any error comes up kindly mention them in forum page of gettobyte: Forum – gettobyte
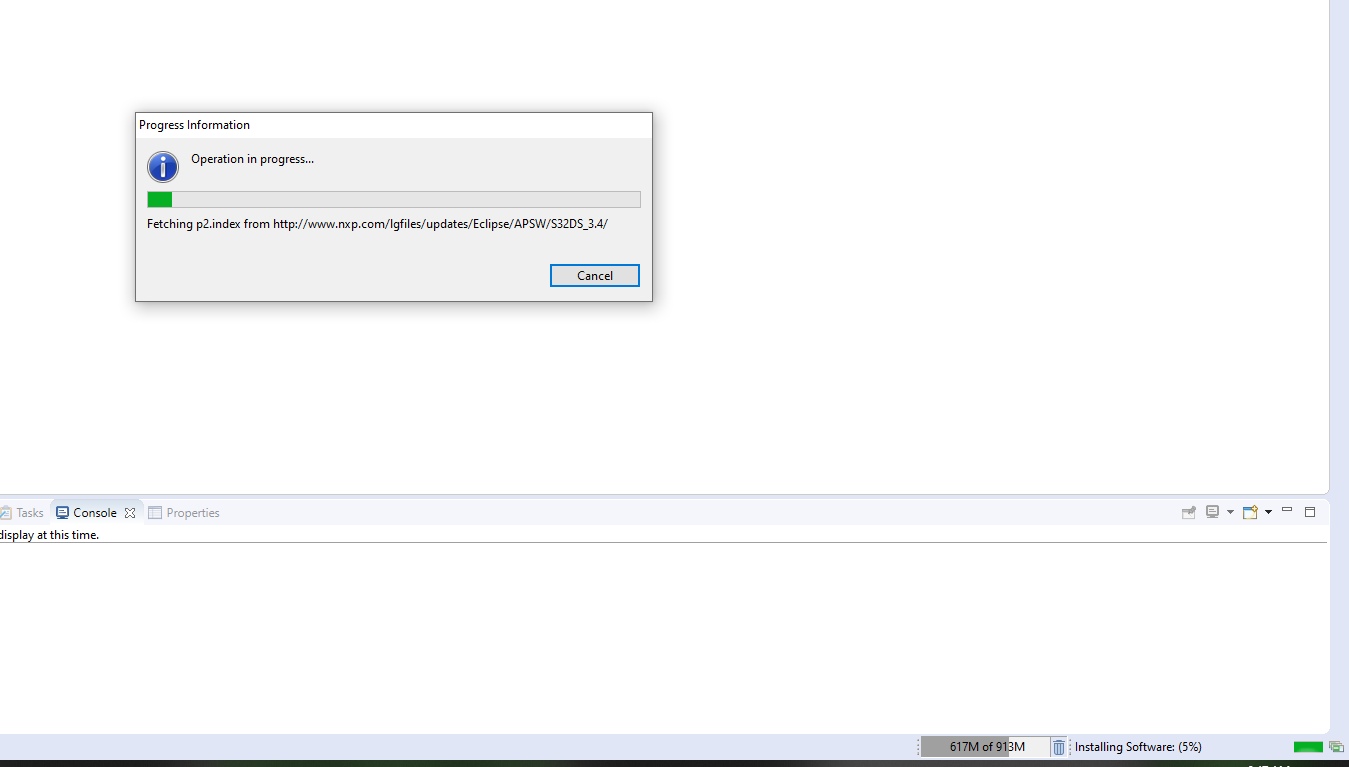
- Click on next and follow the installation process, after which you can see window like this. On the bottom left you can see there is Software Installation being displayed in percentage. This would take now 1-2mins
- Once Installation process is done, window will pop-up asking for the restart of the Design Studio, so restart the S32DS so that changes can be reflected in DS.
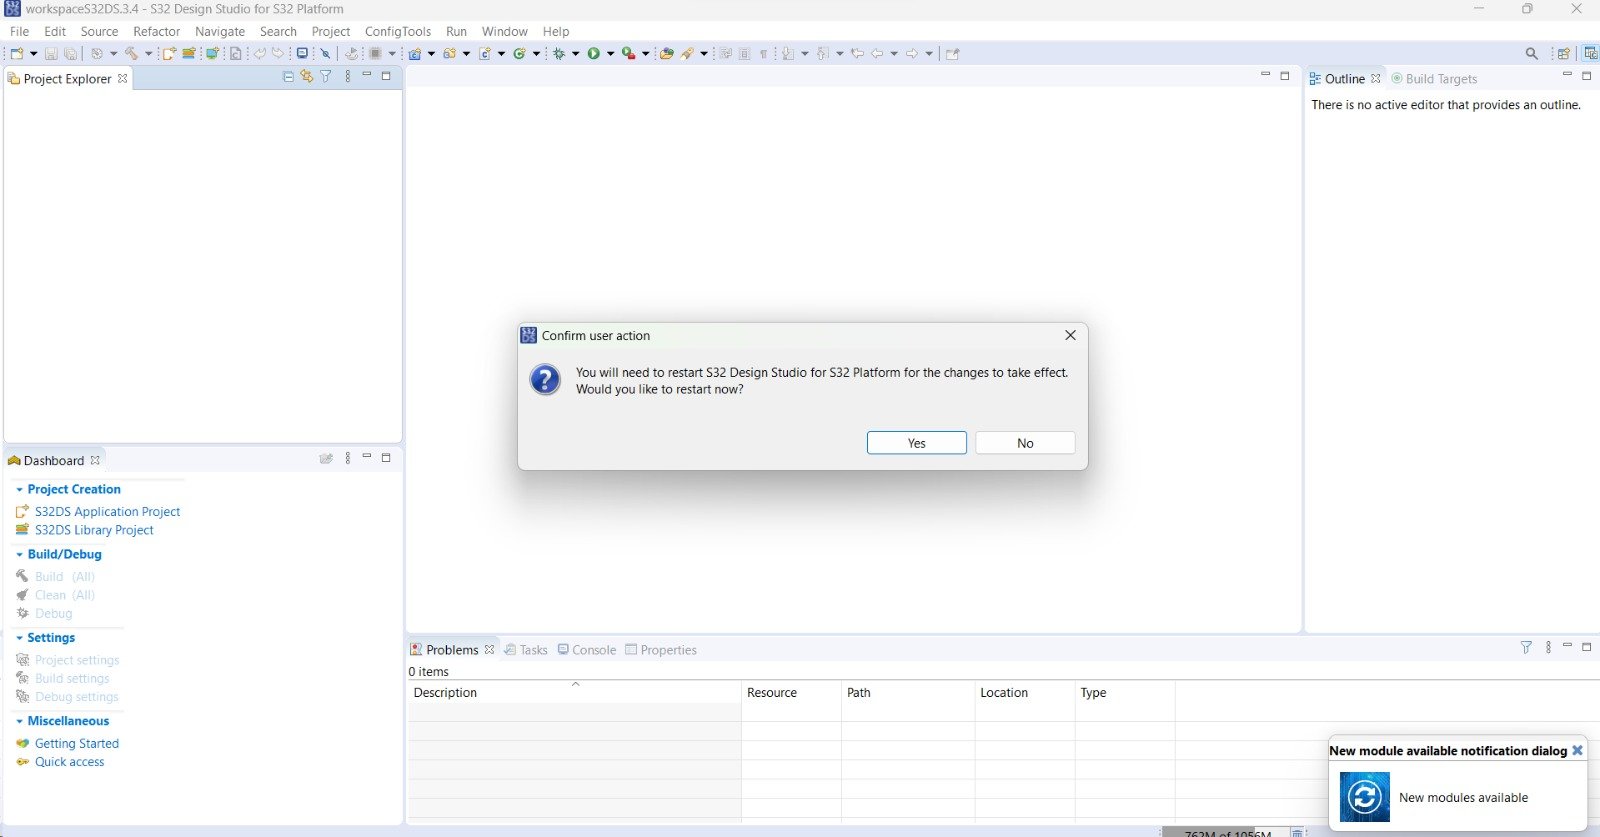
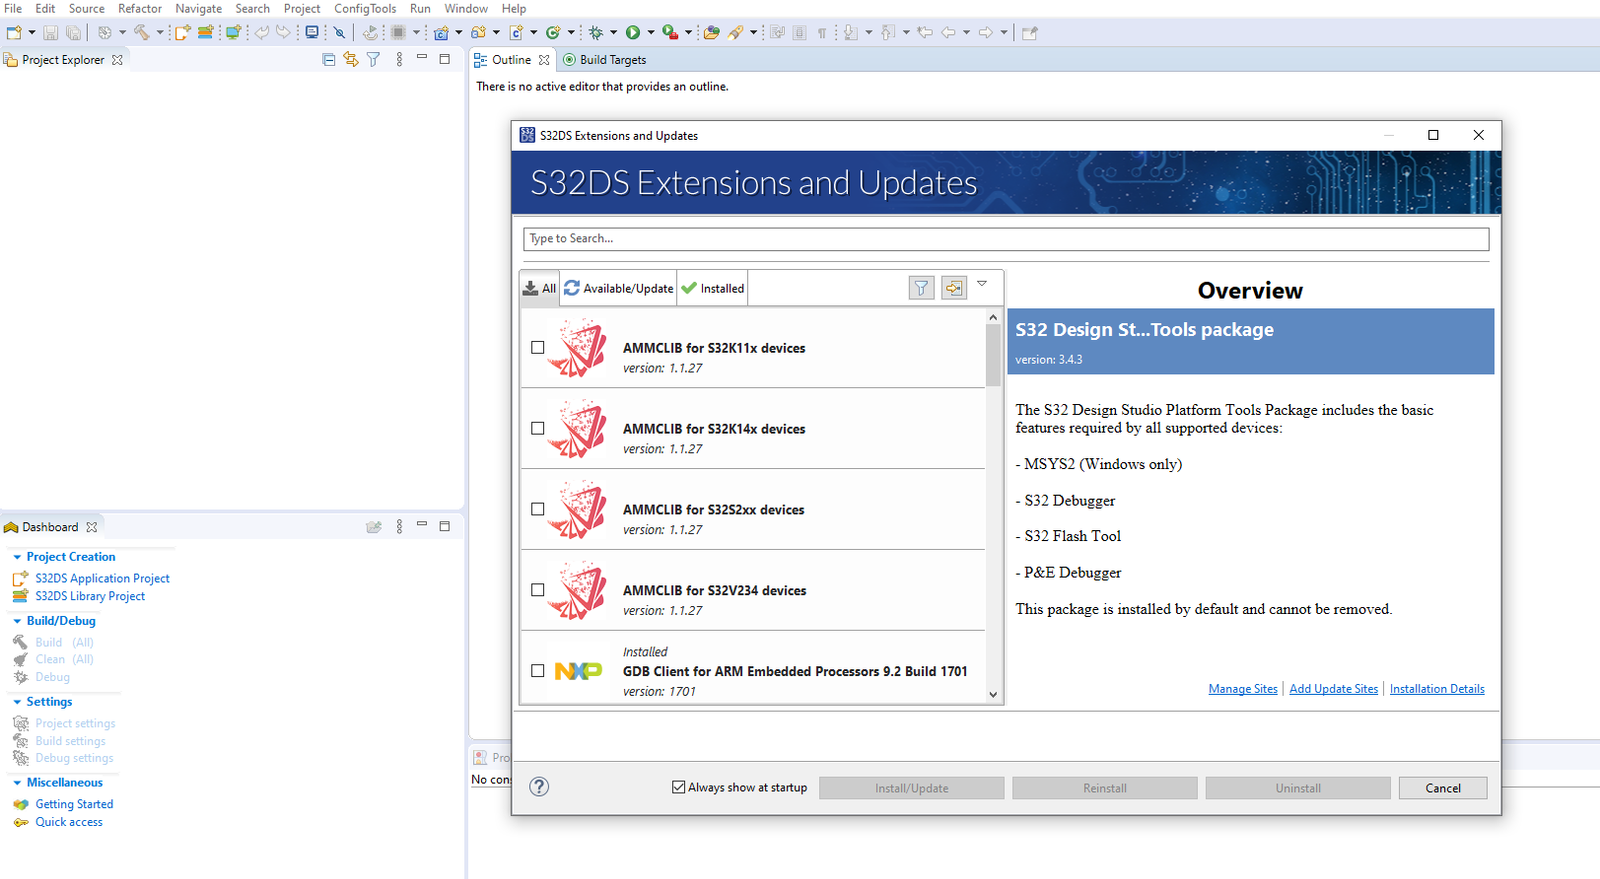
Restart_S32DS - Now S32 Design Studio, will open again and Open S32DS Extension and Updates window again:
- In that go to Installed tab and search S32K1 and you will see its development package being installed over their.

Checking_S32K1_Development_Package_Installation - Next step is to know how to download the RTD packages of NXP S32 MCU’s in S32 Design Studio.
There are 2 RTD packages which are available. One is Autosar Complaiant RTD package and Other
is Non-Autosar Complaint RTD Package. We are going to see both the RTD packages software
installation process. User can Install both the RTD packages.
S32K1xx Non Autosar Complaint RTD packages Software Installation
- In S32 Design Studio, go to help and open S32 DS Extensions and Updates Window:
S32 Design Studio Extensions and Updates - Now in this window go to Available/Update section and lookout for this 1 package: S32SDK S32K1XX RTM 4.0.3(version: 4.0.3).
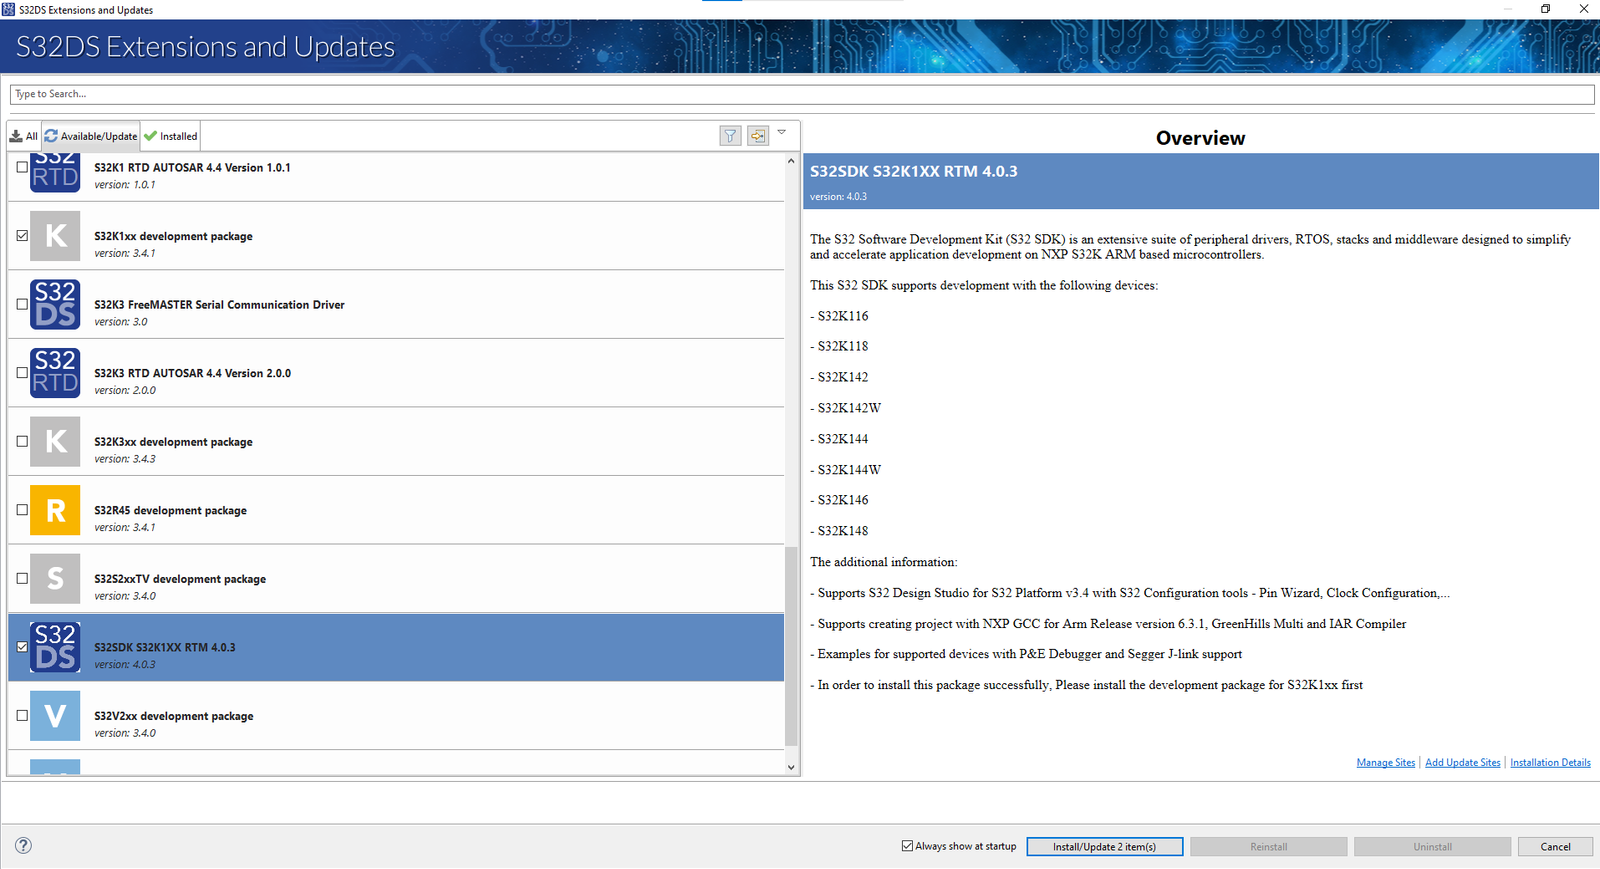
Development paclages for S32K1 family in S32 Design Studio - This is the packages that all we would be needing for Non Autosar Complaint RTD package. Click on Install/Update Items button and you will see all the plugins and packages that would be installed in next window:
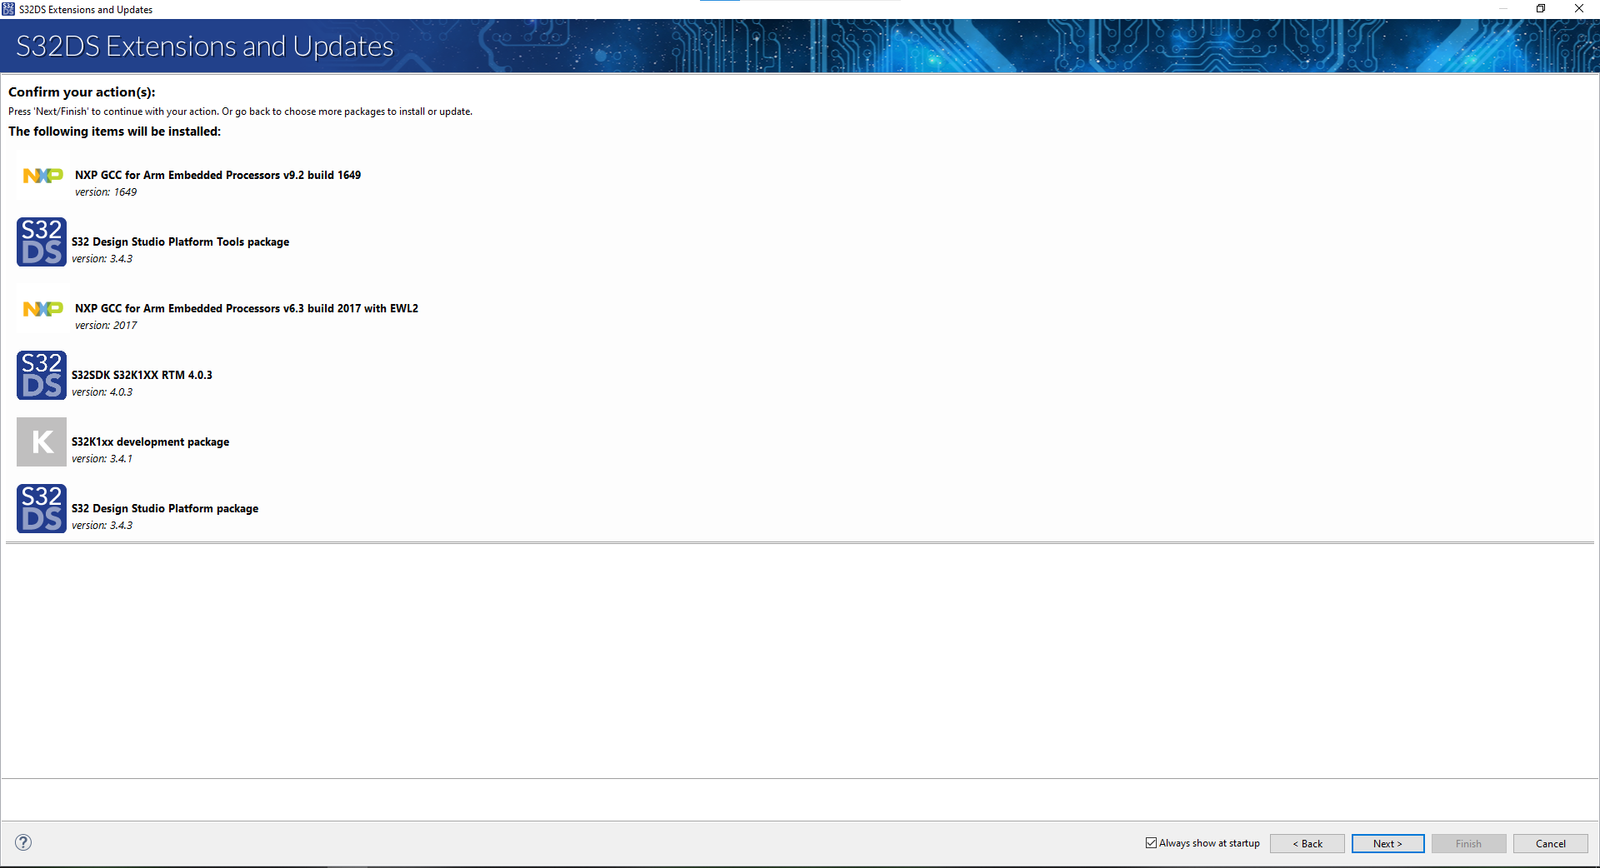
Development Packages for S32K1 family in S32 Design Studio - Click on next and follow the installation process, after which you can see window like this. On the bottom left you can see there is Software Installation being displayed in percentage. This would take now 1-2 mins.
- So, till then sit back and explore other blogs on Gettobyte website: NXP Semiconductors S32K1 MCU – gettobyte, Sensors and Modules Archives – gettobyte, STM32F1 – gettobyte, IoT – gettobyte, You searched for technology – gettobyte.
- Once Installation process is done, window will pop-up asking for the restart of the Design Studio so that changes can be reflected in DS.
- Now let’s go to step 2 and check whether our Development package and SDK files are installed or not. Just go to subsection Installed, instead of Available/Update section
- If you navigate to location: C:\NXP\S32DS.3.4\S32DS\, this time you can see there is a Folder by the name of Software being created in which there are below shown packages being created.
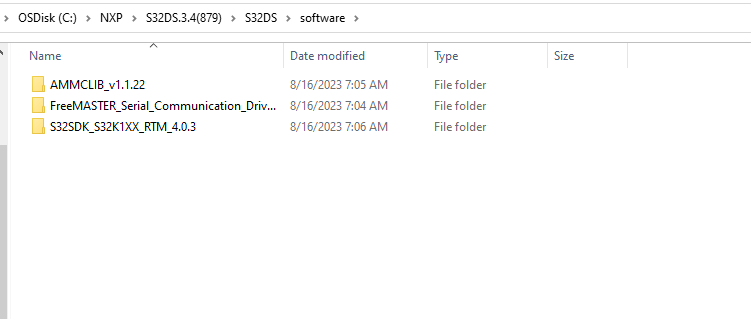
Software packages for S32K1 SDK successfully downloaded And inside the S32SDK_S32K1XX_RTM_4.0.3, you will see, following folder. Which means your SDK Files have been downloaded successfully.
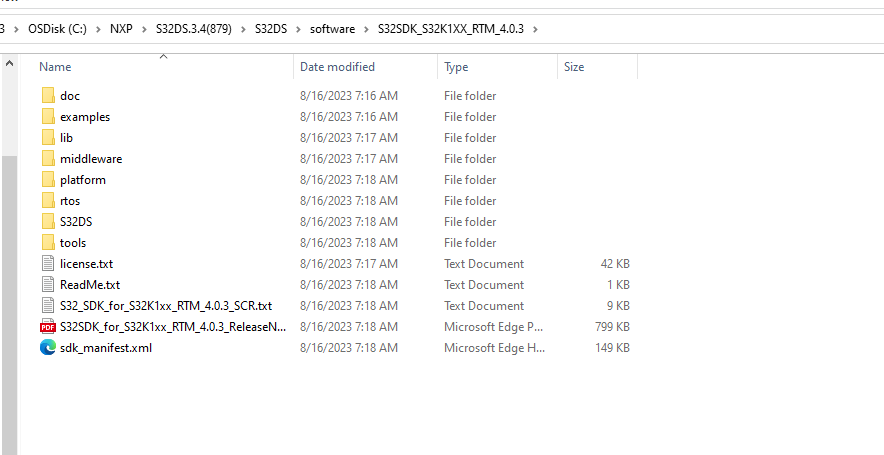
Software packages for S32K1 SDK successfully downloaded. - Open the S32 Design Studio Extension and Update Window by going to Help Menu in S32 DS. And in the Installed section of Window, you can see new packages have been installed compared to step 5. 
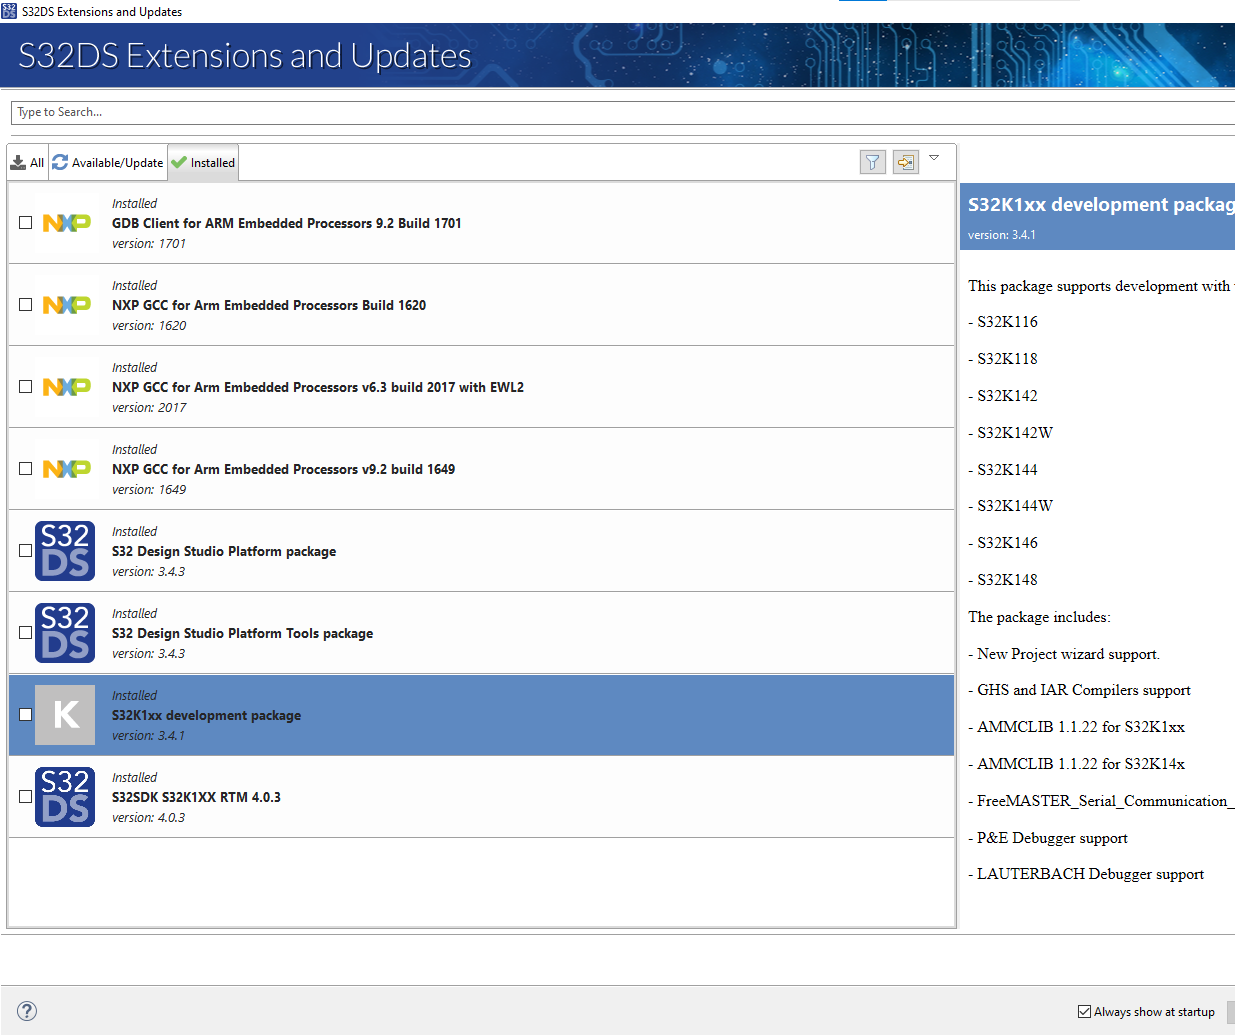
Installed packages in S32 DS Extensions and Updates - In S32 Design Studio, lets heck whether SDK files are properly imported and loaded into the IDE. For doing so, got to below menu area
S32 Design Studio Demo Examples after SDK files downloaded. And you can see this time, we can see S32K1xx SDK RTM v 4.0.3 Example Projects, which means SDK files and Demo examples of SDK for S32K1 Family have been successfully imported into our IDE.
S32K1 SDK Files and Demo Examples successfully loaded into IDE - Now, we have verified by all 3 ways that our MCU SDK is successfully installed and loaded. Lets just import one Demo Example from the Step 16 and compile it. So as to confirm Our ARM Compiler toolchain for S32K1 MCU is also working. So After the Step 16, select the hello_world_s32K144 project and click on Finish.

Opening S32K1 hellow world project to cmform ARM compiler toolchain working - You will see after this Project will be imported into the Project Explorer, as shown below.
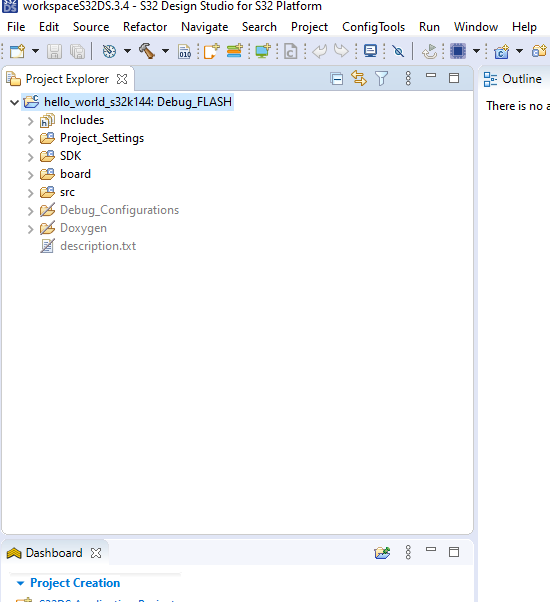
S32K144 Hello World Project - Compile the project by clicking on the hammer button just above the Project Explorer. After which program will start compiling, you can see compilation verbos in the console window.
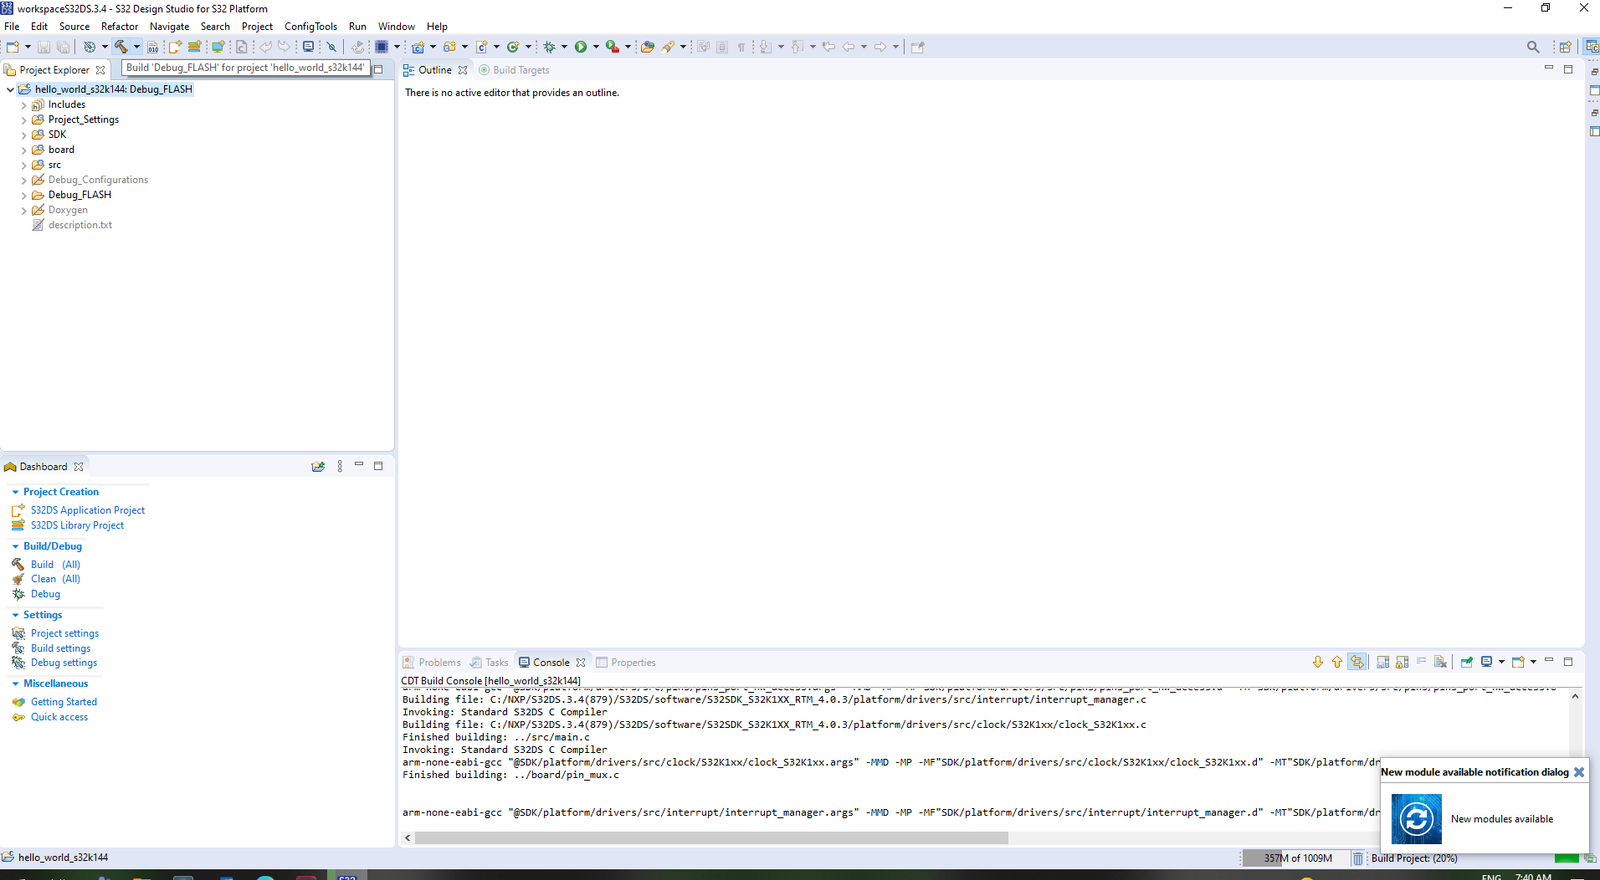
Compiling S32K144 Hello world Demo Project - If Compilation Process is done and you can see Console window like this, then it means our ARM Compiler toolchain is also up and working. 
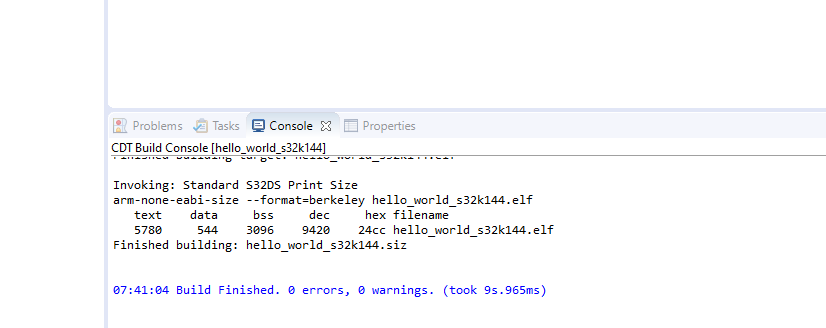
- So, kudos now, if you have reach to step 20. It means your MCU development package and SDK files are also successfully installed.
S32K1xx Autosar Complaint RTD packages Software Installation
- Go to NXP Website:
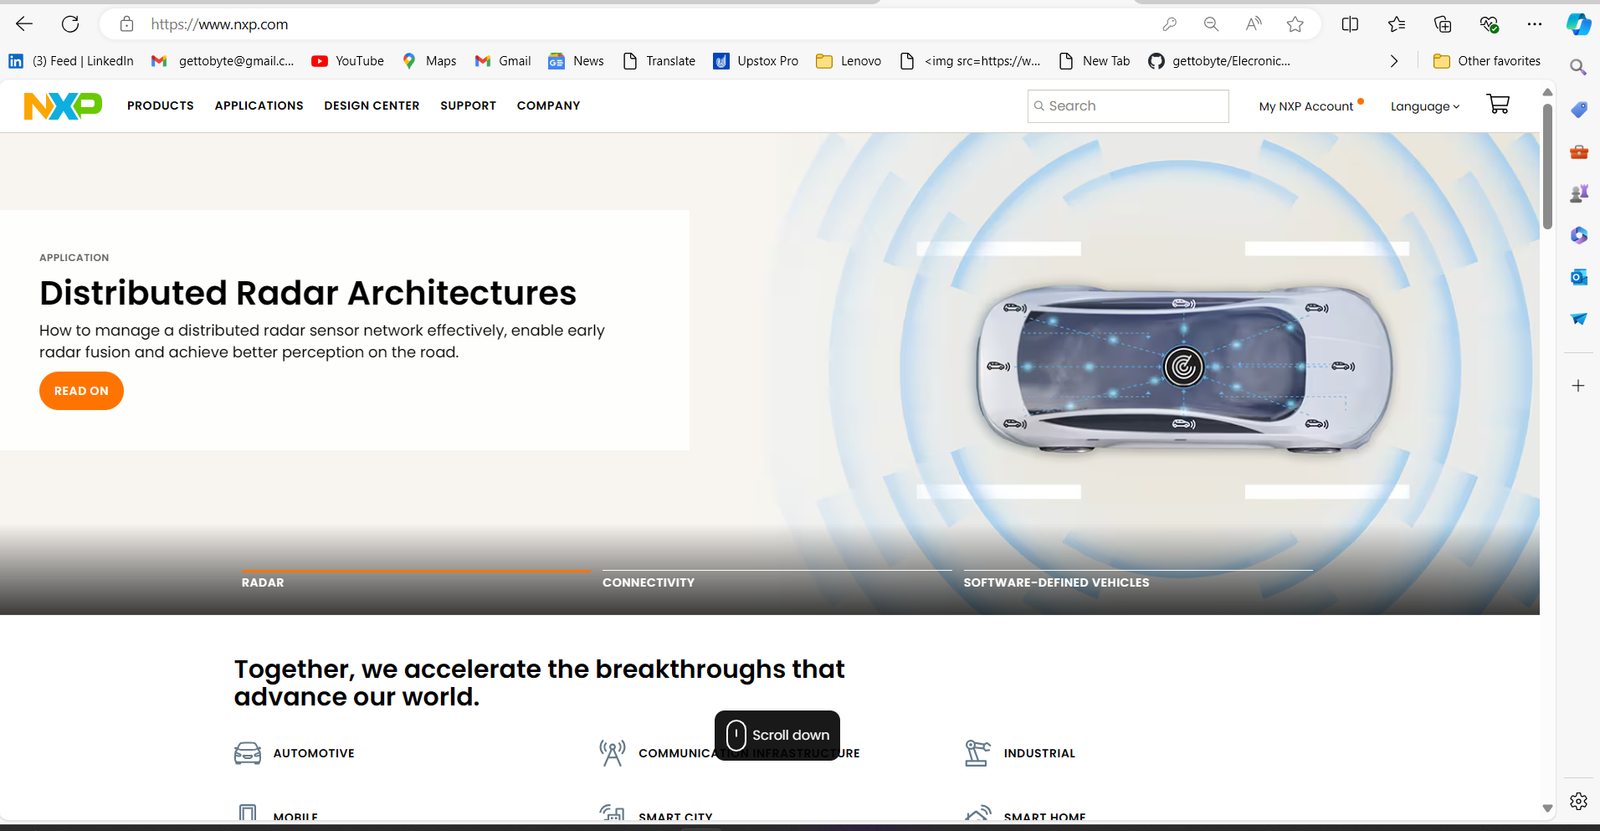
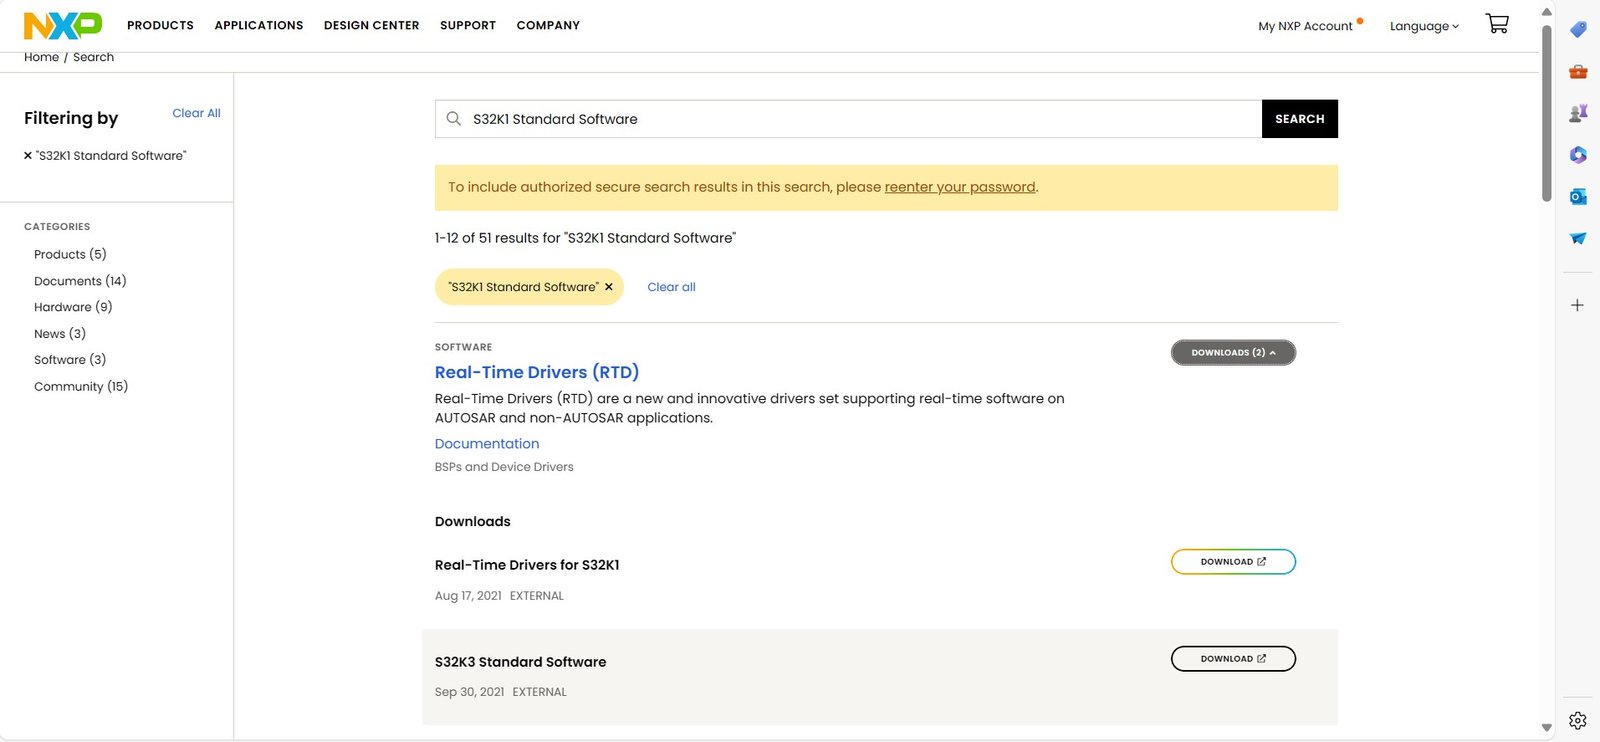
nxp_website - Search S32K1 Standard Software in search bar of NXP Website:
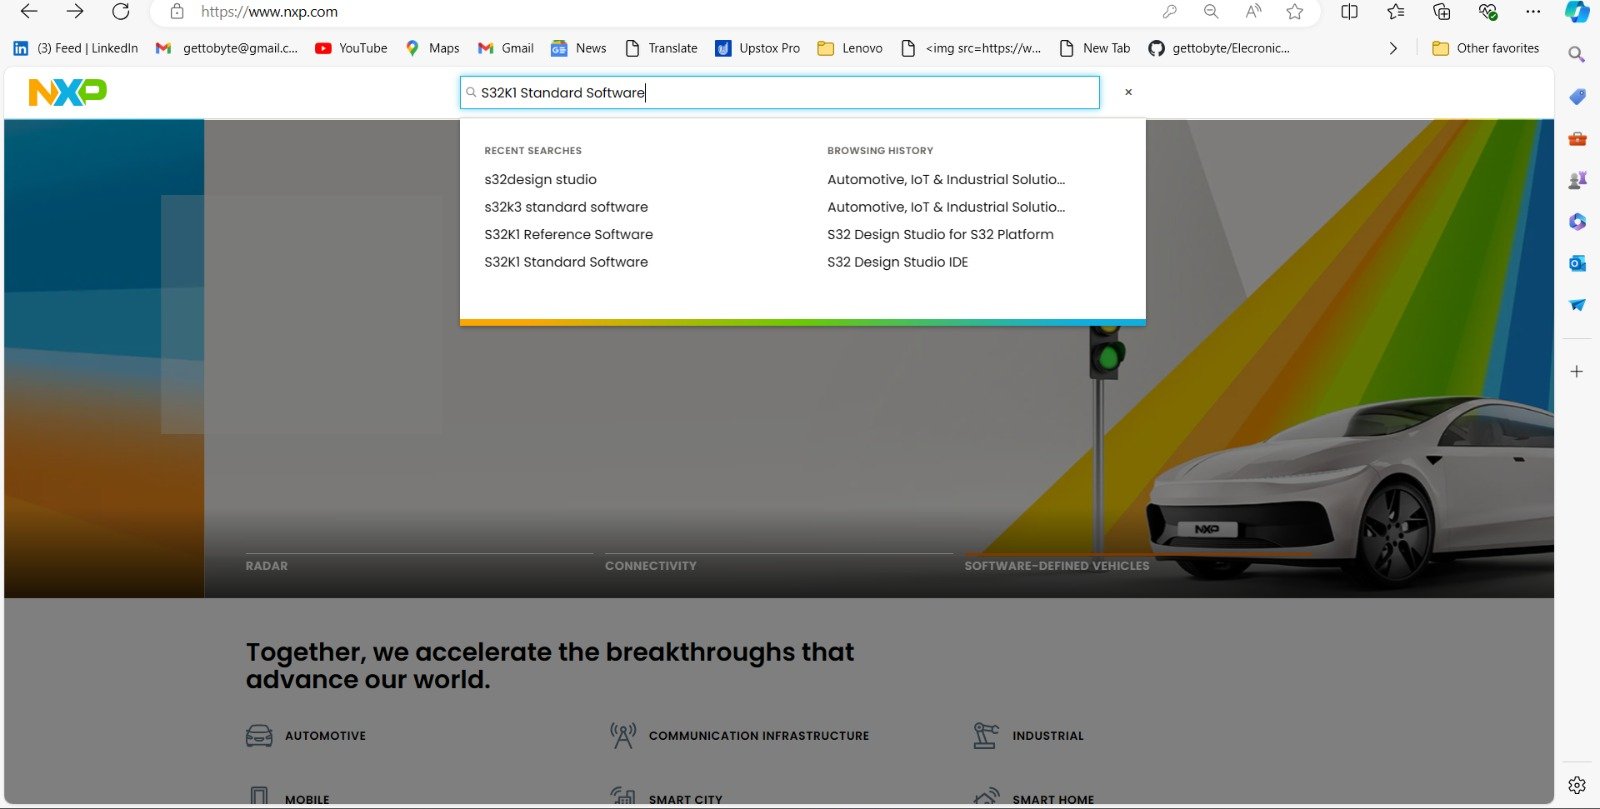
Autosar_RTD_Package_Search_NXP_Website After that, go to Real Time Driver Section and click on its drop-down arrow at Download tab. Under which you will see 2 subsections. Click on Real Time Drivers for S32K1.
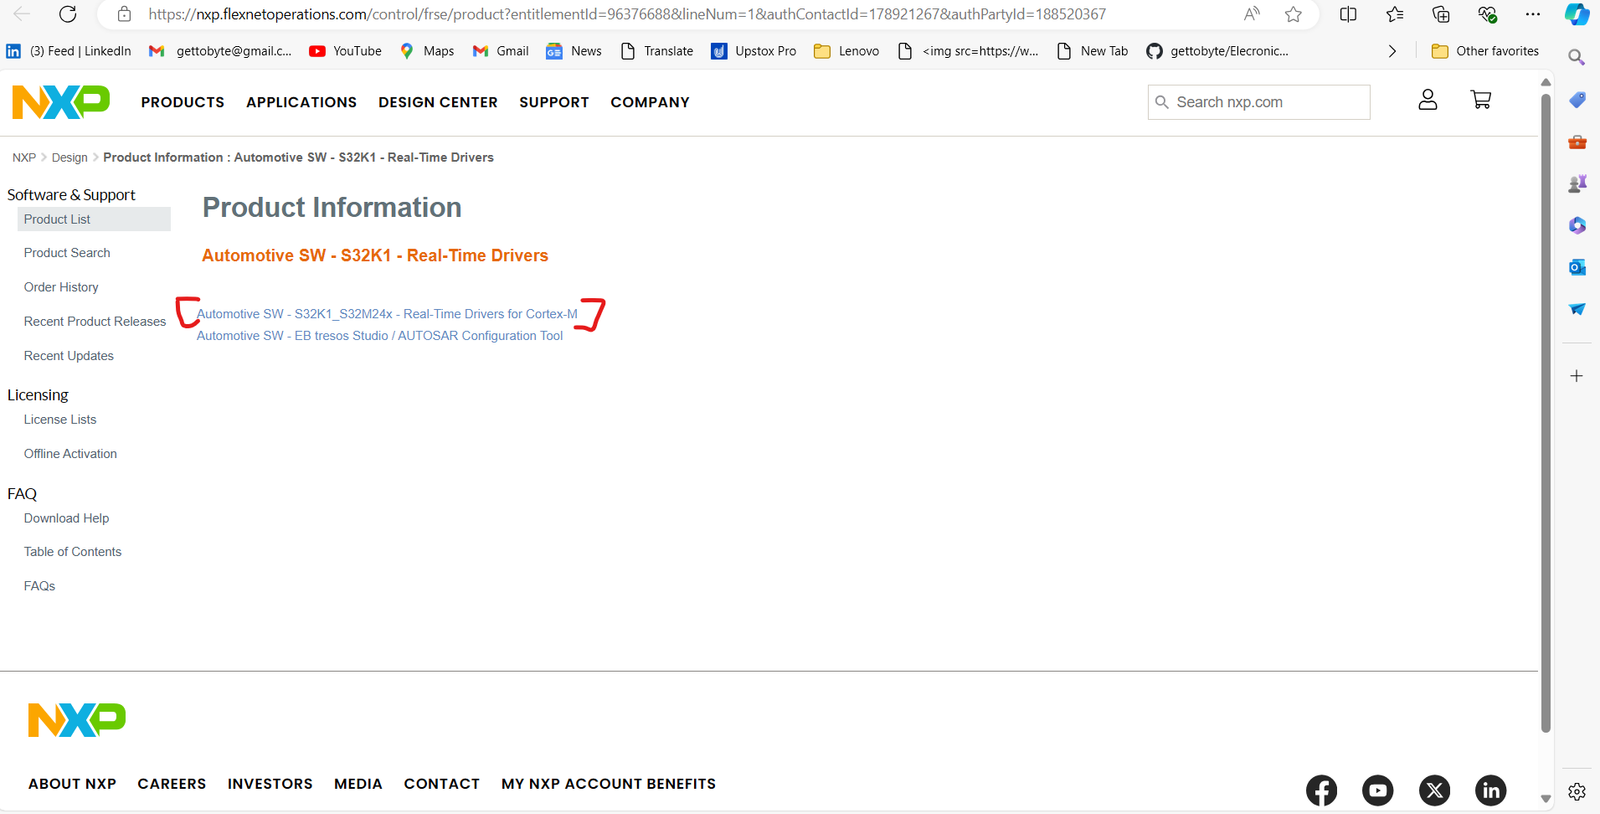
S32K1_Standard_Software - After that, you will be redirected to NXP FlexNet website, from where all Embedded Software packages of NXP Chips can be done. (Make sure but you are login to NXP website by creating your account)

NXP_FlexNet_Website Now click on Automotive SW – S32K1_S32M24x – Real-Time Drivers for Cortex-M.
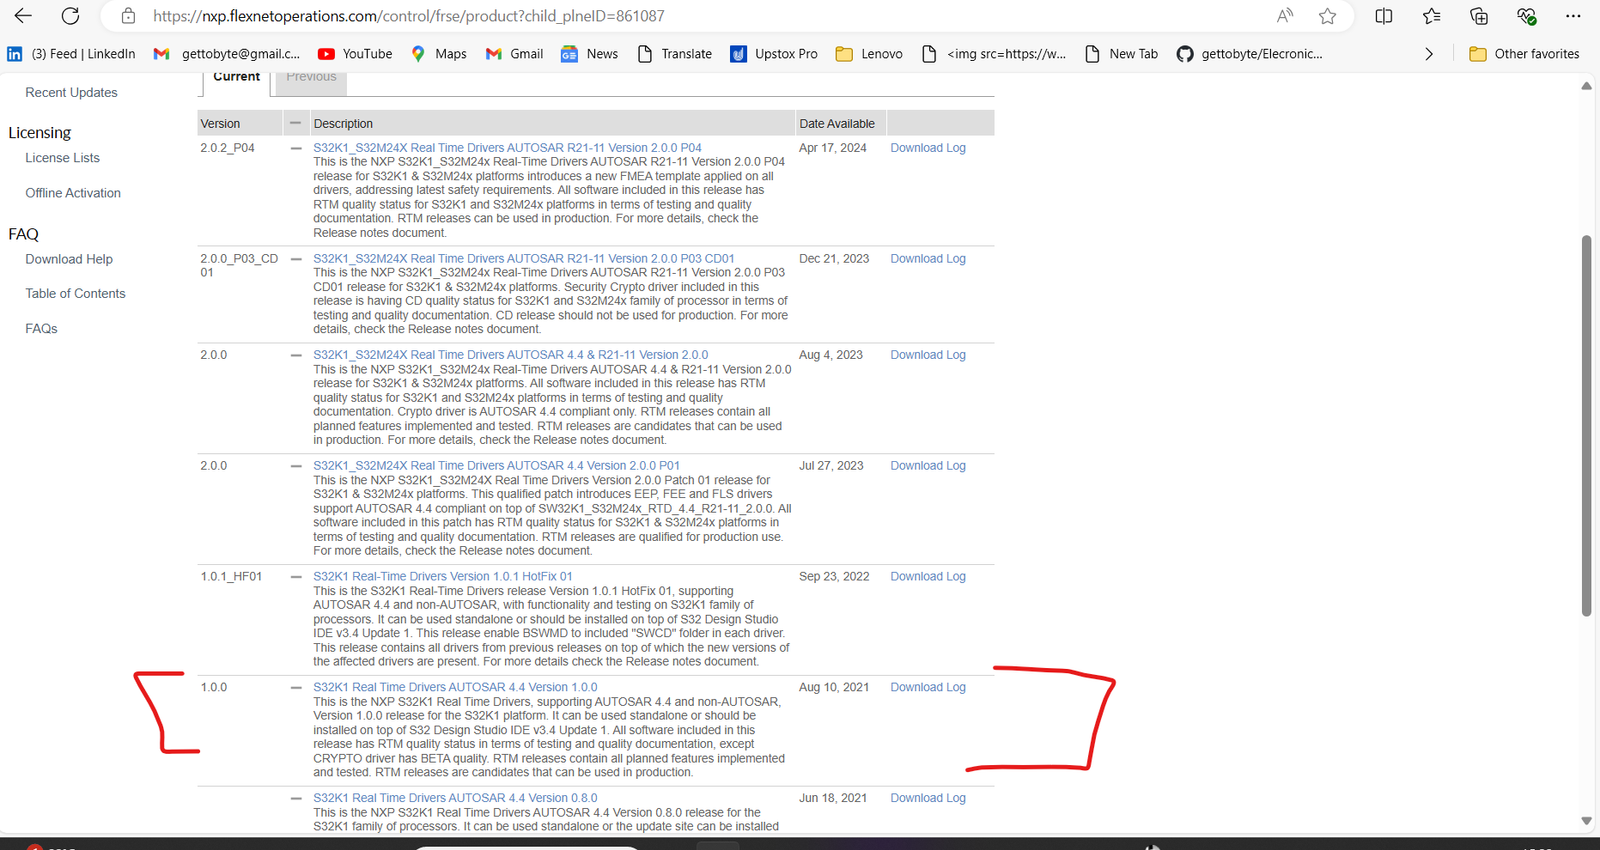
NXP_RTD_Package - You will see list of all Autosar RTD packages versions:
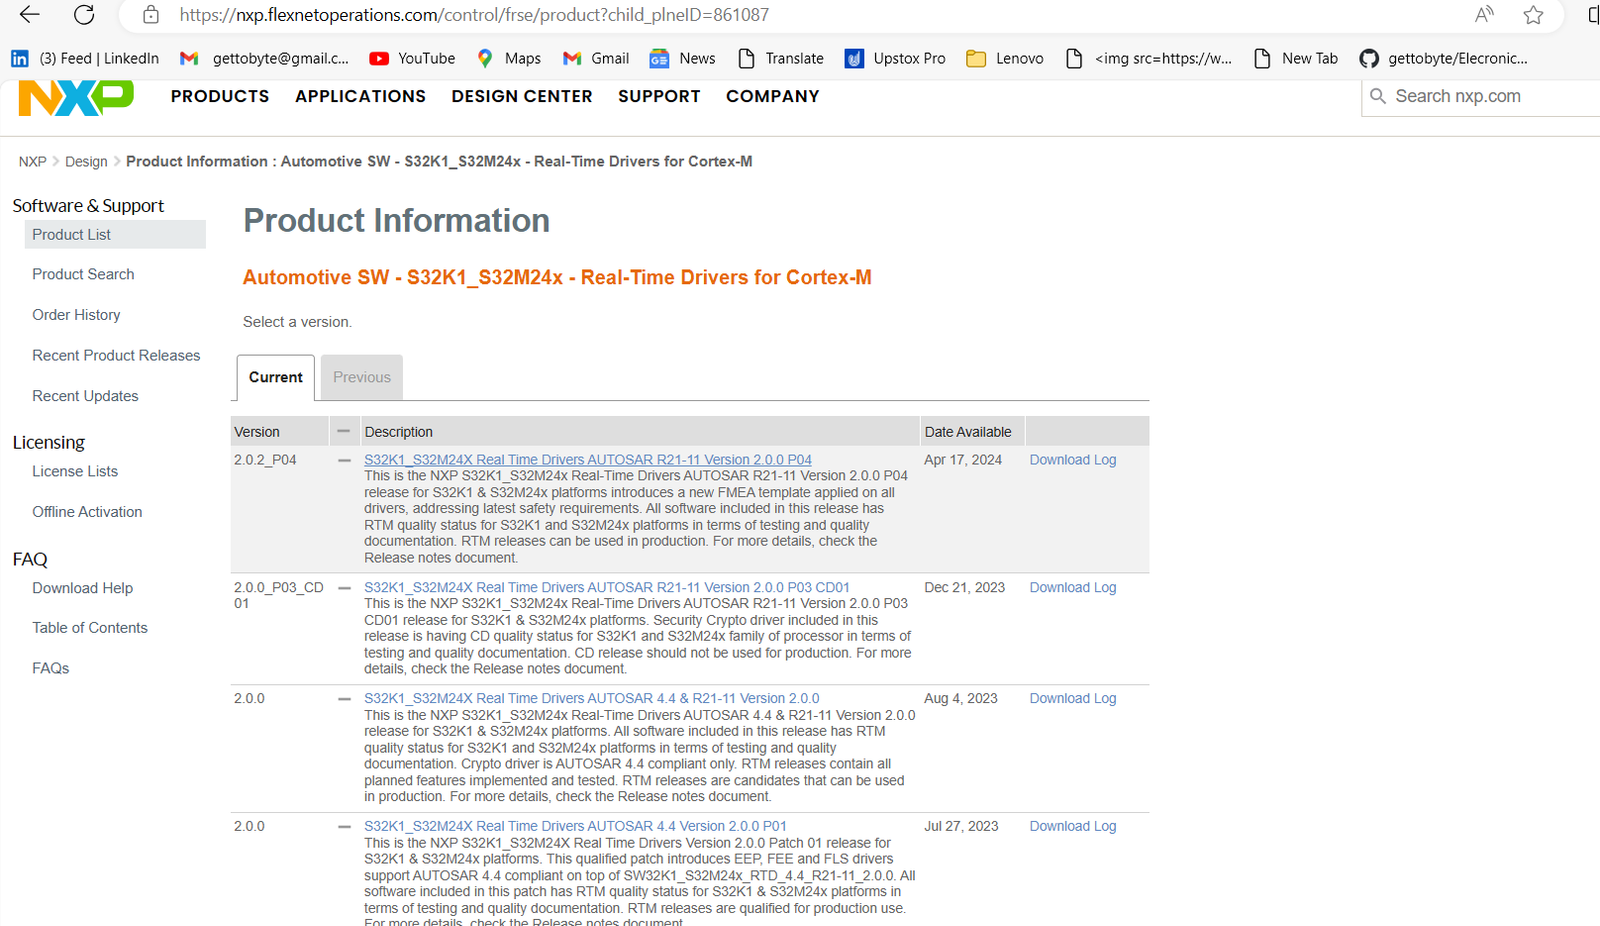
NXP_Autosar_Complaint_RTD_Packages - You can download RTD package version as per your choice and use. We are going to use RTD 1.0.0 version in this blog and all of our demo codes and tutorials would be based on RTD 1.0.0 version. So, click on package which is of 1.0.0 version.
- After that product page of this RTD version would be opened, in which all the RTD installation files would be available for the software. You can also see release notes of corresponding RTD package.

RTD_V_1.0.0_Product_Page - In this click on highlighted package, which is updatesite package of autosar Complaint RTD package 1.0.0. This package would be needed to download and integrate RTD package in S32 Design Studio. 
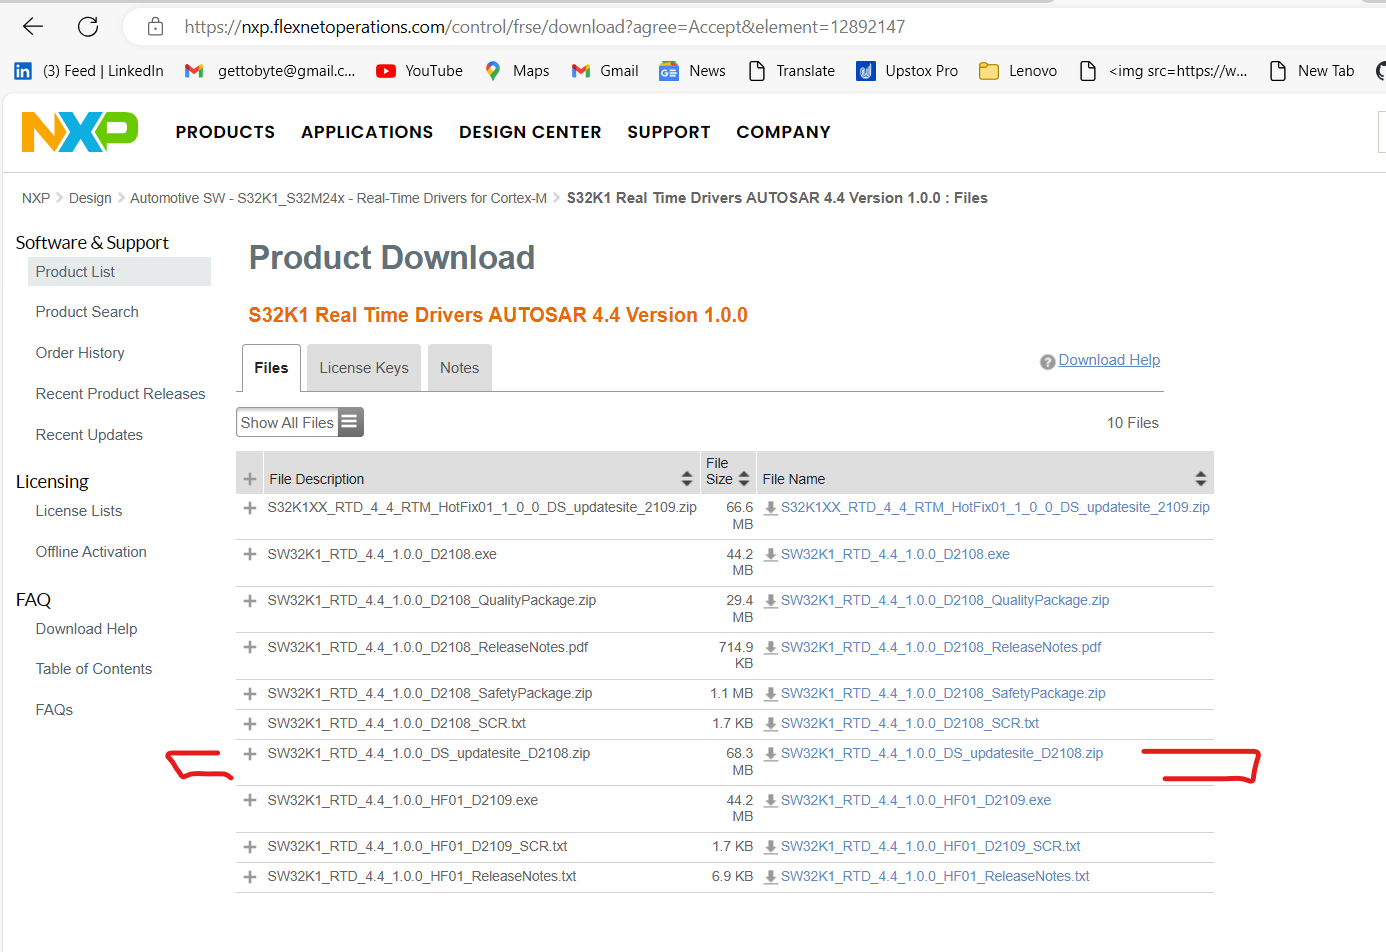
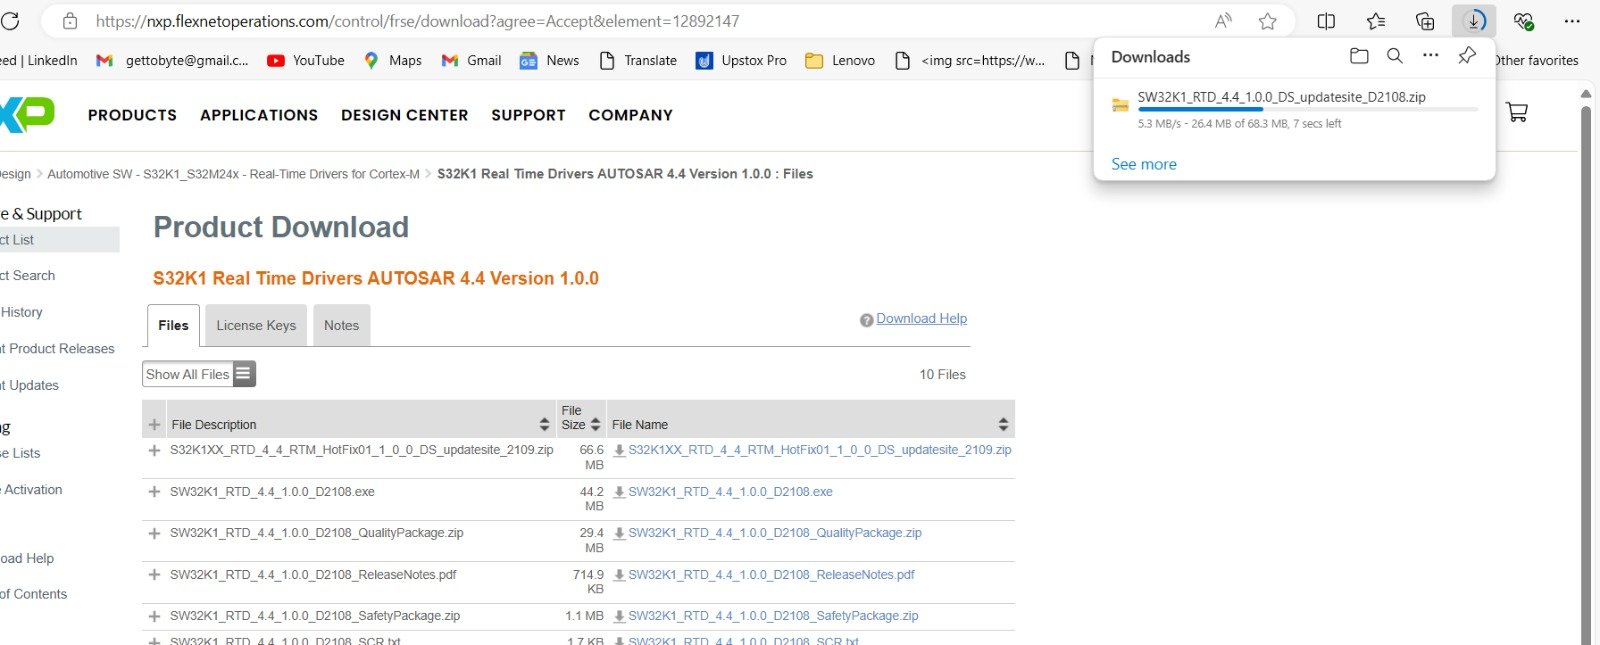
- Clicking on it, download of UpdateSite will start begin. Make sure it is downloaded and saved into your PC:
RTD UpdateSite downloading - Now Open the S32 Design Studio and Install New Software, by navigating to menu as shown in figure:

Install New Software for S32 Design Studio - After that Install New Software Menu will open in which at first click on Add and then click on Archive.
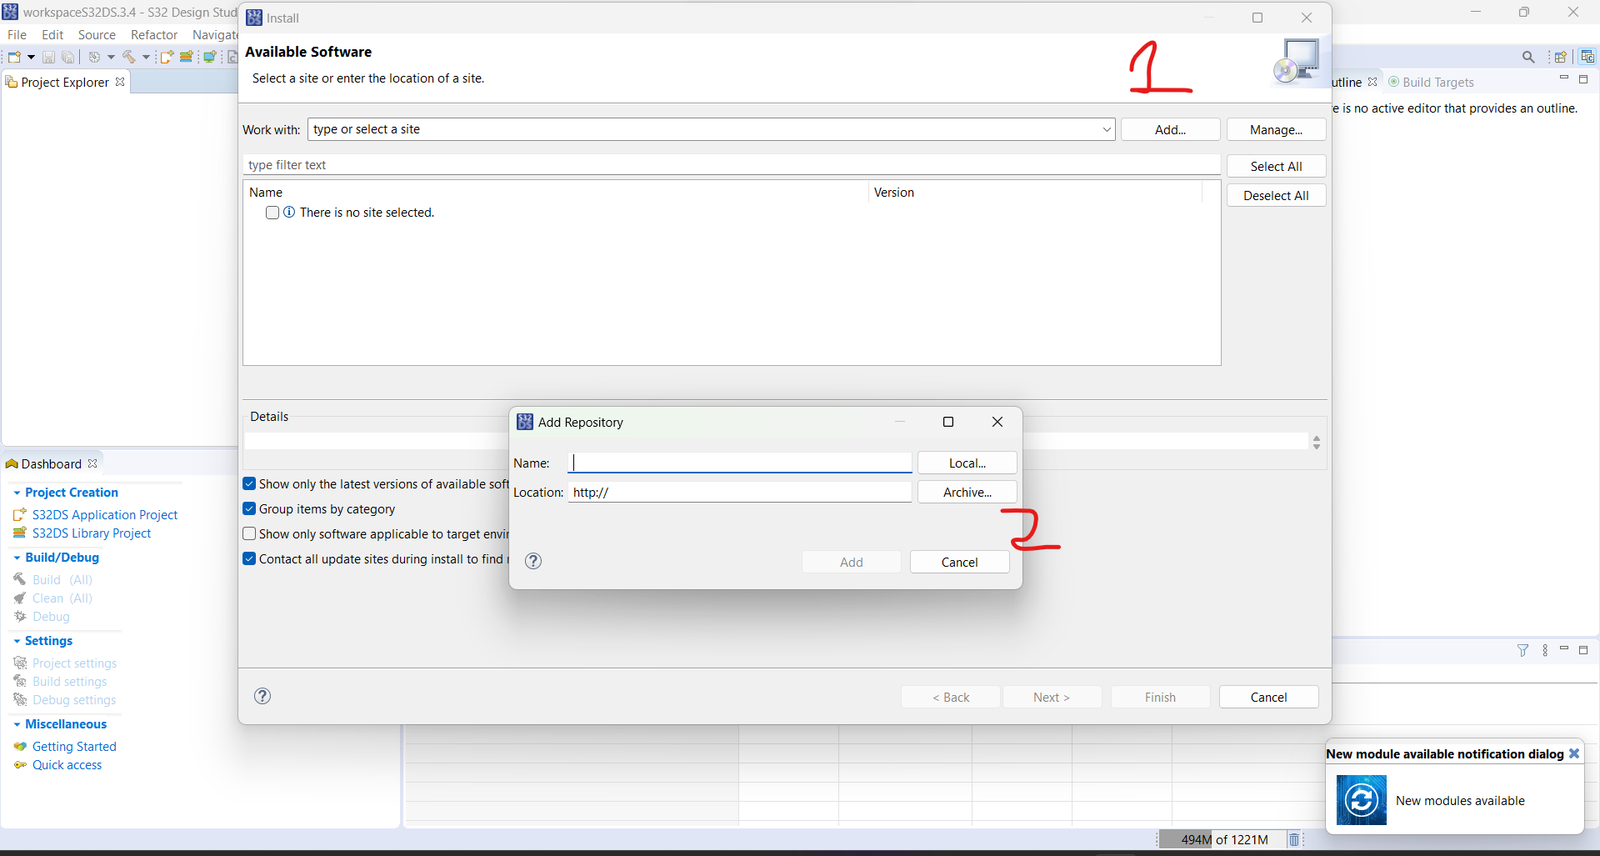
Install_New_SOftware_Menu - After that pop-up will open and select the Update Site Zip folder which is downloaded in step 11. And Add it into the Add repository menu which is shown in step 12.
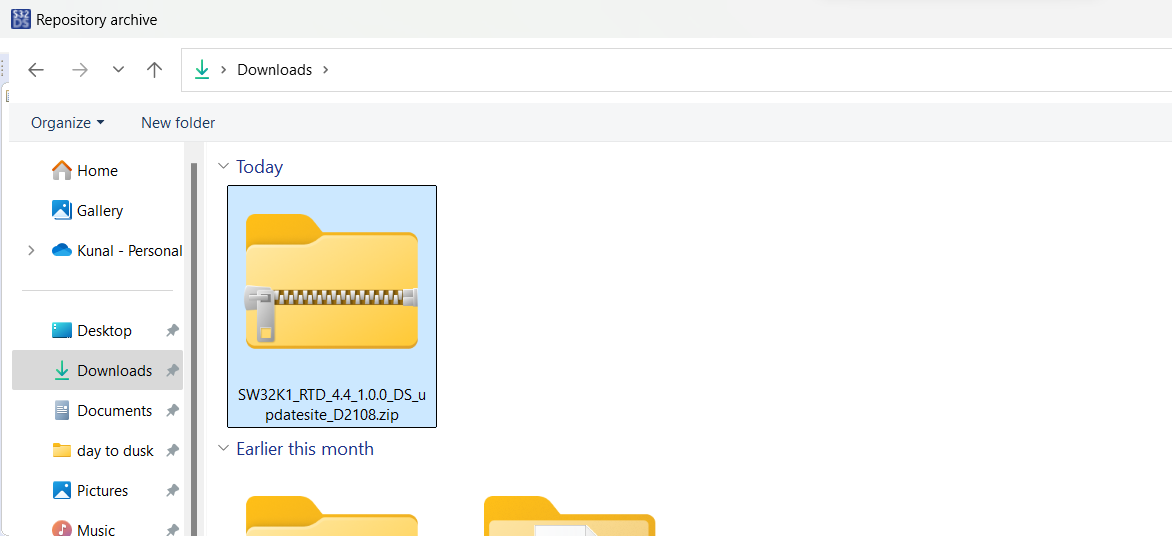
- After that click on Select All and click on Next. After this follow the instructions as shown in screens and RTD Package Installation process will begin
- After successful installation, popup will come for Restarting the S32 Design Studio. Restart the S32 Design studio.
- Now lets check whether Software installation is done or not.
- Go to File and click on S32DS projects from Example.
- In this you will see a Section by name of x and if you drop down it, all the peripheral demo examples with the installed RTD package would be shown.
- Now you can click on any example project and explore it.
- You can also follow steps from Step 7-10 of last section, to check whether RTD package installation is done or now. Just this time look for RTD packages with name similar to: ” S32K1 RTD 1.0.0″
- Congratulations your Autosar Complaint RTD package for S32K1xx is successfully done.
Now after successful installation of software packages and SDK files for corresponding Microcontroller to be used, next step to do is Project creation.
Project creation can be further categorized into 3 parts:
- Making project from Demo Examples
- Opening already developed code.
- Making a project from scratch.
Let’s dive into each of these steps one by one:
Making project from Demo Examples
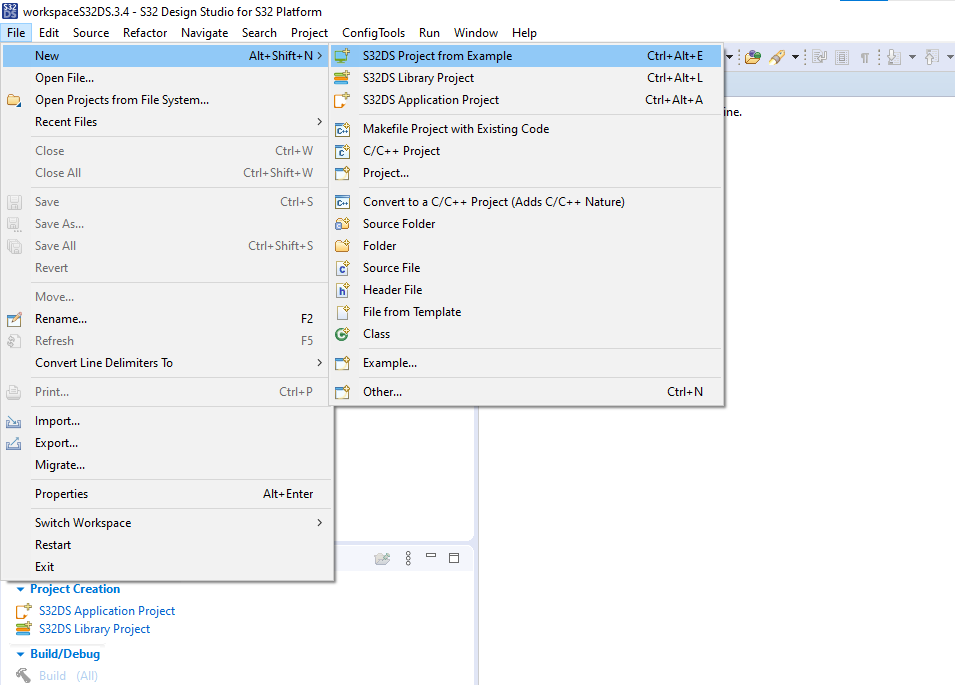
Just like in Arduino IDE environment we have basic Demo Examples already developed so that we can get hands on Microcontroller peripherals quickly, same way NXP Semiconductors, also provides demo examples in S32 Design Studio IDE for S32K144 Microcontroller to get hands on its peripherals easily and quickly. These Demo examples are downloaded once Software packages and SDK files of the S32K144 MCU are properly installed in IDE as told in previous step. To see this demo examples navigate to area of S32DS IDE as shown in below pic:
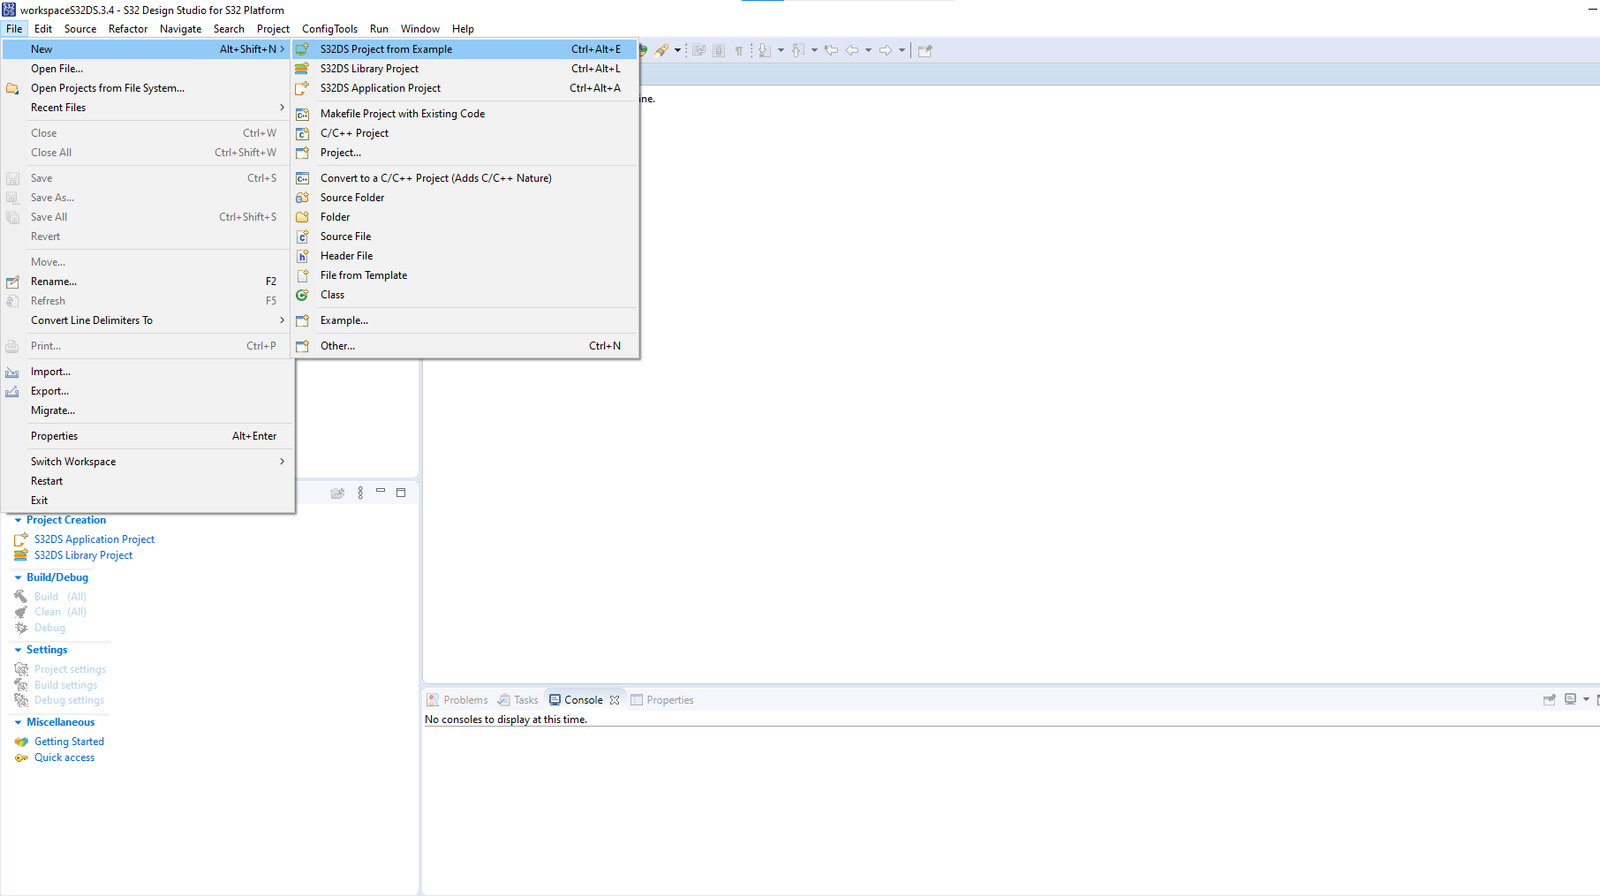
- Navigate to File–>New–>S32DS Project from Examples
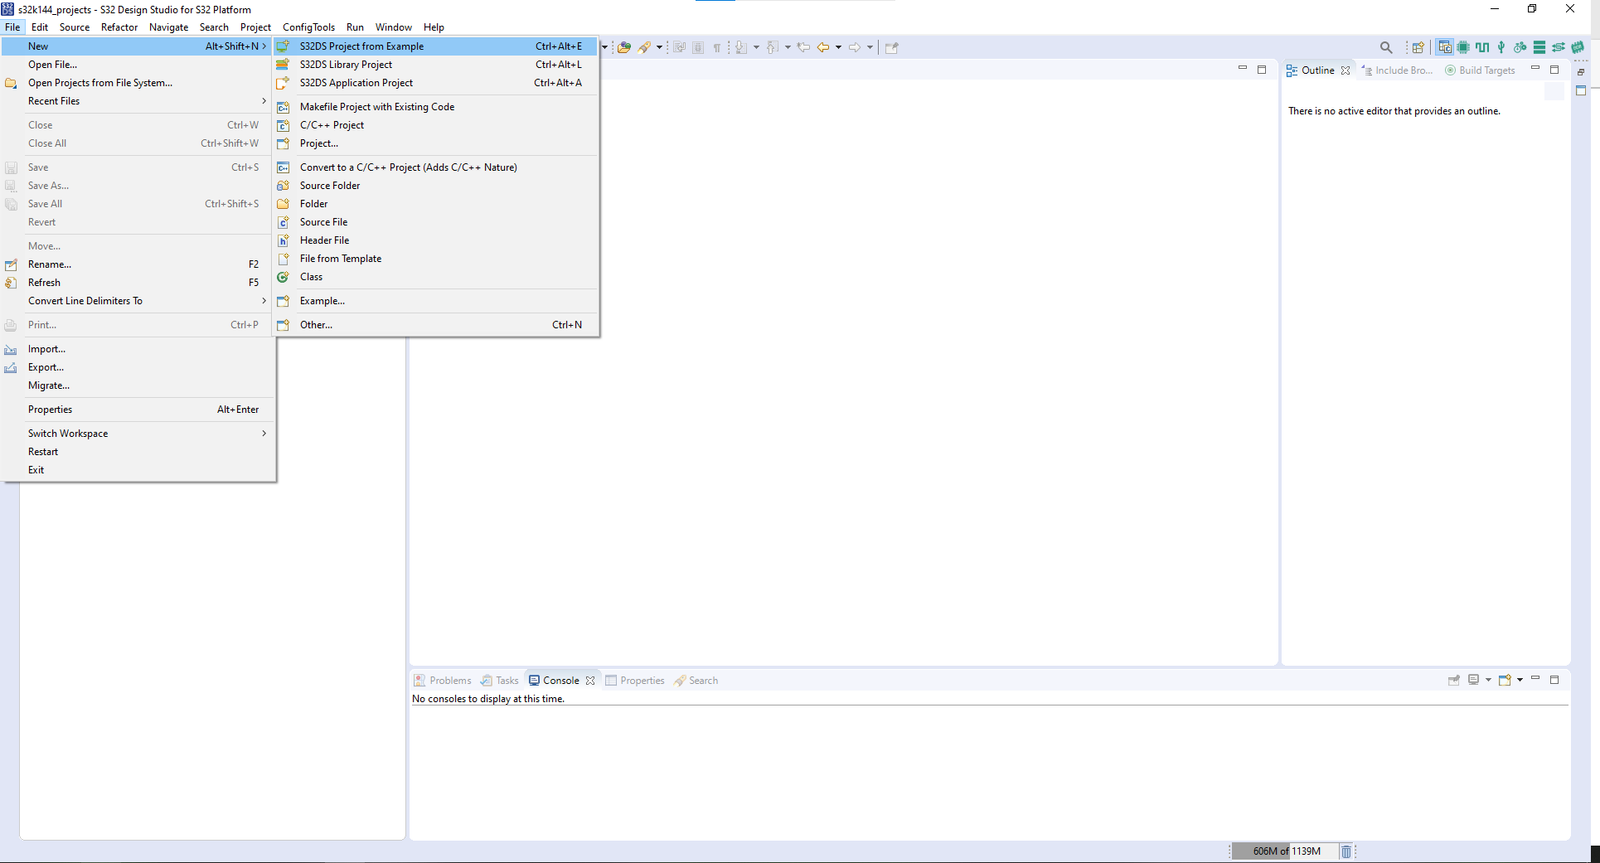
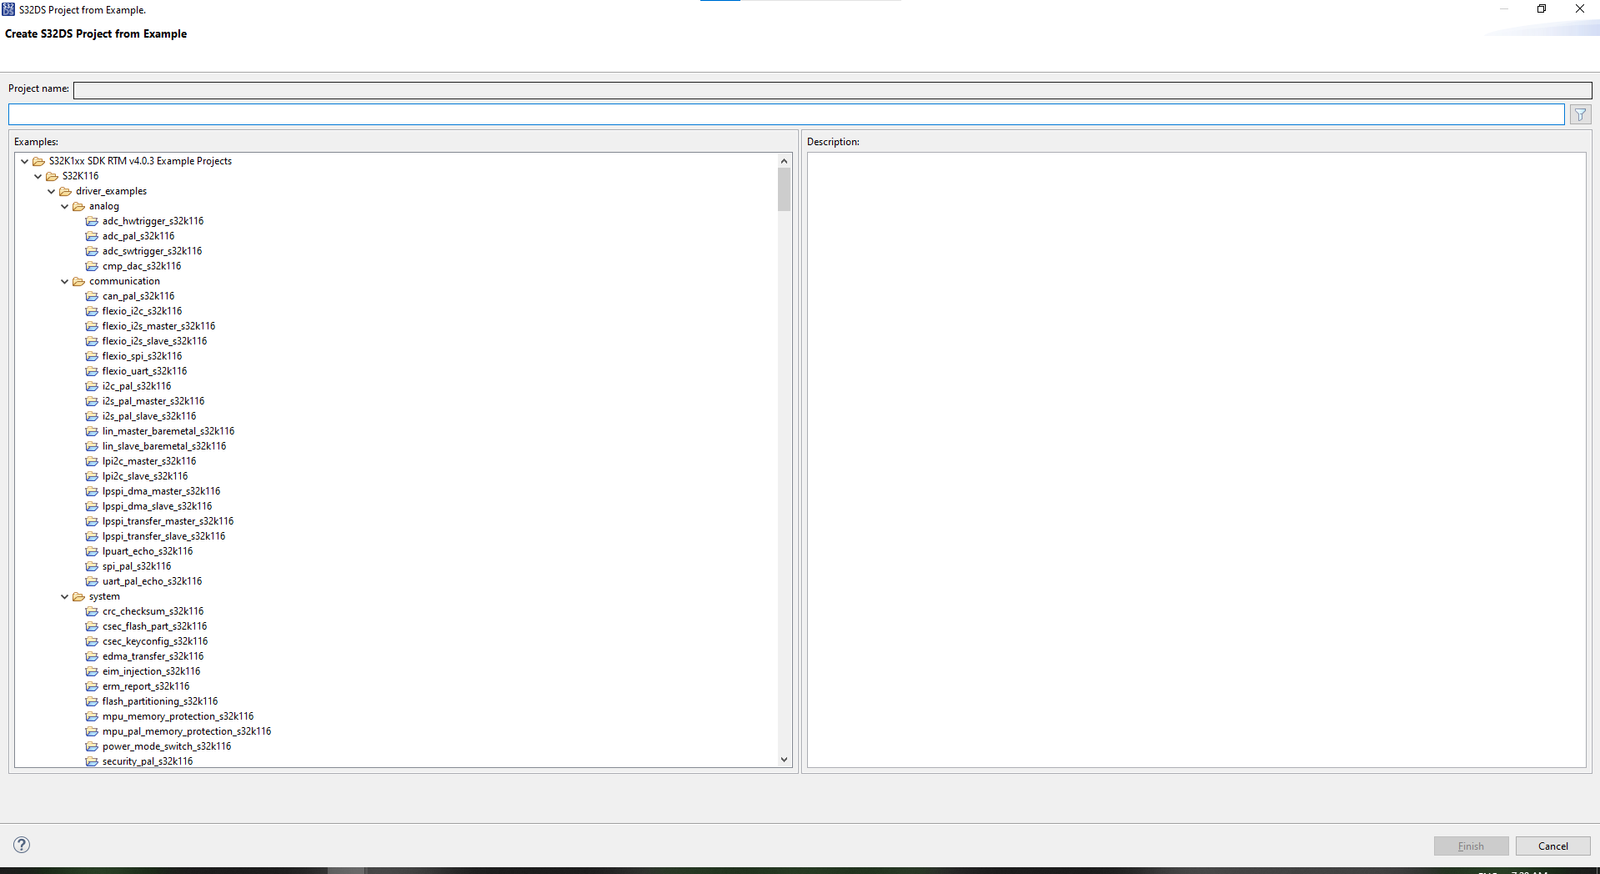
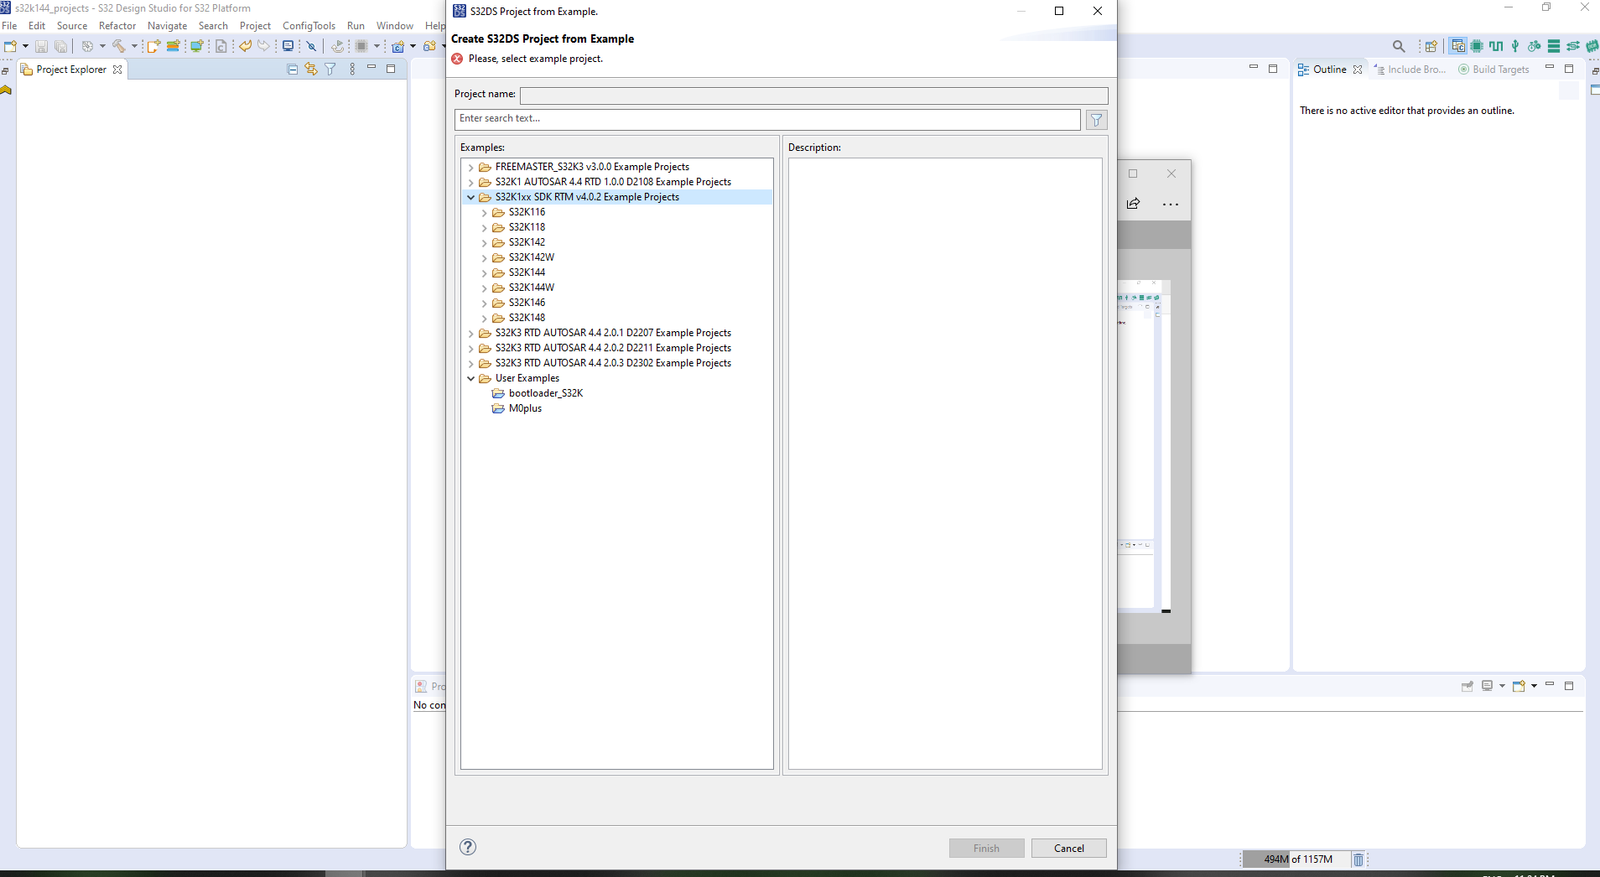
Creating S32DS Project Examples Part1 - After that a window will pop-up like this, and it will be loading all demo examples from internal SDK that we have installed in last step.
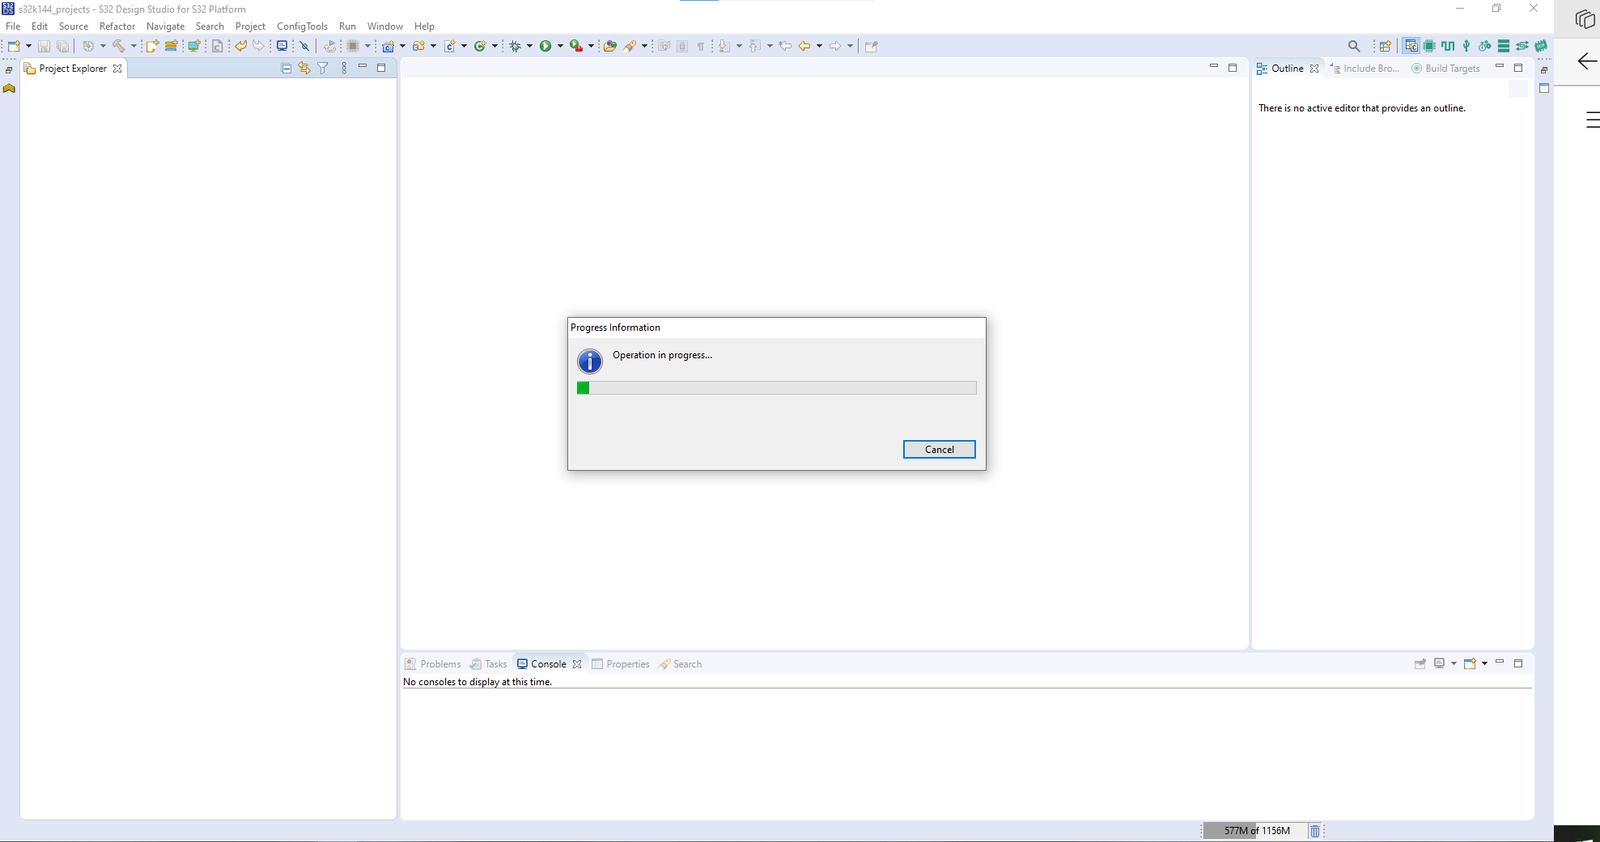
Creating S32DS project from examples Part 2 - After successful loading, window will show Demo examples for all the SDK’s that you have downloaded, in below pic you can there are number of SDKs in my system, but in your case, you will see only S32K1xx SDK RTM v4.0.2 Example Projects highlighted SDK.
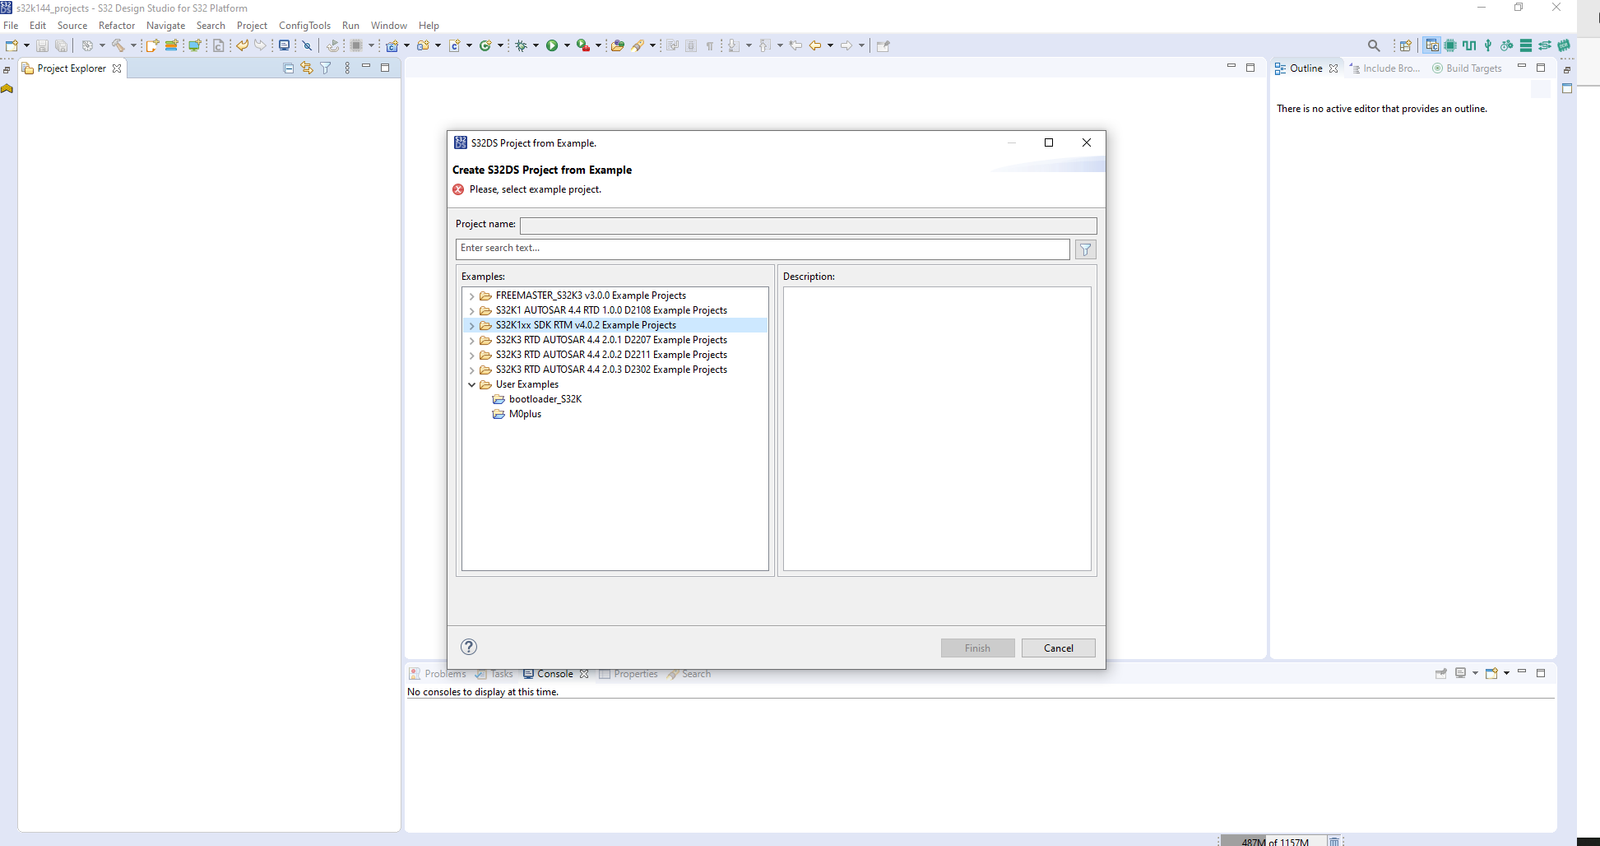
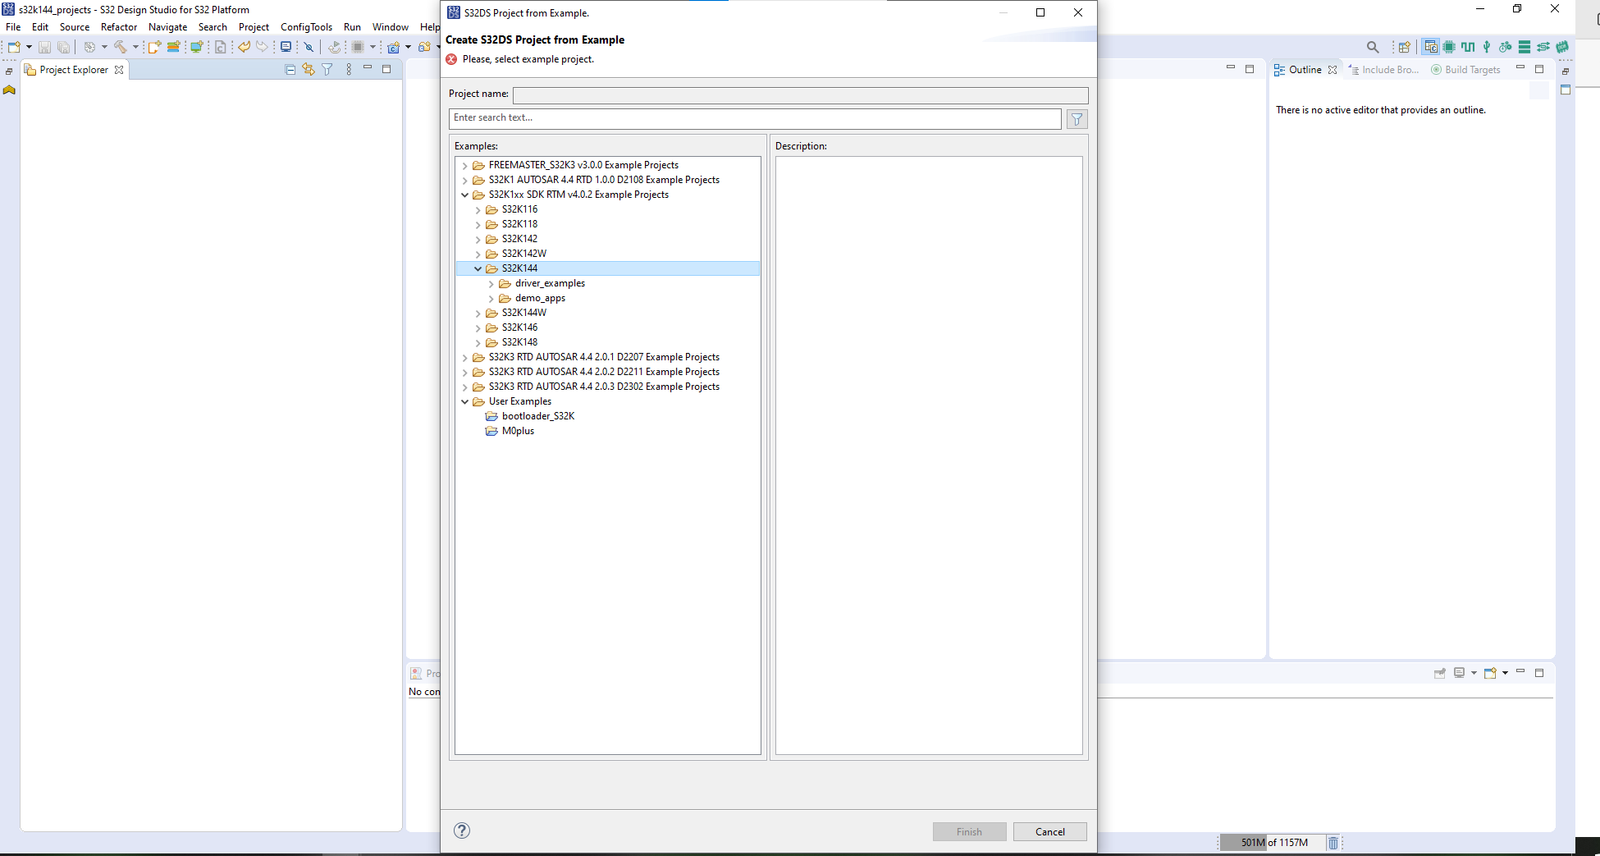
Creating S32DS project from examples Part 3 Now click on the SDK name: S32K1xx SDK RTM v4.0.2 Example Projects and we can see list of demo codes for all the MCU’s of S32K1 family: S32K116, S32K118, S32K142, S32K142W, S32K144, S32K144W, S32K146, S32K148, as shown below. Our ElecronicsV2 development board is made on S32K144 MCU, so we will be exploring demo examples of S32K144 MCU
Creating S32DS project from examples Part 4 Now Demo Examples are also further divided into 2 categories: Driver Examples and Demo Apps. Driver Examples: demonstrate basic example to use each peripheral of the MCU. Demo Apps: demonstrate basic application codes like blink led, motor control example.
Creating S32DS project from examples Part 5 - I will open the Demo Apps examples of blink led, to demonstrate the Demo Example project. This Project blinks the on board RGB LED which is attached at pin PD15 and PD16 of the S32K144 MCU using ElecronicsV2 Board.
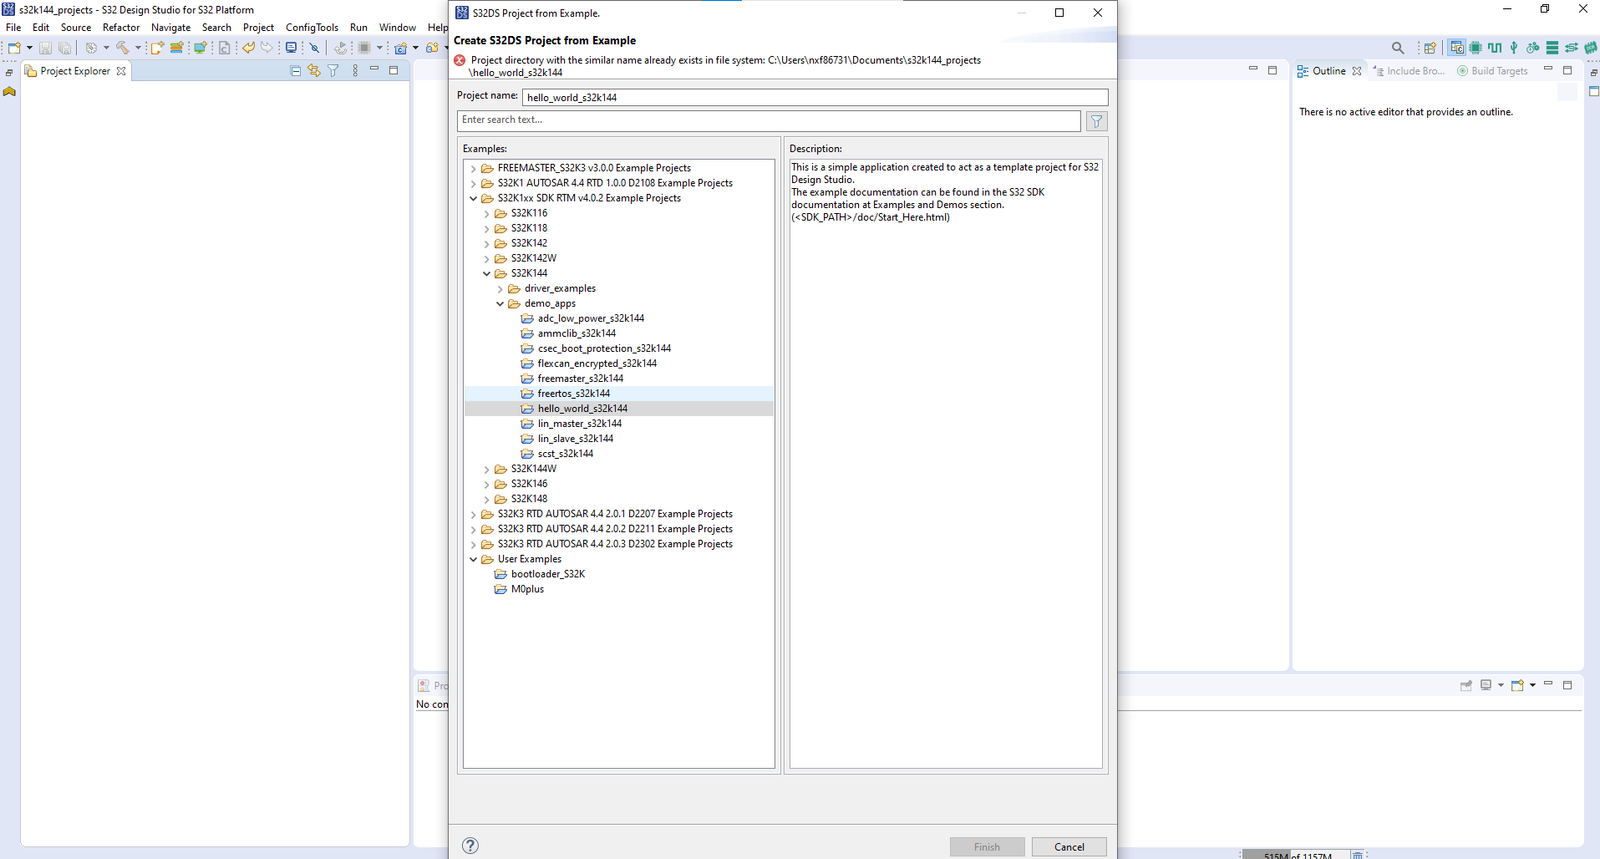
Creating S32DS project from examples Part 6 - After opening the project our window will look like this:
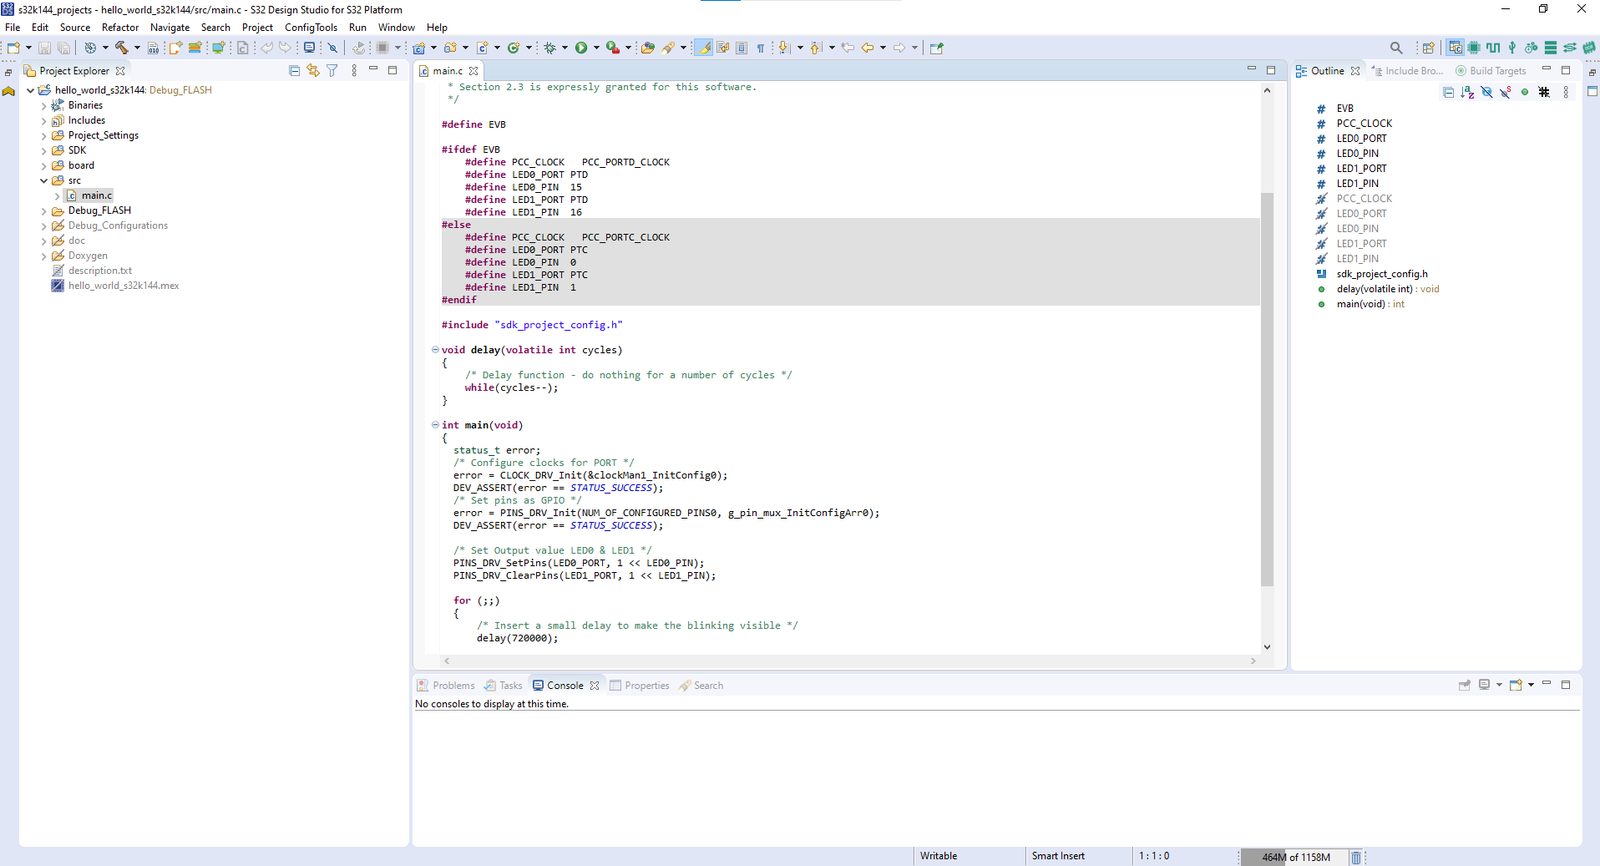
Creating S32DS project from examples Part 7 - Now as we open the project, we will see multiple windows as shown above, for us for initial understanding we will focus on only 2 windows. The one in left is Project Explorer: where we can see our Demo_App Project folder structure and all (.c,.h) files of our project. And in the center is the Code Editor, where you can see main.c. We can double click on any .c/.h file from the project explorer window and that file will open up in code editor. Now we can edit/modify/understand our project files directly from here.
Creating S32DS project from examples Part 8 - This feature in S32DS makes it very easy and convenient for developers to understand and develop the software by navigating to different project files. This feature is not there in Arduino IDE environment and it’s very hard to understand the Demo example project files and code over their.
- One can explore different examples in the list of demo example at step 5 & 6 to get hands on with S32K144 MCU peripherals and features easily using ElecronicsV2 Board.
Making Project from Scratch
This is the step, in which we can make a Project in S32DS from scratch. From the scratch i mean without any
Opening already developed code.
This step i guess would not be used by most of the beginners, but those who have some Project code of S32DS and wanna open it in S32DS 3.4. They can open it by below steps:
- Go to file–>Opening project from file system: 
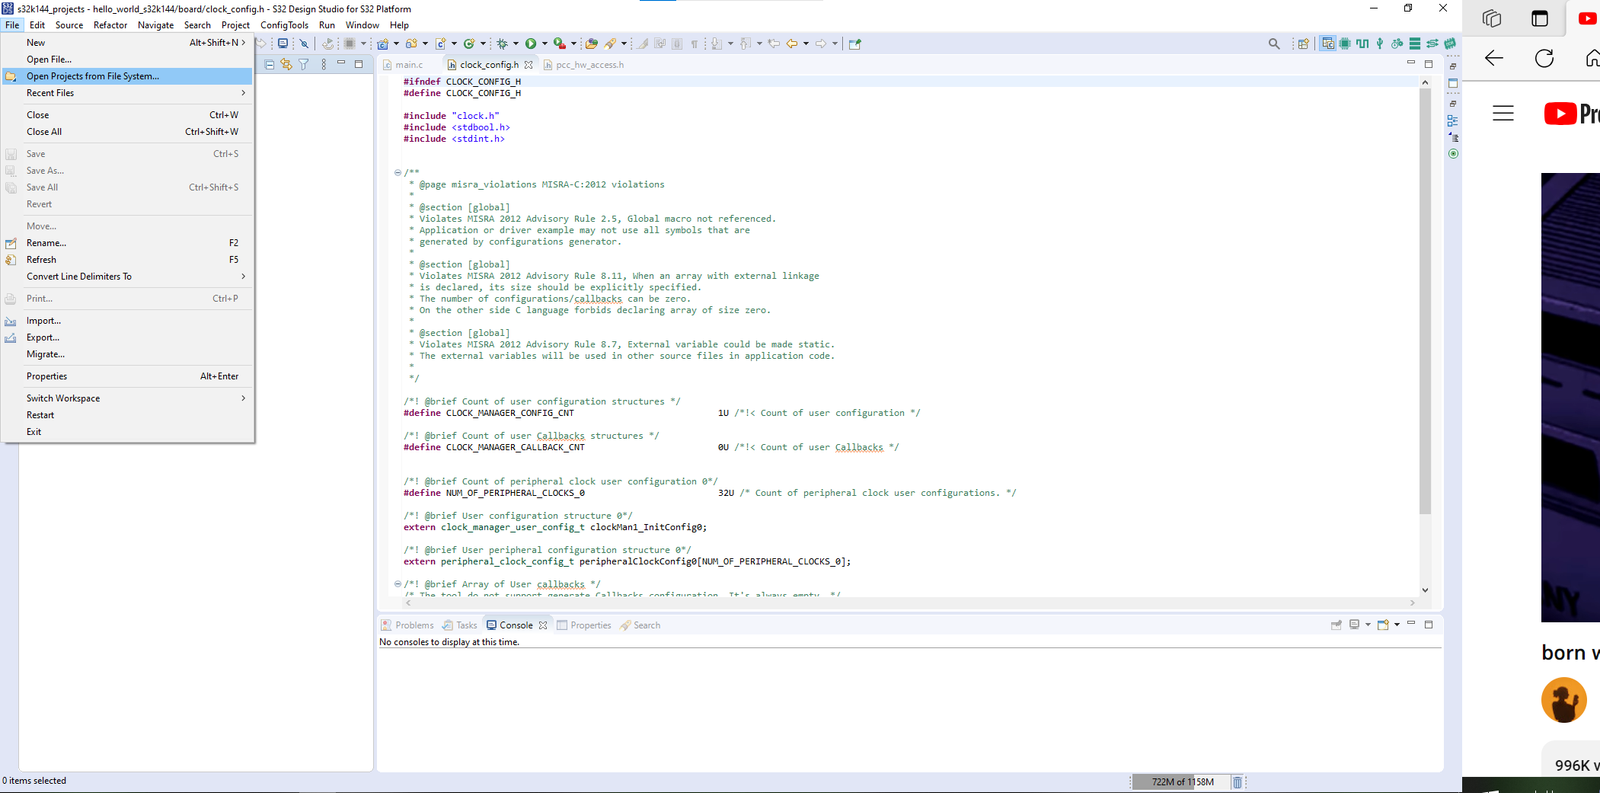
Opening already S32DS project Part 1 - After that the pop-up which comes up, in that click on directory:
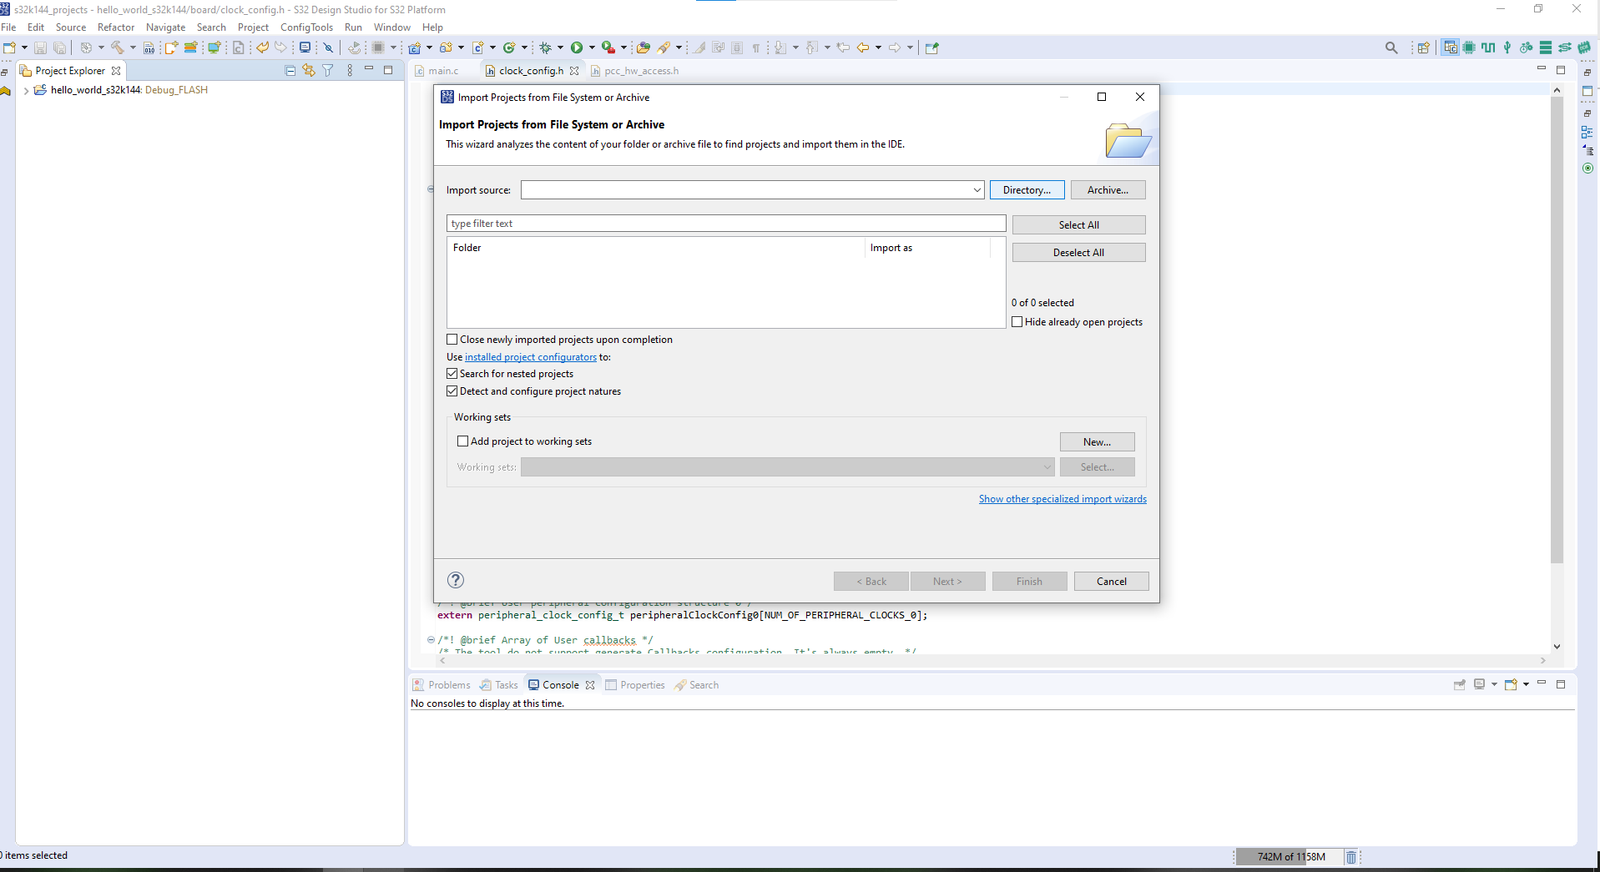
Opening already S32DS project Part 2 - Now navigate to the project folder that you wanna open, like i am goanna open the RFID Project here, which i have already developed and click on select folder:
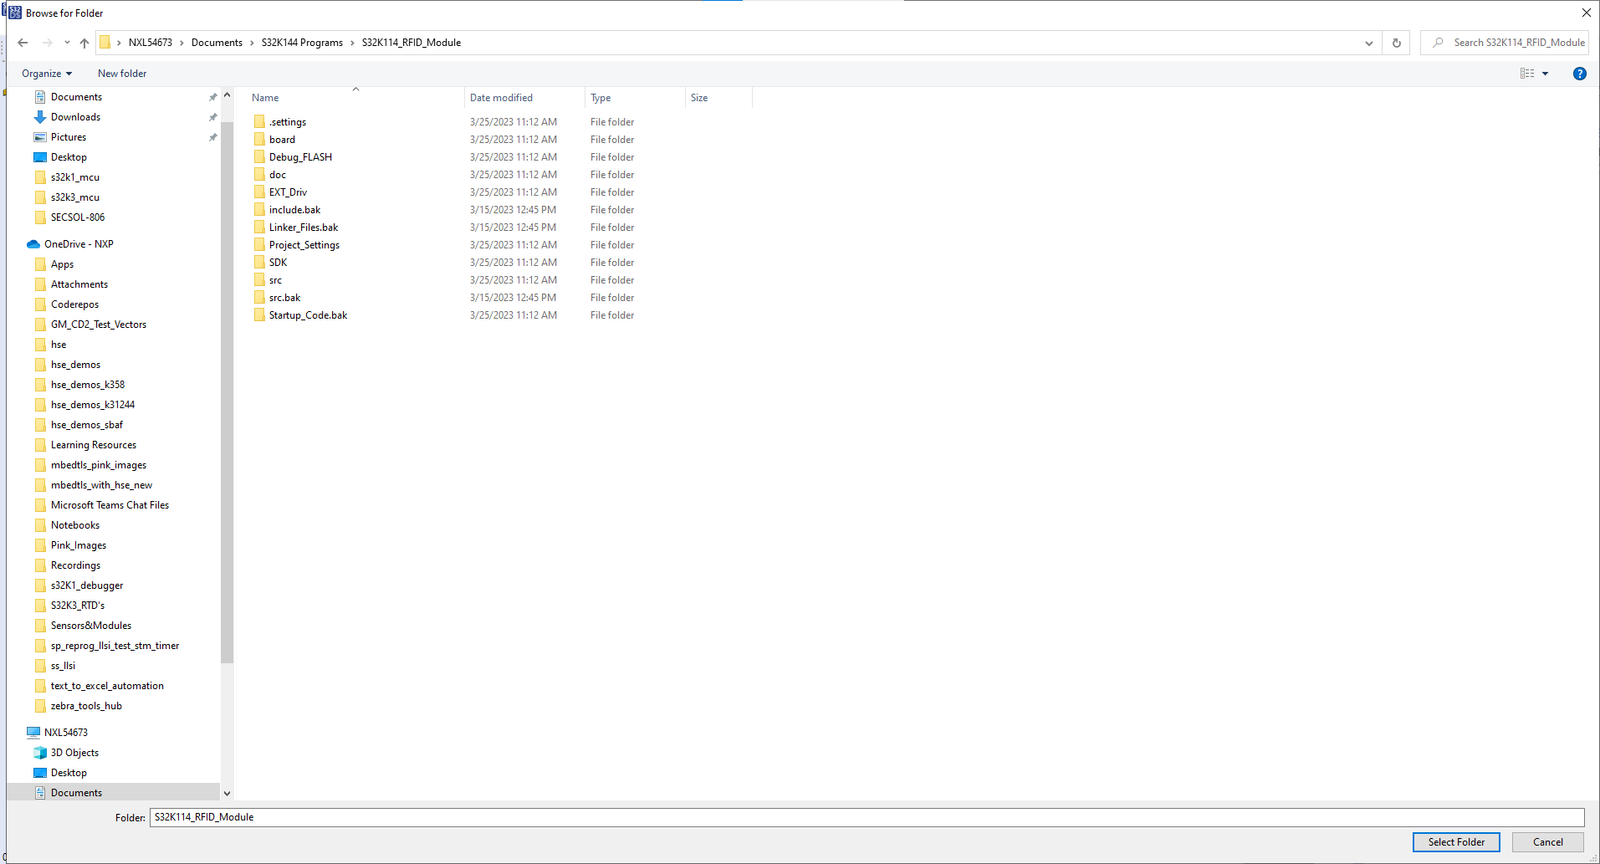
Opening already S32DS project Part 3 - Now you will see project folder, will be opened and select the project in the folder window. After that click on finish:

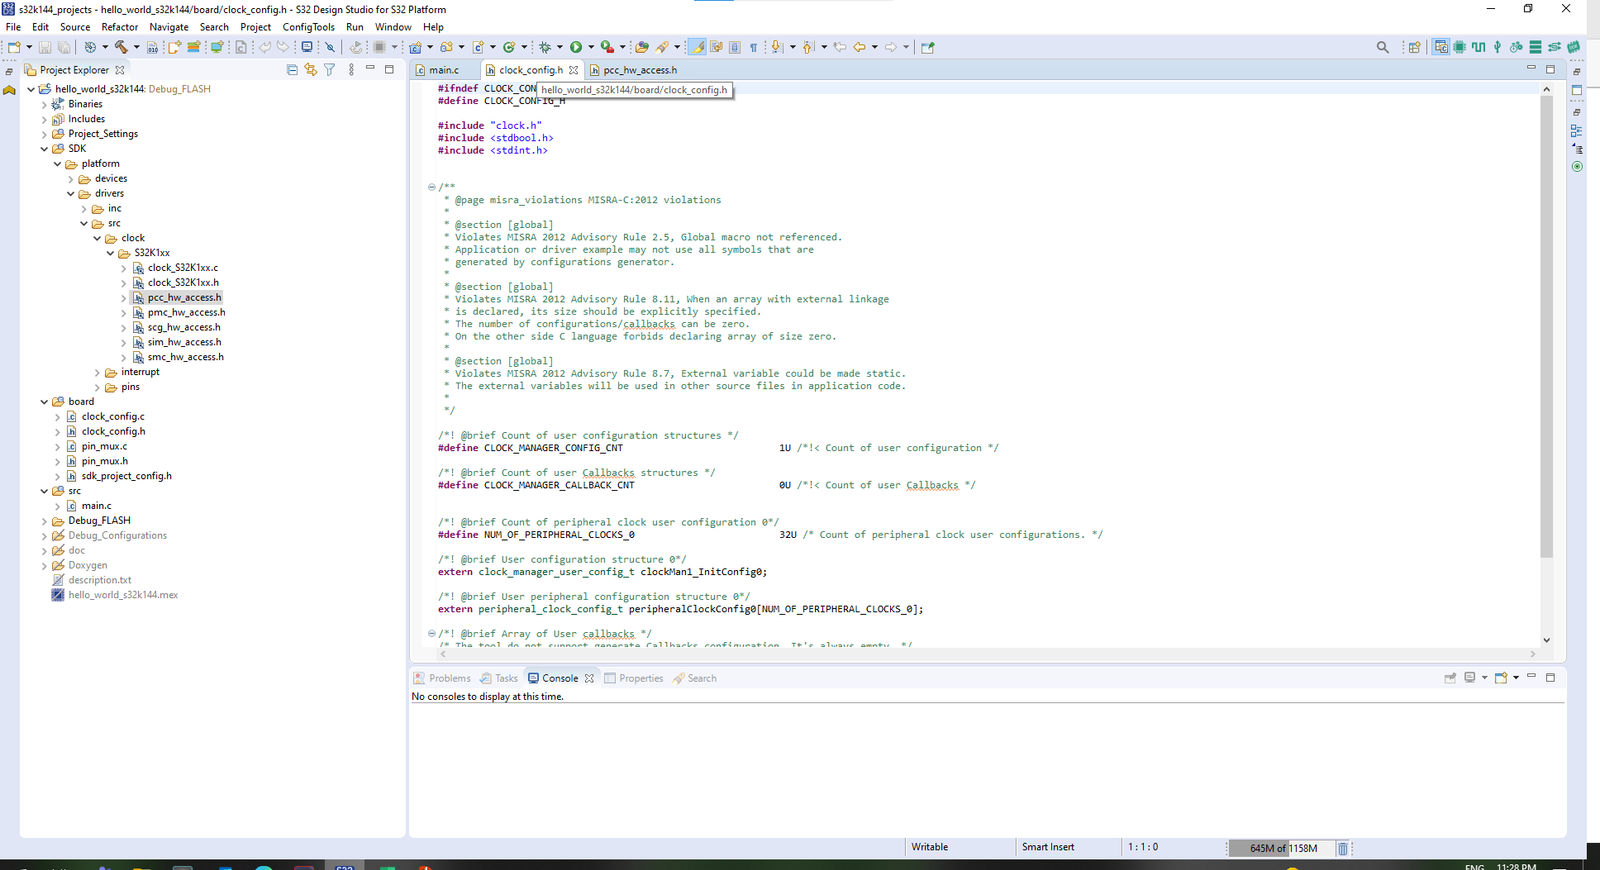
Opening already S32DS project Part 4 - Now you will see your project will be opned in S32DS3.4. Project explorer showing all the project files and folder.
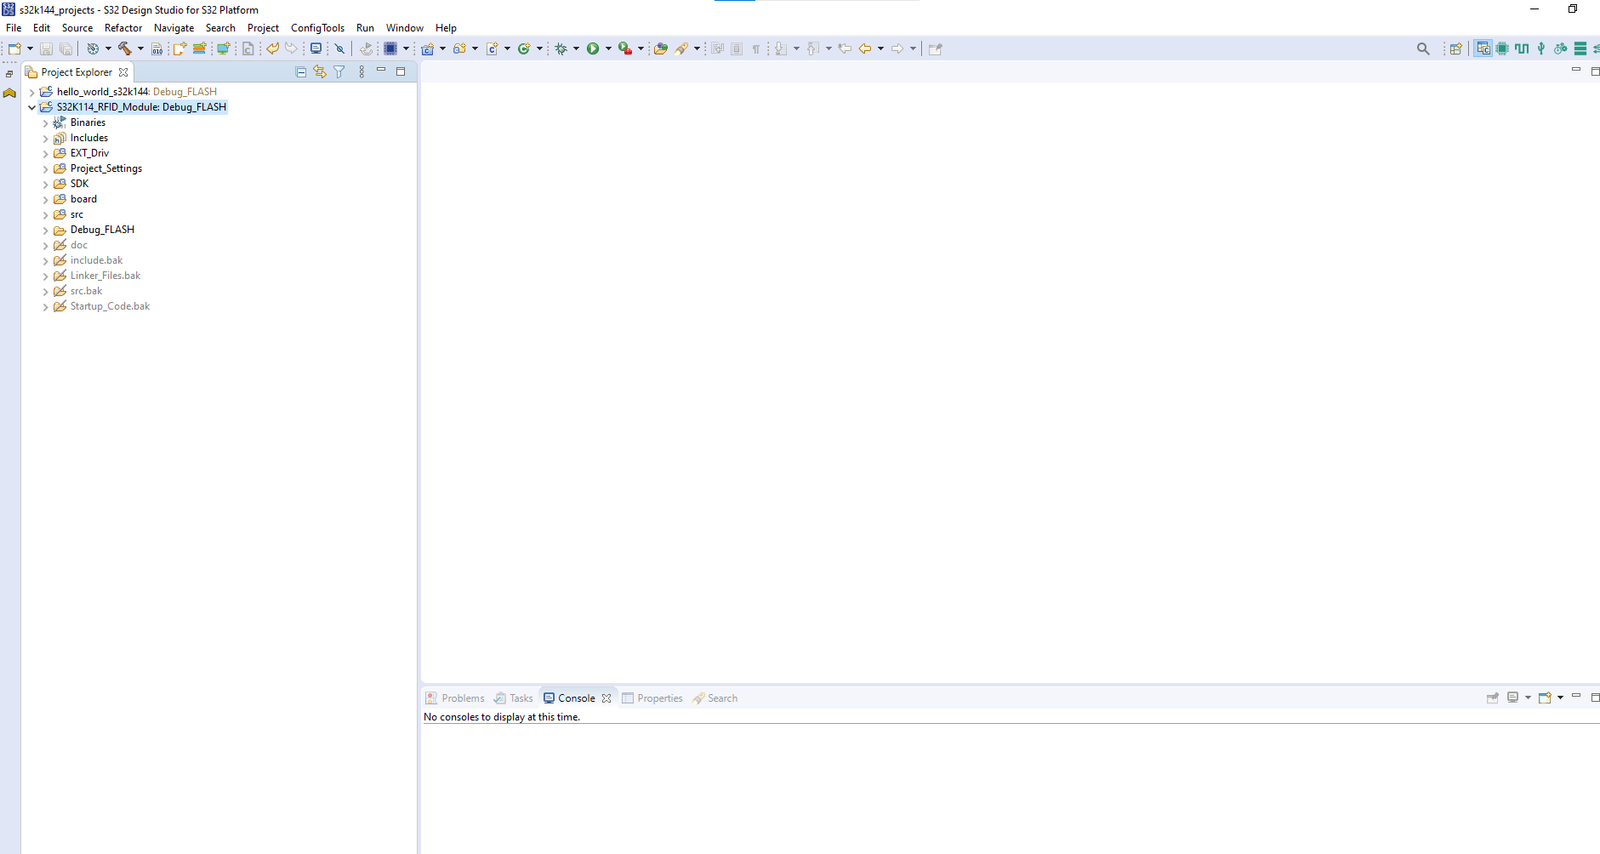
Opening already S32DS project Part 5 - And that’s how you can open your already developed project based on S32DS. If your project doesn’t open by this way, write down your issues in below comment section or in the forum page of Gettobyte.