So, hello guys, welcome to Gettobyte website. This blog is part of the Microcontroller coding series on NXP Semiconductors S32K144 MCU. Objective of this series is to learn Microcontroller technology by getting knowledge on how to do microcontroller coding. And for doing so we would be proceeding with NXP Semiconductors S32K144 Microcontroller. To know about this Microcontroller and reasons for selecting this MCU, it would be nice to have a look onto this blog.
In the previous blog we had Started with S32 Design Studio, installed the IDE and installed S32K1 SDK and Development package.
S32Design Studio Part 1
Objective of this Blog
Now in This blog we are going to explore the Code Configuration Tool of S32 Design Studio and see how to use it.
Code configuration/Generation: About S32 CDT and how to use it.
About Code Configuration Tool
In S32 Design Studio there is code configuration tool for S32 controllers, by the name of S32 Configuration Tools.
S32 Configuration Tool is a set of tools that helps one do initial configuration and evaluation of the Embedded Software for the corresponding S32 Microcontroller without actually writing any code and just by playing on the GUI of tools we can do all basic development.
S32 Configuration tools
So, for doing so we need to have some basic familiarity with the corresponding Microcontroller and its peripherals.
In our case we are using S32K144 MCU, so to get knowledge of MCU best place is from its reference manual and user guide. But i guess most of the people find it very tiering and boring to read docs, so in subsequent blogs of S32K144 MCU. I have explained about each peripheral of MCU, in detail also. You can refer some blogs from here:
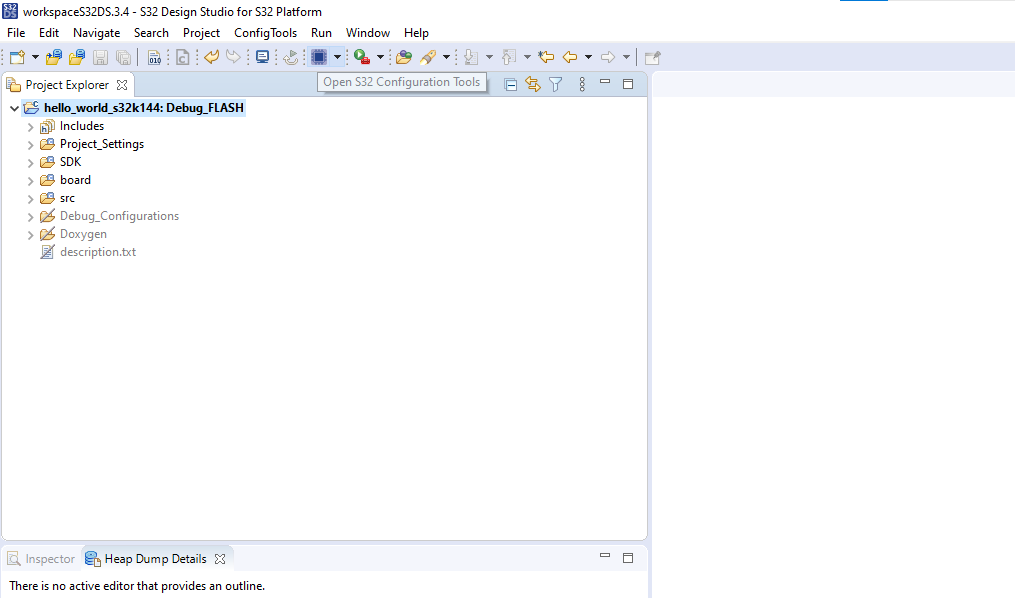
Once you have opened some Project of the Corresponding MCU on the Project Explorer Window of the S32 Design Studio, then you can see an icon like this above it:
S32 Code Configuration Tool Icon in S32 Design Studio
Step 2
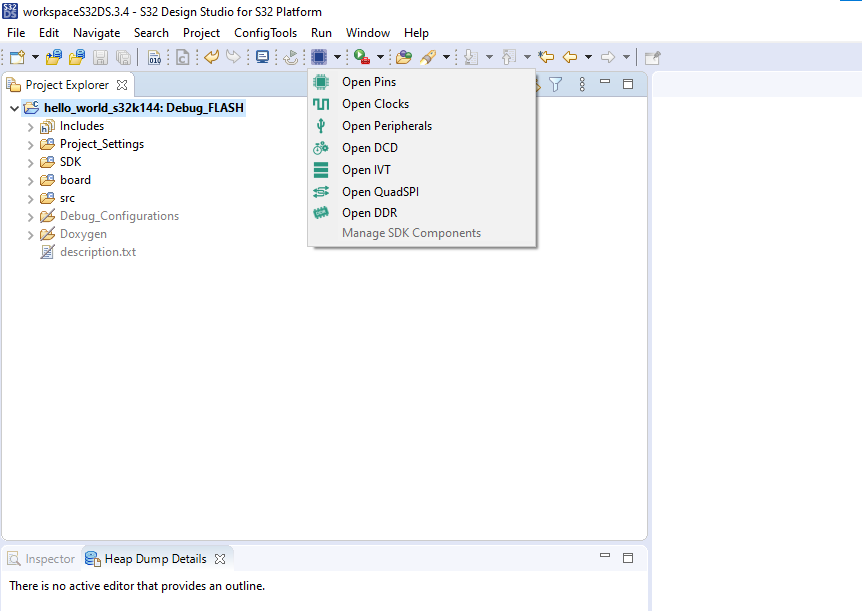
Clicking on the small blue rectangular icon, we will be able to open the S32 Code Configuration Tools. Also, alongside the blue icon, you can see there is a drop-down, clicking on it will show you the menu of Code Configuration Tool.
S32 Code Configuration Tool Menu Option in S32 Design Studio
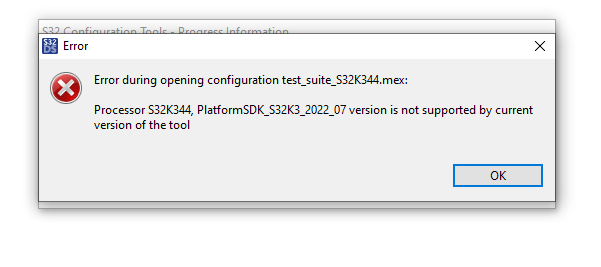
If you see window like this when clicking on blue icon:
S32 CCT tool cant open
Then just check if you have properly installed the SDK files and development package of the corresponding MCU.
Now let’s move ahead with First option, as that will open Home/Default view of the S32 CCT, as shown below:
Home View of S32 Code Configuration Tool
So that’s how you open S32 Code Configuration Tool for corresponding MCU in S32 Design Studio
Understanding S32 Code Configuration Tool Icons
Icon 1
Icon 2
Icon 1
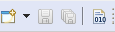
The first 4 icons from the left, are basic icons. As you hover from them, you will what they do. Create new project, Save, Save All and build all.
Icon 2
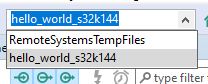
Next Icon is for selecting the project. Project which you have opened in Project Explorer can be selected from their and corresponding to the S32 MCU which is used in the project, CDT tool will show things.
Selecting Project in S32 Config tool
Now as we open the S32 Code Configuration Tool, there are many icons and windows we can see on the window. It might be confusing or overwhelming at first but don’t worry, we will go step by step.
S32 CCT Menu bar
Let’s first understand, the menu bar of the S32 CDT tool.
The first 4 icons from the left, are basic icons. As you hover from them, you will what they do. Create new project, Save, Save All and build all.
Next Icon is for selecting the project. Project which you have opened in Project Explorer can be selected from their and corresponding to the S32 MCU which is used in the project, CDT tool will show things.Selecting Project in S32 Config tool.
Next icon is S32 Config Tools, clicking on it will open the window in which it shows ALL the config tools which can be used for the project that you have selected in last step.
S32 CCT Config tool overviewOne can see in bottom left of this image, it is written some tools are there for the selected project, that because selected project is using S32K144 MCU and S32K144 MCU don’t have QSPI peripheral, IVT features. There are number of tools in S32 CCT, but depending on MCU of the project avaiblity of tools can vary. As tools are dependent on the S32 MCU, if corresponding MCU don’t have some features, so tool corresponding to that feature would also not be there. So, in S32K144 broadly there would Pins, clock and peripheral Config tools would be used. Clicking on these tools, from here will open that corresponding tool. Also in last step, you can see details of the project. Like Project path, Which SDK is attached with the Project, which MCU and processor is selected in project and etc.S32 Design Studio Project Overview information from S32 CDT tool
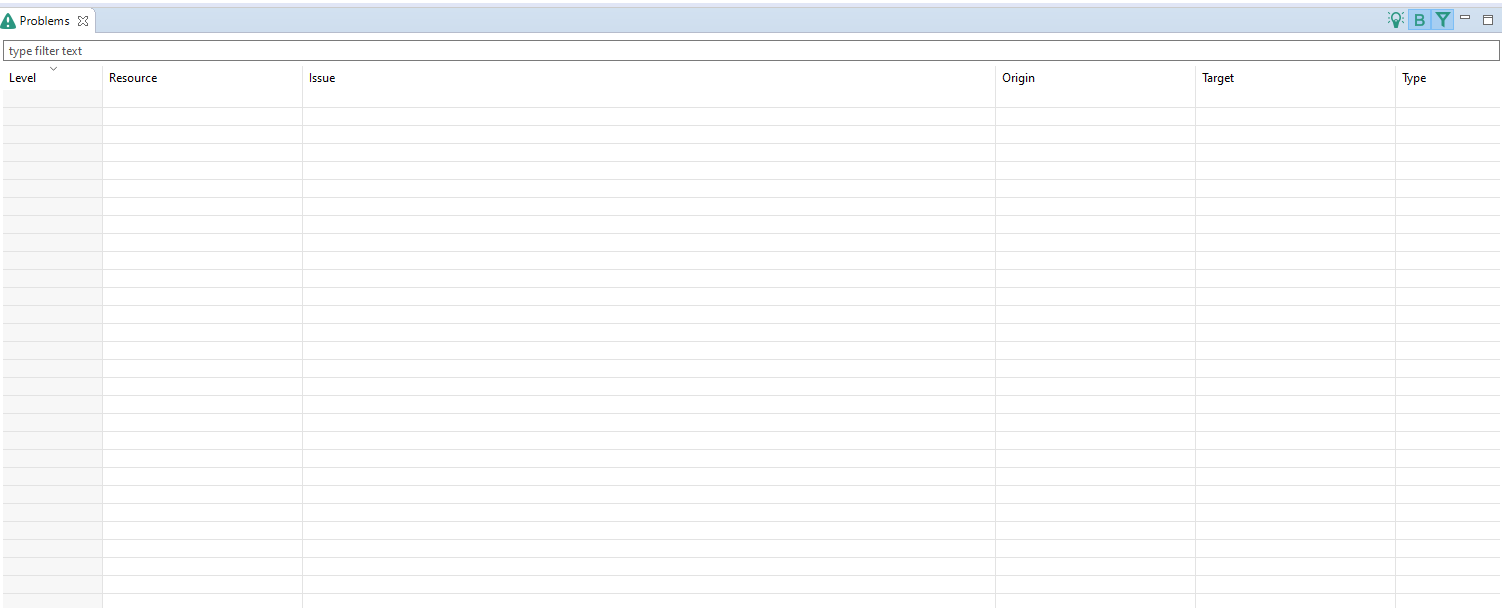
Next icon shows the problems, errors. Clicking on this icon will open the Problem view.Icon for opening Problem viewProblem view on S32 Design StudioIf you are doing some wrong configuration or some packages for some tools are not installed properly. All those things we will get to know from Problem View. This icon and view will be very handy to use when doing peripheral and clock configurations.
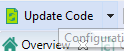
Next icon will update the code, according to the configurations we have done using S32 Configuration tools, as told in step 3.S32 CCT update code
Clicking on this icon will open the window in which one can see all the files which will be changed.
file change’s view after updating the code.
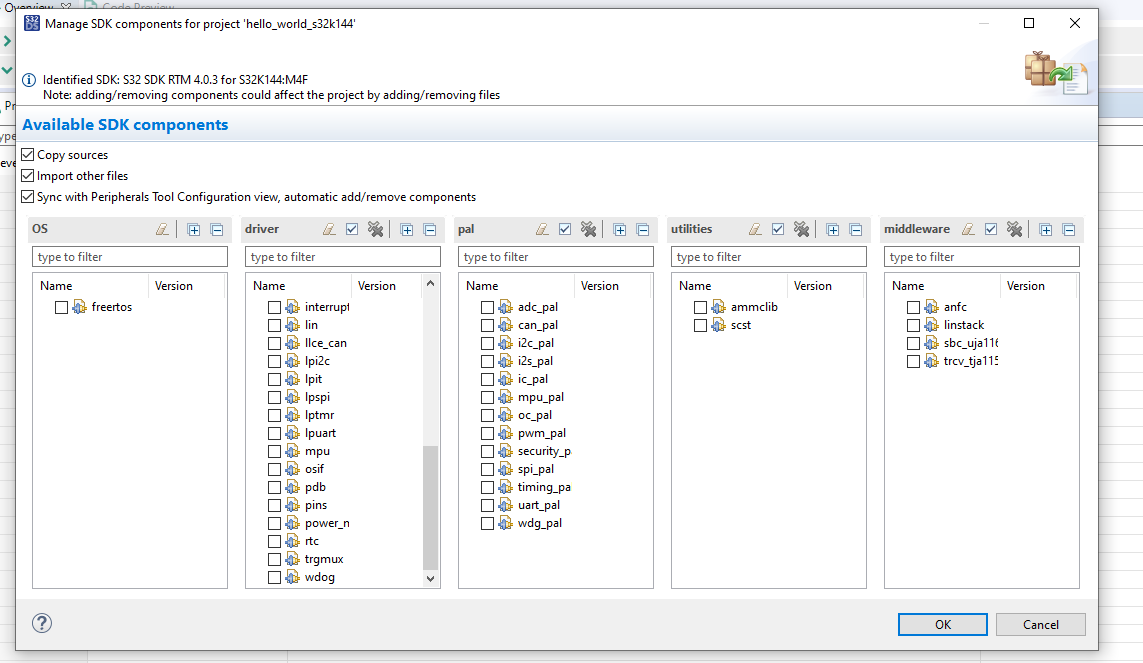
Next Icon is there for managing the modules in the SDK of the project.SDK Configuration in Project
From here you can manage which modules of the SDK you want to use and can enable/disable them.
SDK modules configuration in S32 DS Project
Above told icons are the ones which we are going to use mostly. Rest icons on menu bar, one can explore on their own and if any Douts or issues. Mention your queries over here: Forum – gettobyte
Understanding S32 Code Configuration Tool's
Now coming to tool’s present in S32 Code Configuration. Broadly there are 7 tools in it,
Pins Tool
Clocks Tool
Peripheral Tool
IVT Tool
DCD Tool
QuadSPI Tool
DDR Tool
Each tool is used to configure the corresponding MCU features according to our application and need. Out of these 7 tools, first 3 tools would be there in every S32 MCU. As Eveny MCU will be having pins, clock and peripherals. Rest 4 tool’s depending upon the S32 MCU would vary. Like S32K144 MCU don’t have any QUADSPI peripheral or DDR memory, so both of these tools would not be present in our case.
Now let’s dive into each tool, to get better understanding and clarity.
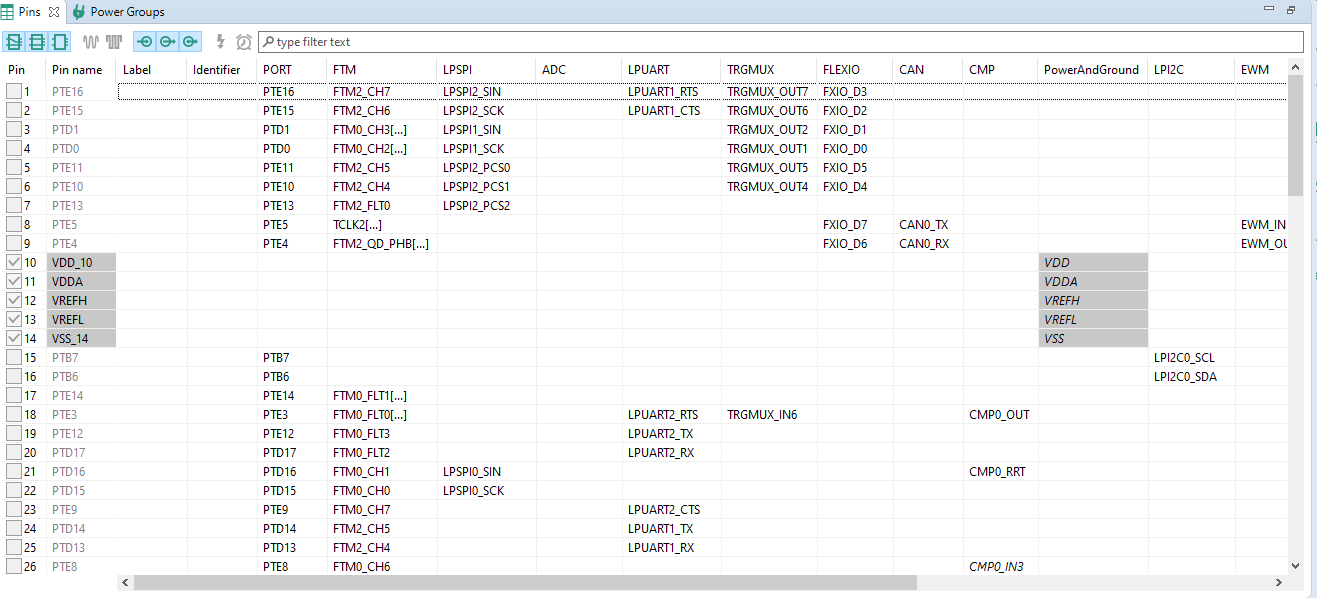
Pins Tool: is used to configure the MCU pins. The pins tool helps create, inspect, change, and modify any element of pin configuration and device muxing. To use the pins tool, one can divide it into 3 views.
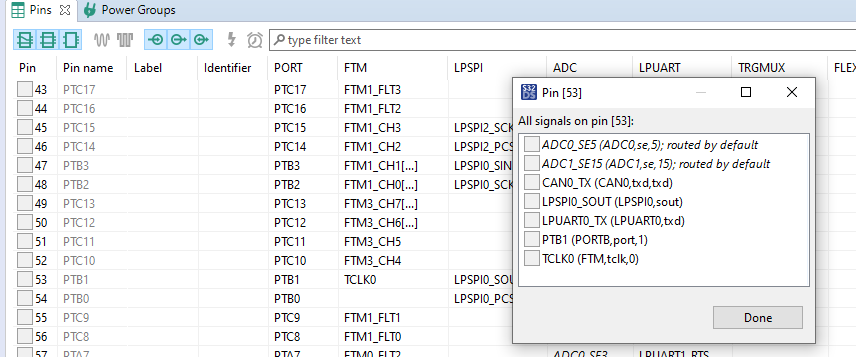
a) Pins: As you can see in below pic, in this all the pins name of the Corresponding MCU are listed and what all functions that pin can configured to. Clicking on the Pin Name, open the pop-up window in which we can select which function we want to use for that pin.
Pins View in S32 Design studio

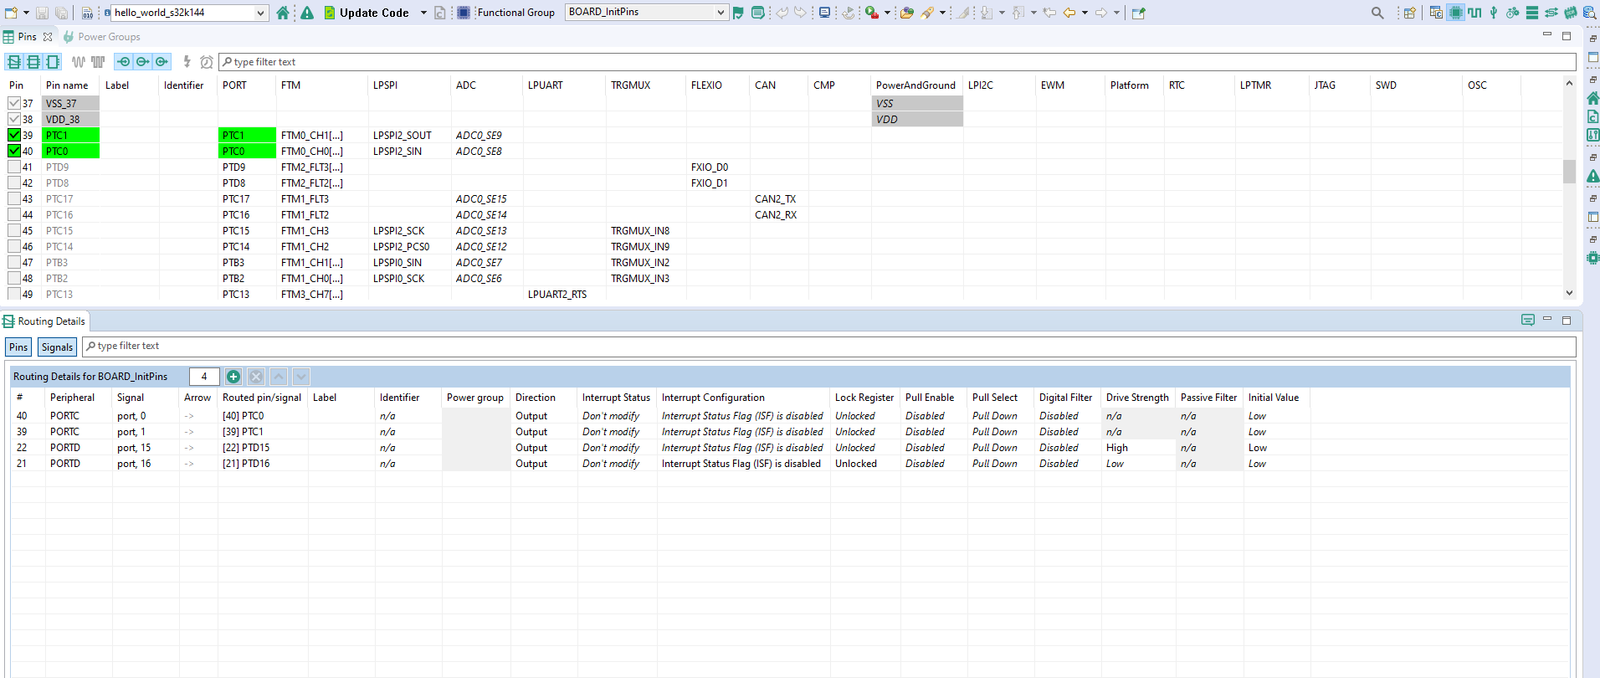
b) Routing Details: In this view, we can see summary of all the pins that we have selected in step A. Also, we can do additional configuration like Interrupt configuration’s, Lock register configuration, Pull-up/down resistor configuration. We can also give custom names to pins under identifier column.
Routing details view in S32 Design studio.
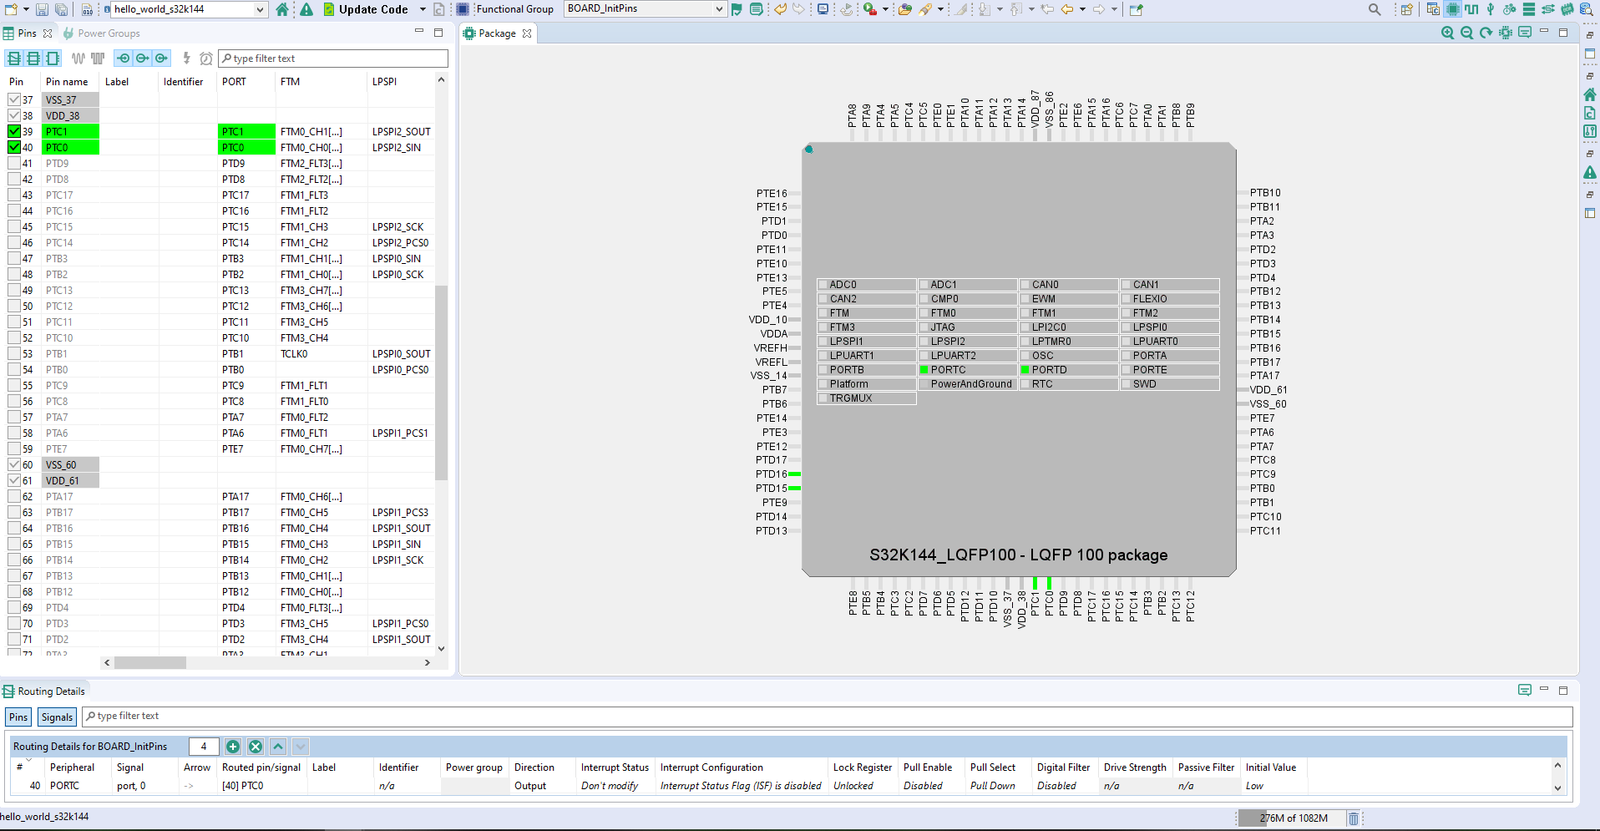
c) Package: This view is used to see all the pins of the MCU. The pins and ports that we had configured in step a & b, are also highlighted.
Clock Tool: This tool is used to configure the clock of our S32 Microcontroller. So as to use this tool, one should know about the clock module of corresponding S32 Microcontroller. In our case, we would be using S32K144 MCU, so one can get to know about its clock module from its reference manual or readers can read this blog on Clock peripheral in S32K144 MCU.
To use clock tool, we can divide it into 4 views:
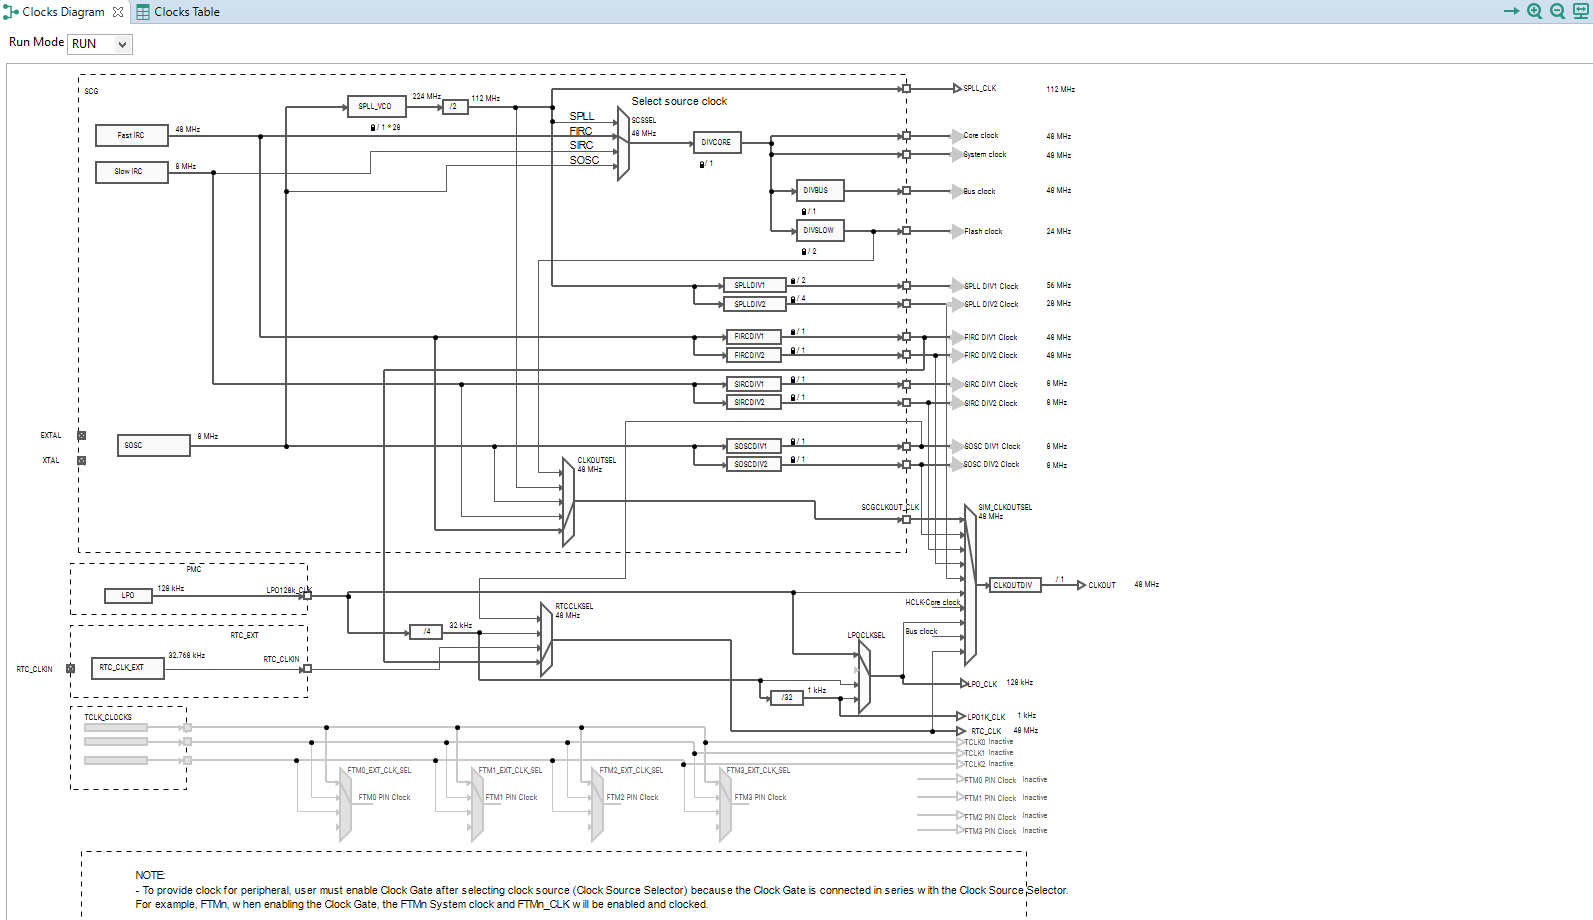
a) Clock Diagram: This is the main clock view, where we configure the system clock and peripheral clock. We can see the clock diagram of our corresponding MCU from this view. To configure the clock, double click on the nodes and boxes where numbers are written, select the routing lines to select clock sources and then select configurations according to your need. In below pic, clock diagram of S32K144 MCU is shown.
Clock Diagram View in S32 Design studio
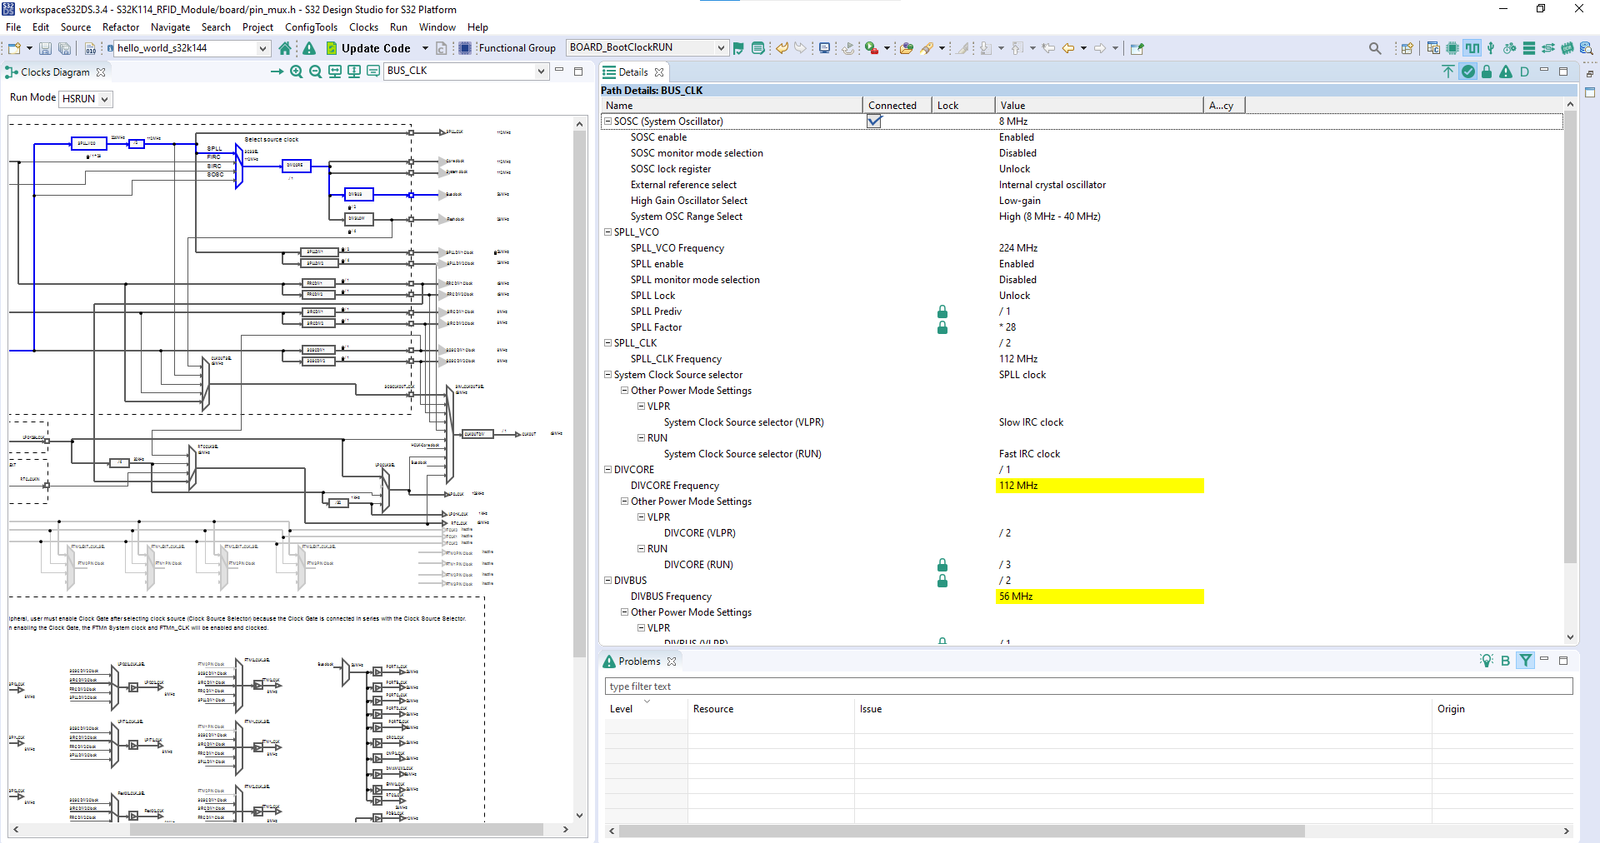
b) Details View: In this view, we can configure the clock buses, clock sources ,clock prescaler and dividers. Select the clock from Clock diagram and corresponding options to select the prescaler and divider would be opened in Details view.
Clock Details view in S32 Design studio
c) Registers View: In this view we can get information of hardware registers that are getting configured and modified as we do clock configuration in step A & B.
Register’s view in S32 Design studio
d) Clock Table: In this view we can get summary of what clock frequency we have done in Step A. The table is divided in terms of Clock Sources and Clock Outputs.
Clock Diagram View in S32 Design studio
Under clock sources we can see what frequency we have done for the different clock sources present in the corresponding MCU and underclock outputs we can see the value of the different clock outputs and from which clock source selected clock output has been derived.
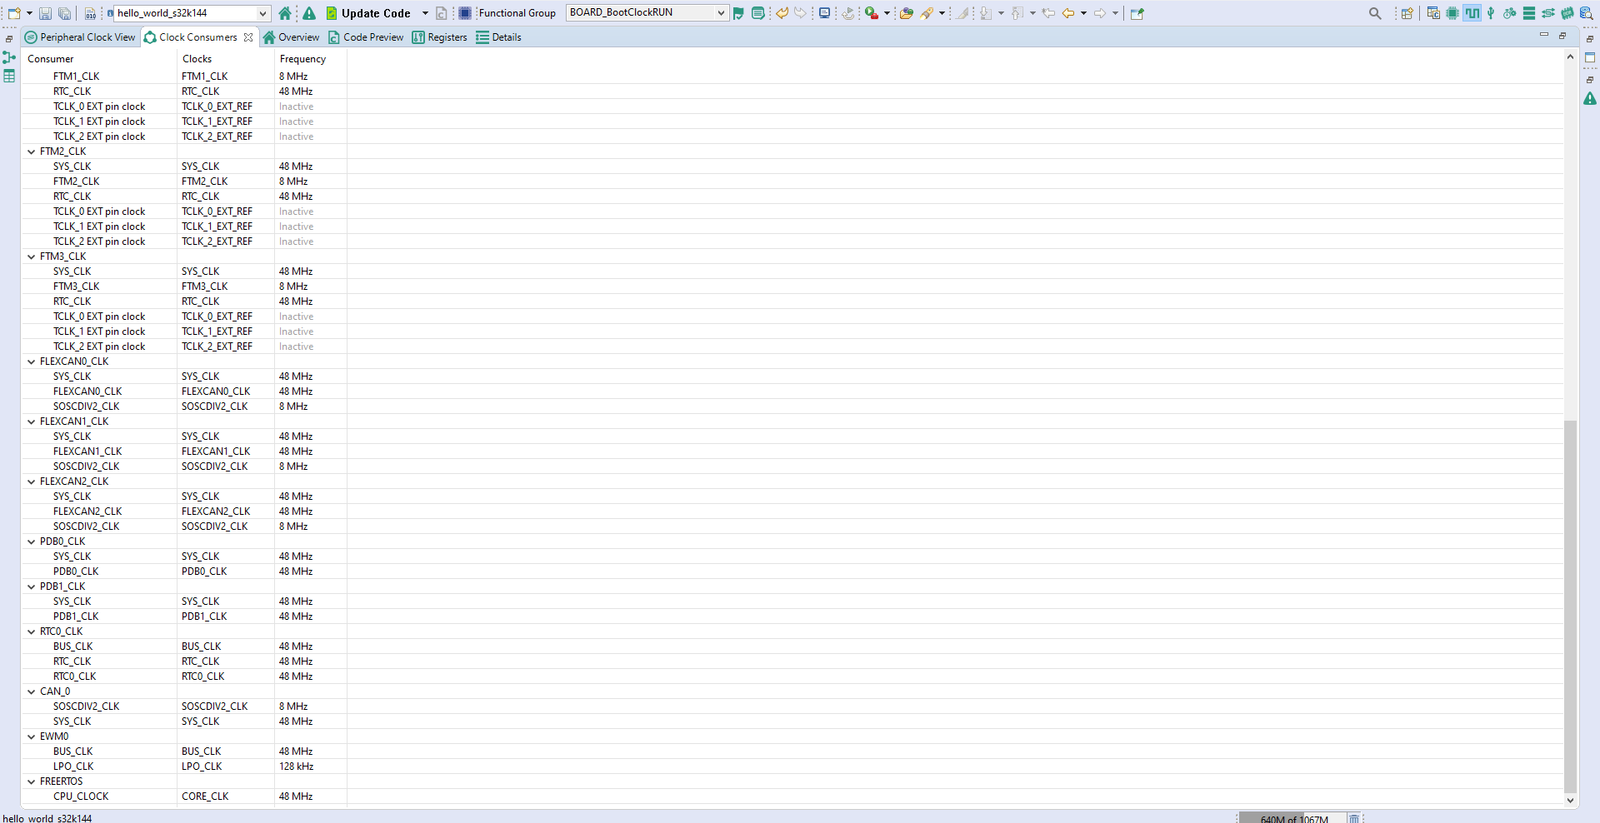
e) Clock Consumers: In this view, we get information from which clock busses peripheral clock is being configured to derive according to configuration we have done in step A. The ClockConsumers view provides an overview of peripheral clocks. As peripherals are the consumers of the system clock, thus its name is clock consumers. This view is not editable and is for information only.
Clock Consumers in S32 Design Studio
You can see in the above pic, that all peripheral’s clock summary is listed. Not only peripherals but of software stacks like FreeRTOS too.
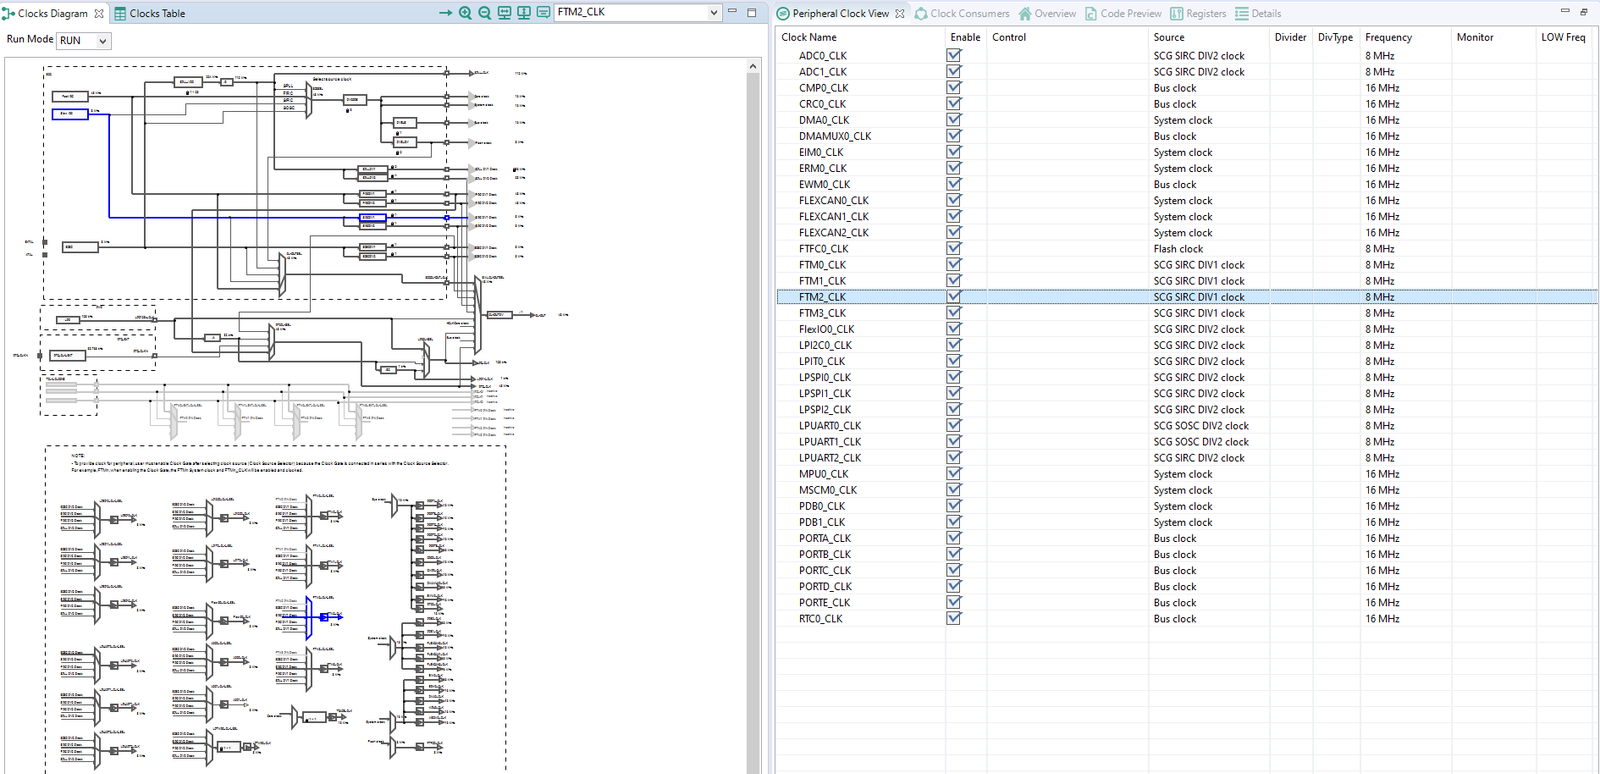
f) Peripheral Clock View: This view is basically a combination of Steps d & e. This view is also not editable, and we get information on clock configuration that we have done in Step A. Information of clock frequency and clock busses of peripherals that we have selected in the clock diagram.
Peripheral Tool: This tool is used to configure the peripherals of the corresponding S32 Controllers. So as to configure the peripheral, it’s important to have a basic understanding of the corresponding S32K Microcontroller Peripherals and peripheral working. An depth understanding of how to do peripheral configuration will be done in subsequent blogs. There are 2 views in which this tool can be divided:
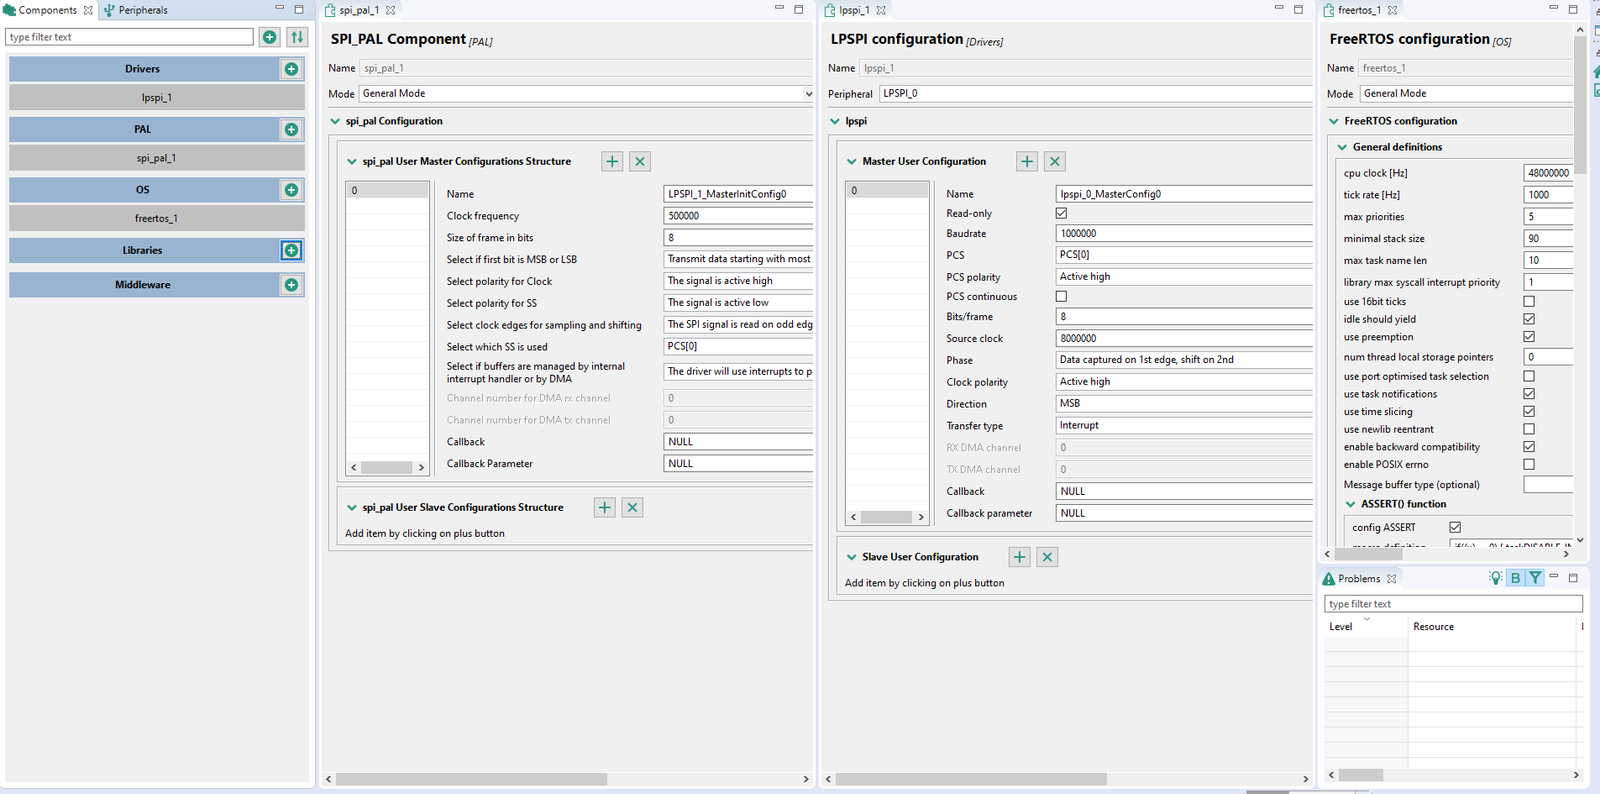
a) Components: This is the main and most important view in the Peripheral Tool. Via the component, we can configure peripheral components. Components like peripheral drivers, peripheral abstraction layer(pal), Operating Systems, External sensor/module libraries, and Middleware software stacks are provided by NXP.
Component View in S32 Design Studio
Clicking on the + sign adjacent to different components, will pop up the window from which we can select which peripheral we want to configure.
Peripheral configuration Component in S32 Design Studio
After this corresponding peripheral windows will open, in which there are various configurations that we can do according to our needs. To understand these configurations, we need to be aware of the peripheral and its basic concepts.
These are some tools, that would be used from time to time in all the above Tools.
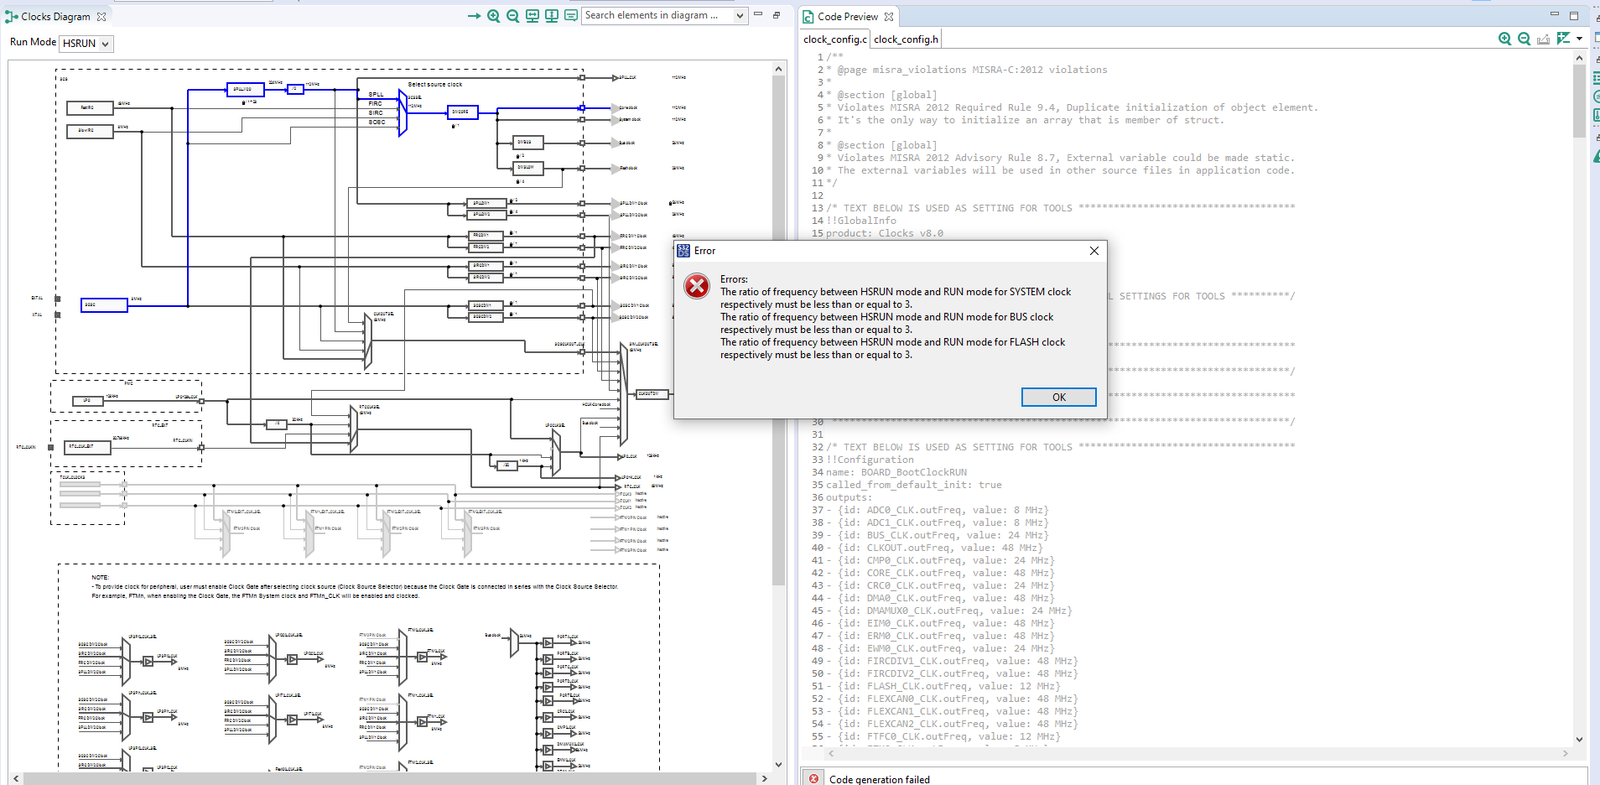
a) Code Preview:
If the settings are correct and no error is reported, the tool’s code generation engine instantly re-generates the source code. The resulting code is found in the CodePreview view.
Code Preview Successfully in S32 Design StudioCode Preview cant be done because of error in configuration in S32 Design studio
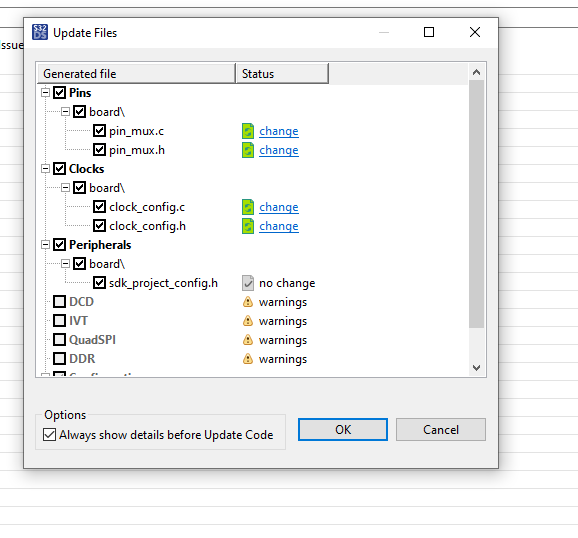
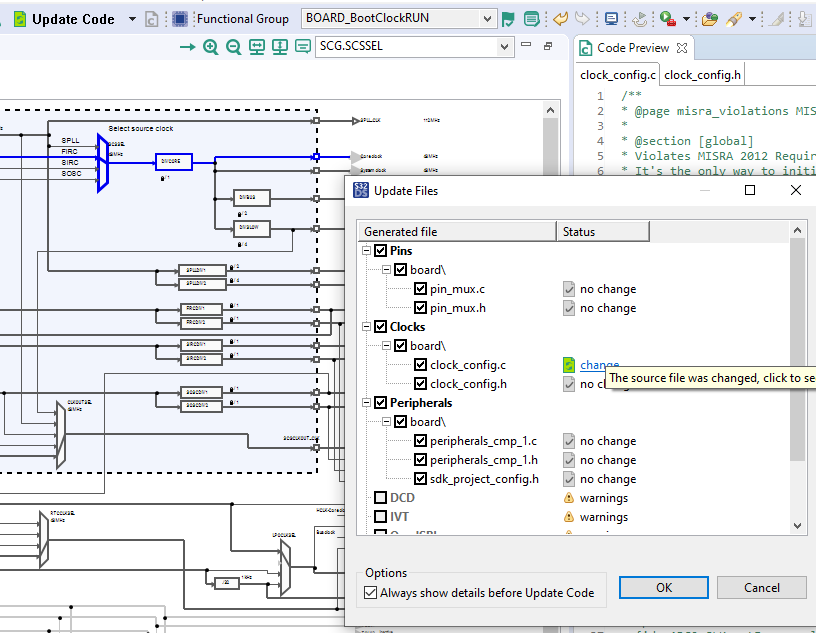
c) Update Code: Clicking on Update the code in Menu bar, window will pop-up showing which all files are newly created or which files would be changed.
Updating the code after doing configuration in S32 CCT
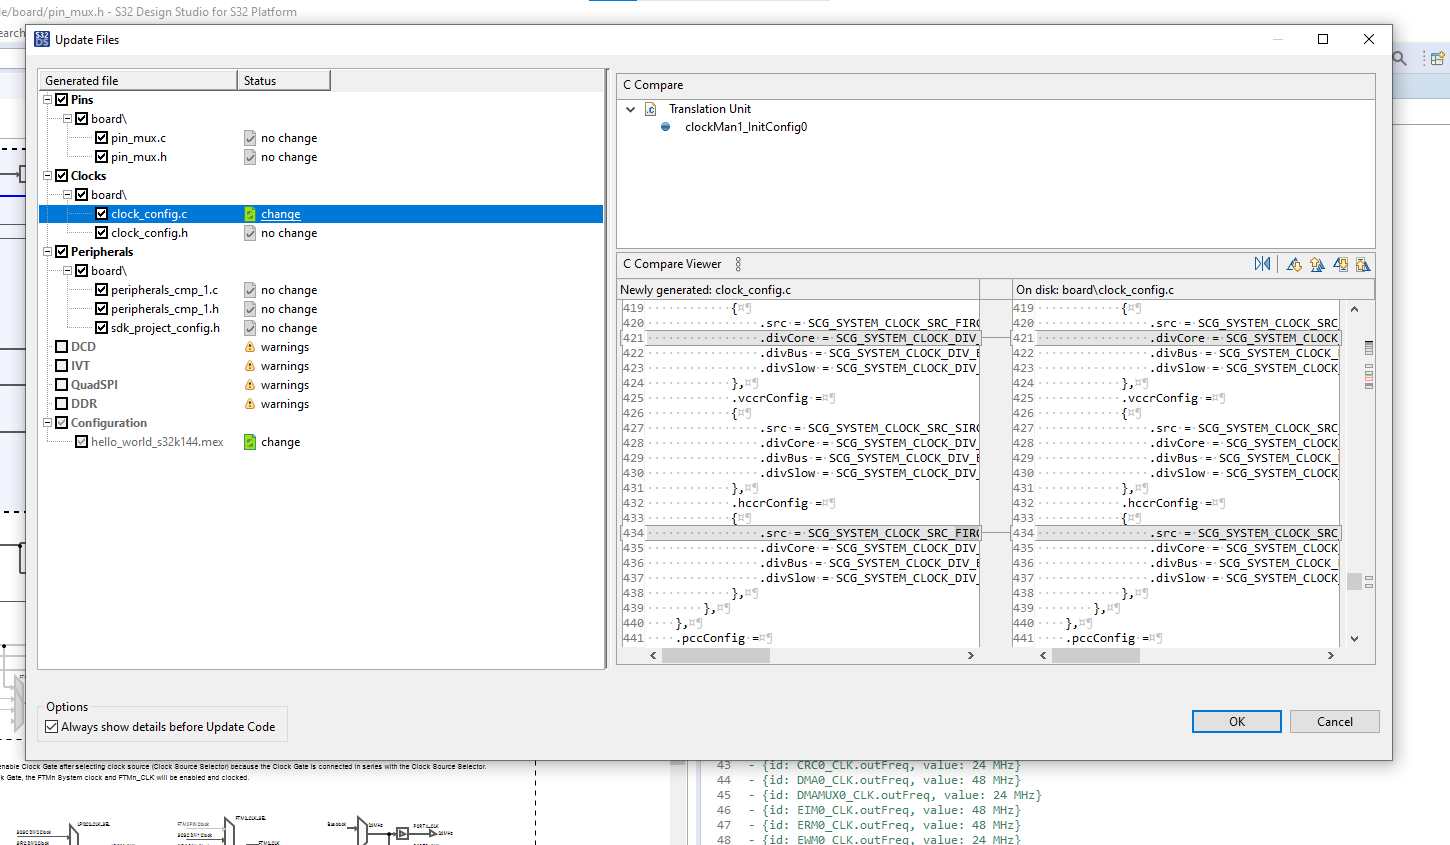
clicking on change, we can see what changes would be done in corresponding file, after code generation.
Changes in S32 Design studio after updating Code
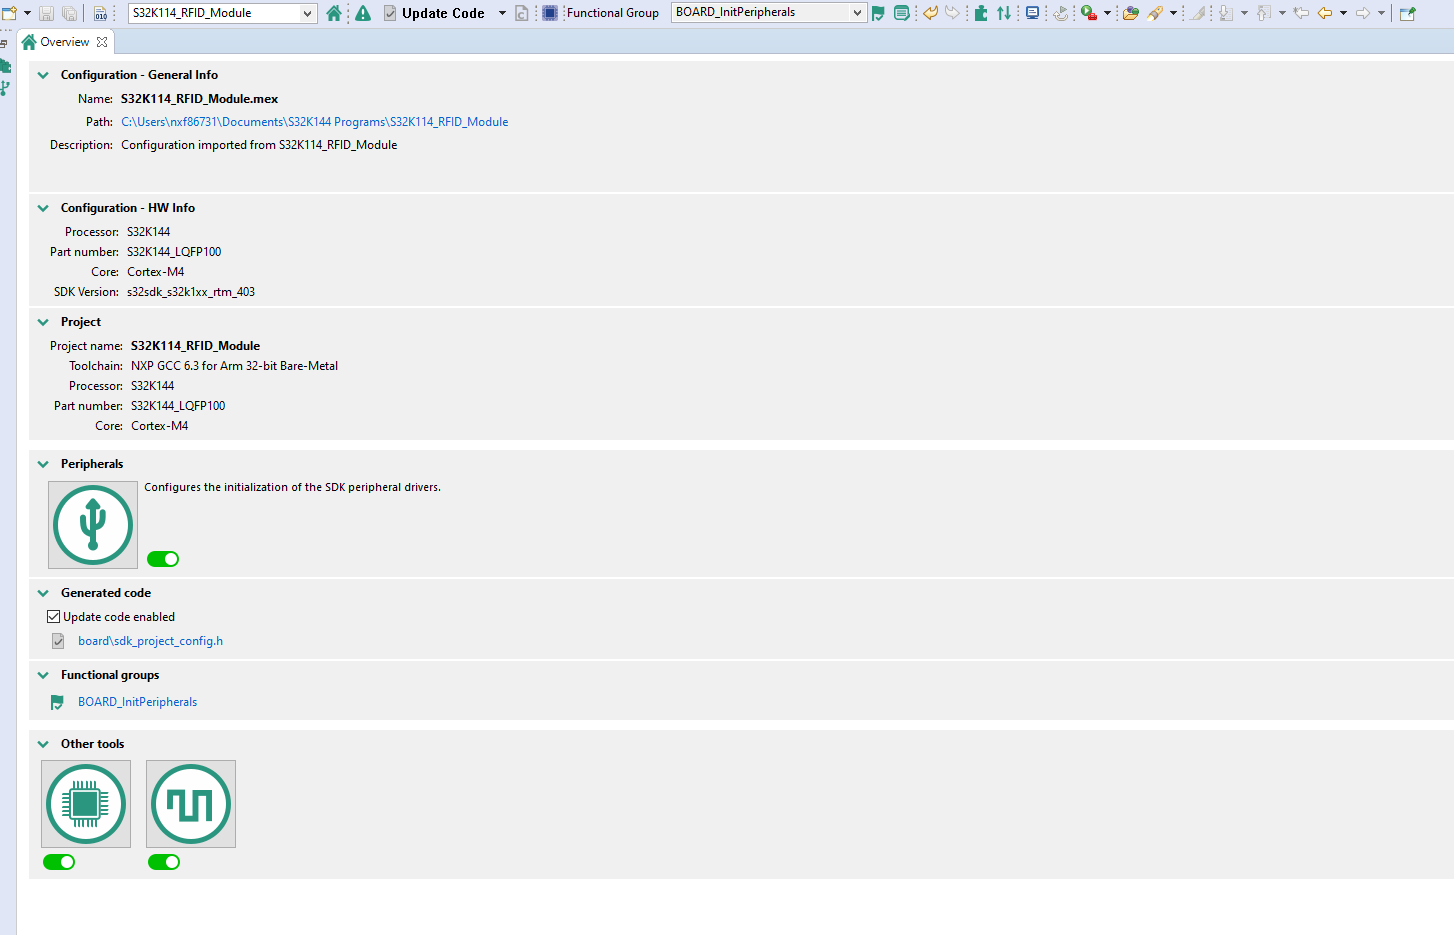
c) Overview: Using Overview View, we can get information about our project. Information like: Project name, project path, Hardware info like Microcontroller core, MCU packaging, MCU SDK attached, Which configuration tools have been used, and which files are generated as of now.
Overview View in S32 Design studio
Conclusion
Lorem ipsum dolor sit amet, consectetur adipiscing elit. Ut elit tellus, luctus nec ullamcorper mattis, pulvinar dapibus leo.