Overview
Welcome to Module Interfacing using AUTOSAR MCAL driver. In this blog, we’ll learn how to operate on-Board LED and control it with variations of different patterns.
What is GPIO ?
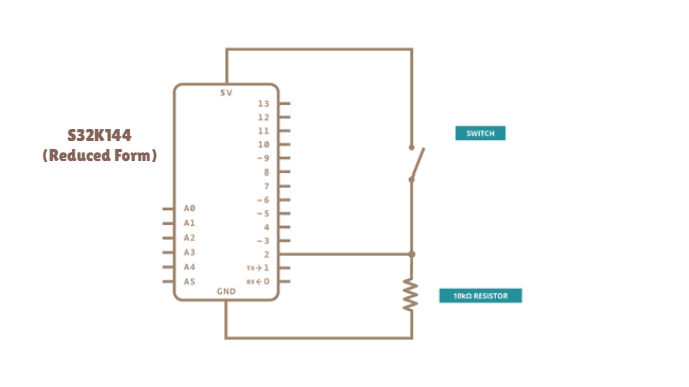
–> GPIO (General Purpose Input/Output) refers to digital pins found on microcontrollers, that can be configured to either input or output. These pins serve as a simple interface for interacting with other components in an embedded system, such as sensors, switches, LEDs, and more. GPIOs support simple digital control, where each pin can be set to high (1) or low (0) states.

Getting Started
We are going to move toward the embedded software understanding of PWM frequency and duty cycle modulation, as per requirement, under the AUTOSAR MCAL standards, according to our DIY project statement. Make sure to follow the steps keenly and if any suggestion is invoked, please submit it on our community forum.
Step 1: Cloning the Repo from our GettoByte Github
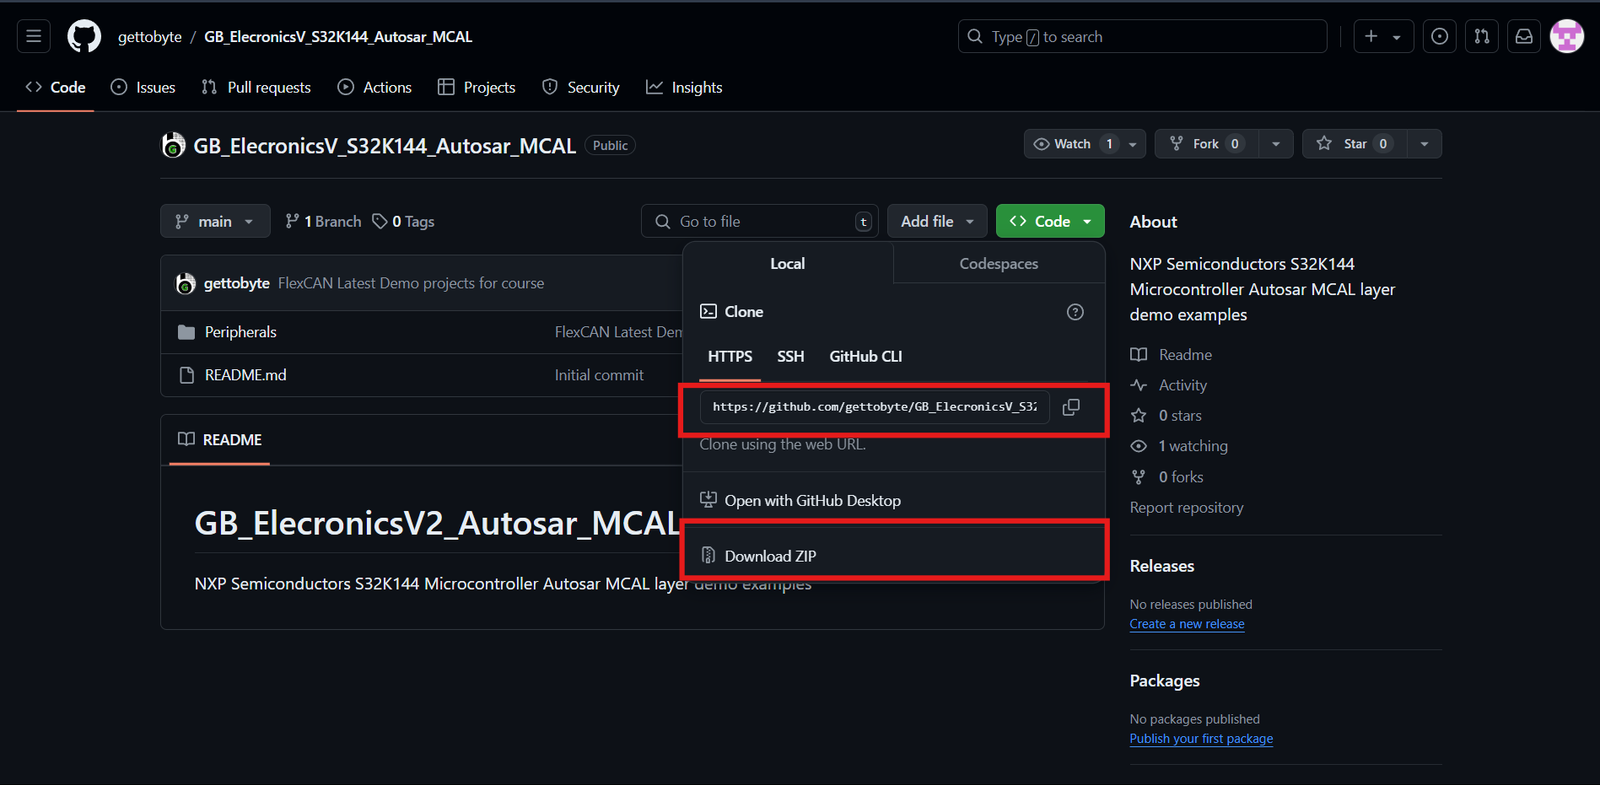
Download the ElecronicsV board Demo codes from the GitHub Repo of Gettobyte Technologies. If you have installed the Git, then one can clone the repo. Otherwise, one can download the repo by its zip file.
For cloning the repo, you can directly download it as a .zip file and extract it, else you can also use Tortoise Git to extract the files.

Step 2: Opening the cloned repo in S32 Design Studio
After getting the repo, now we are going to open the GitHub repo Example projects in S32 Design Studio. Make sure that you have downloaded the S32 Design Studio 3.4 and S32K1 RTD package versions 1.0.0 and 1.0.1 which we have stated in the tools installation.
Follow the below steps mentioned in slider to Open the Example projects in S32 Design Studio.
Step 3: Building the specific code
In Project Explorer, you can see all the files generated and included for the project but our main focus is on the .mex file which contains all portions of peripheral and MCU-related information. You can directly debug and run the code through the debug option.
To understand the complete explanation of the .mex file and how these different peripherals have different parameters thorough which we can generate our required result, you can follow the details on the courses link mentioned.
Code and Explanation
Breaking down the code
					#include "Mcal.h"
#include "Mcu.h"
#include "Port.h"
#include "Dio.h"
- Declaration of important and used header files where
- “Mcal.h” is the header for MCAL standards
- “Mcu.h” is the header for Clock configuration.
- “Port.h” is the header for Pins and Port configuration.
- “Dio.h” is the header for GPIO(General Purpose Input Output) aka DIO(Digital Input Output) configuration.
					void testDelay(uint32 value);
void testDelay(uint32 value)
{
	while(value > 0)
	{
		value--;
	}
}
2. Function prototyping for a delay function that counts the parameter and decrementing it.
					Mcu_Init(&Mcu_Config_BOARD_InitPeripherals);
	 /* Initialize the clock tree and apply PLL as system clock */
	Mcu_InitClock(McuClockSettingConfig_0);
	#if (MCU_NO_PLL == STD_OFF)
	while ( MCU_PLL_LOCKED != Mcu_GetPllStatus() )
	{
		/* Busy wait until the System PLL is locked */
	}
	Mcu_DistributePllClock();
	#endif
	Mcu_SetMode(McuModeSettingConf_0);
4. Function for clock configuration and initialization to CPU and different peripherals.
					/* Initialize all pins using the Port driver */
	Port_Init(NULL_PTR);
5. Function for MCU Port initialization, without this function pins of the microcontroller will be settled for usage.
					uint32 blinker = 0;
	uint8 blinker_direction = 0;
	uint8 color_shifter = 0;
	uint8 color_shifter_direction = 0;
6. Variable declaration for usage in the main loop and tracking of different patterns.
- blinker = This variable is for different delay generation in the blinking of the LED.
- blinker_direction = This creates an up-down counter that varies and tracks the delay of the blinking LED.
- color_shifter = This variable tracks different patterns and changes the pattern on the fly.
- color_shifter_direction = This creates an up-down counter that varies and tracks the different patterns of the blinking LED.
					if(Dio_ReadChannel(DioConf_DioChannel_SW_1) == STD_LOW)
    	{
    		if(blinker_direction == 0)
			{
				if(blinker <= 1000000)
				{
					blinker += 100000;
				}
				else
				{
					blinker_direction = 1;
				}
			}

			else if(blinker_direction == 1)
			{
				if(blinker >= 150000)
				{
					blinker -= 100000;
				}
				else
				{
					blinker_direction = 0;
				}
			}
    	}
7. This ‘if’ condition gets triggered when SW1 is pressed. This triggering provides the change in the delay of the blink LED. It sets the specific parameter as per us, you can modify the value to create your delay.
Line 5: UpperLimit is set to 1000000
Line 17: LowerLimit is set to 150000
Line 7 and Line 19: Denotes the steps for changing the delay
					if(Dio_ReadChannel(DioConf_DioChannel_SW_2) == STD_LOW)
		{
    		if(color_shifter_direction == 0)
			{
				if(color_shifter <= 7)
				{
					color_shifter += 1;
				}
				else
				{
					color_shifter_direction = 1;
				}
			}

			else if(color_shifter_direction == 1)
			{
				if(color_shifter >= 0)
				{
					color_shifter -= 1;
				}
				else
				{
					color_shifter_direction = 0;
				}
			}
		}
8. This ‘if’ condition gets triggered when SW2 is pressed. This triggering provides a change in the pattern/color of the blink LED. It sets the specific parameter as per us, you can modify the value to create your pattern/color.
Line 5: Maximum number of combinations of RGB is set to 7
Line 17: The starting pattern/color is set to 0
Line 7 and Line 19: Denotes the steps for changing the pattern/color
					switch (color_shifter) {
			case 1:

				Dio_WriteChannel(DioConf_DioChannel_GreenLED, STD_LOW);
				testDelay(blinker);
				Dio_WriteChannel(DioConf_DioChannel_GreenLED, STD_HIGH);
				testDelay(blinker);

				break;
			case 2:

				Dio_WriteChannel(DioConf_DioChannel_RedLED, STD_LOW);
				testDelay(blinker);
				Dio_WriteChannel(DioConf_DioChannel_RedLED, STD_HIGH);
				testDelay(blinker);

				break;
			case 3:

				Dio_WriteChannel(DioConf_DioChannel_BlueLED, STD_LOW);
				testDelay(blinker);
				Dio_WriteChannel(DioConf_DioChannel_BlueLED, STD_HIGH);
				testDelay(blinker);

				break;
			case 4:
				Dio_WriteChannel(DioConf_DioChannel_BlueLED, STD_LOW);
				Dio_WriteChannel(DioConf_DioChannel_GreenLED, STD_LOW);
				testDelay(blinker);
				Dio_WriteChannel(DioConf_DioChannel_BlueLED, STD_HIGH);
				Dio_WriteChannel(DioConf_DioChannel_GreenLED, STD_HIGH);
				testDelay(blinker);

				break;
			case 5:

				Dio_WriteChannel(DioConf_DioChannel_GreenLED, STD_LOW);
				Dio_WriteChannel(DioConf_DioChannel_RedLED, STD_LOW);
				testDelay(blinker);
				Dio_WriteChannel(DioConf_DioChannel_GreenLED, STD_HIGH);
				Dio_WriteChannel(DioConf_DioChannel_RedLED, STD_HIGH);
				testDelay(blinker);

				break;
			case 6:
				Dio_WriteChannel(DioConf_DioChannel_RedLED, STD_LOW);
				Dio_WriteChannel(DioConf_DioChannel_BlueLED, STD_LOW);
				testDelay(blinker);
				Dio_WriteChannel(DioConf_DioChannel_RedLED, STD_HIGH);
				Dio_WriteChannel(DioConf_DioChannel_BlueLED, STD_HIGH);
				testDelay(blinker);

				break;
			case 7:
				Dio_WriteChannel(DioConf_DioChannel_RedLED, STD_LOW);
				Dio_WriteChannel(DioConf_DioChannel_BlueLED, STD_LOW);
				Dio_WriteChannel(DioConf_DioChannel_GreenLED, STD_LOW);
				testDelay(blinker);
				Dio_WriteChannel(DioConf_DioChannel_RedLED, STD_HIGH);
				Dio_WriteChannel(DioConf_DioChannel_BlueLED, STD_HIGH);
				Dio_WriteChannel(DioConf_DioChannel_GreenLED, STD_HIGH);
				testDelay(blinker);

				break;
			default:
				break;
		}
9. This is the switch having different patterns in different cases. Switch takes the parameter “Color shifter” which provides different pattern linked to SW2.
- Case 1: Green LED blinks
- Case 2: Red LED blinks
- Case 3: Blue LED blinks
- Case 4: Cyan LED blinks
- Case 5: Yellow LED blinks
- Case 6: Magenta LED blinks
- Case 7: White LED blinks
Conclusion
In this blog, we learned how do onboard LEDs and switches work on S32K144 Elecronics V3. You can create different patterns and share them over LinkedIn.
Similarly, you can follow more sensor and module interface blogs for learning through practical implementation.
